I installed a maXpeedingrods diesel heater beneath the front passenger seat of my 2023 Ford Transit 250 High Roof Extended. The project stretched across four build-diary entries, from March 29 to April 3, 2024. Along the way, I cut the floor opening, mounted the underbody components, built a custom vent cover, and worked through awkward screw angles and trim that would not stay attached.
The custom cover became a project of its own. The back of the passenger-seat platform slopes toward the floor, and I wanted the warm-air outlet to face straight into the van. Making that happen meant shaping a black aluminum composite panel, adding triangular sides, and finding a way to attach it in a cramped space.
Why I Chose This Diesel Heater
I bought the maXpeedingrods diesel heater because it was inexpensive compared with the Webasto options I considered. I mostly stay in warmer climates and don’t travel in snow or very cold winter conditions, so occasional heating was a better fit for my needs than investing in a more expensive system.
The Installation Took More Work Than I Expected
Installing the heater took me a few days. Like many projects on my camper van, it turned out to be more challenging than I originally expected.
I had to remove the passenger seat, cut an opening in the floor beneath it, and work underneath the van on the exhaust and diesel fuel connections. Those jobs took time, particularly when working in the confined space under the vehicle. The heater itself was only one part of the project—the surrounding installation work accounted for much of the effort.
How It Has Worked for Me
Once installed, the heater worked well for my use, and I haven’t had problems with it. For the warmer-climate travel I do, I’ve been happy with the choice.
My Heater Build at a Glance
| Build Detail | My Setup |
|---|---|
| Van | 2023 Ford Transit 250 High Roof Extended |
| Heater | maXpeedingrods diesel heater purchased through Amazon |
| Location | Beneath the front passenger seat |
| Vent cover | Custom black aluminum composite panel with triangular side pieces |
| Build diary | Days 88, 89, 90 and 93 |
| Biggest frustrations | Working underneath the van, broken saw blades, awkward cover fasteners and trim adhesive |
Diesel Heater Project Day 1: Opening the Floor
On Diesel Heater Project Day 1, I removed the passenger seat and set it aside to expose the seat base and floor. I cut away the plastic flooring at the heater location, then used the mounting plate and a marker to lay out the opening.
I started the cut with a drill and step bit, then worked through the opening with a reciprocating saw and grinder. Two DEWALT metal-cutting reciprocating-saw blades broke during this part of the job. Getting the opening cut took several tools rather than one clean pass.
Once the opening was made, I sanded the surrounding area and applied two coats each of primer and paint. I attached the heater's intake, exhaust and fuel tubing, guided them through the floor, and set the heater in position for the next day's work.

Diesel Heater Project Day 2: Working Underneath the Van
Diesel Heater Project Day 2 was mostly spent on my back beneath the van. I mounted the intake and filter, exhaust tubing, fuel filter and fuel pump, working with the kit's clamps and hardware along with metal zip ties from my own supplies.
This was the most physically draining part of the project. Without a lift, I had to hold my head up to see the work while reaching into the tight space under the van. My neck, upper body and abdominal muscles all felt it. Two of my four vehicle ramps were also destroyed that day after previously starting to crack.
Back inside, I worked on the passenger-seat platform to make room for the vent and cover. Cutting and filing the platform added another fabrication task before I could move on to the finished panel.
The black coating visible in the underbody photographs is Fluid Film Black, which I had applied to the undercarriage apart from the exhaust parts.

Diesel Heater Project Day 3: Making the Custom Vent Cover
On Diesel Heater Project Day 3, I focused on the warm-air duct and the panel behind the passenger seat. I wanted the vent at a right angle to the van floor instead of following the slope of the seat platform.
I already had black aluminum composite panel from Amazon because I had considered it for the van's interior paneling. I found it easy to cut and work with, and I liked its appearance. I measured and cut the front panel, then made two triangular side pieces to close the gaps beside it.
I joined the pieces with metal brackets and self-tapping screws. Attaching the cover to the sloping seat platform was more awkward: the screw angle was difficult, and I made an unwanted hole in the panel. My plan was to cover that spot with a larger washer.
I shortened the warm-air tubing to reach from the heater to the vent in the cover. I also started moving the red, black and LCD-panel wires beneath the plastic flooring toward the passenger-side pillar area for later routing to the rear of the van.

Diesel Heater Project Day 4: Trim and Fuel-Pump Wiring
By Diesel Heater Project Day 4, I was finishing the cover edges and working on the fuel-pump wiring. I ran the pump wires through a factory floor opening and its rubber gasket, then applied sealant around the wire passage.
The L-shaped black trim was supposed to finish the panel edges, but its adhesive did not want to stick. I used super glue to hold it down and blue painter's tape to keep it in place while it bonded. The tape in the photograph is part of that finishing process.
I marked the heater project completed in that day's diary. My remaining wiring task was to run the red, black and LCD-screen wires toward the back of the van together with the other wiring. Solar panels and the roof vent fan were next on my project list.

What Stood Out from the Project
The hidden work took a large share of the effort. From inside the van, the heater sits in a compact space beneath the seat. Underneath, there were several separate components to position and mount, all while working in a cramped space.
The cover also took more work than simply cutting a flat panel. Its angle affected the outlet direction, the triangular sides, and how I could reach the attachment screws. Reusing material and brackets I already had helped me work through the design as I went.
The small finishing details were memorable too. Broken blades slowed the floor cut, an awkward fastener left a hole to cover, and the edge trim needed extra help to stay attached. Those are the details that filled the gap between placing the heater under the seat and getting the surrounding panelwork together.
Parts and Tools from My Build

MaXpeedingrods Diesel Heater
This diesel air heater supplies warm air to a vehicle interior. Its controller provides an interface for operating the heater.
View On Amazon: MaXpeedingrods Diesel Heater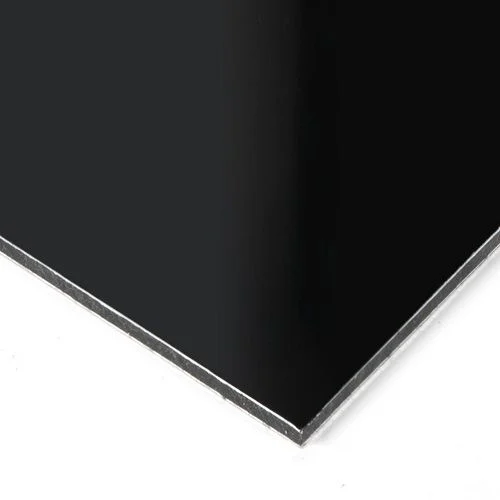
Falken Design Aluminum Composite Panel Black, 12"X 36", 1/8" Thick
This aluminum-composite sheet can be cut into lightweight trim or nonstructural panels for a camper-van interior. Its finished face can reduce finishing work when a black surface suits the design.
View On Amazon: Falken Design Aluminum Composite Panel Black, 12"x 36", 1/8" Thick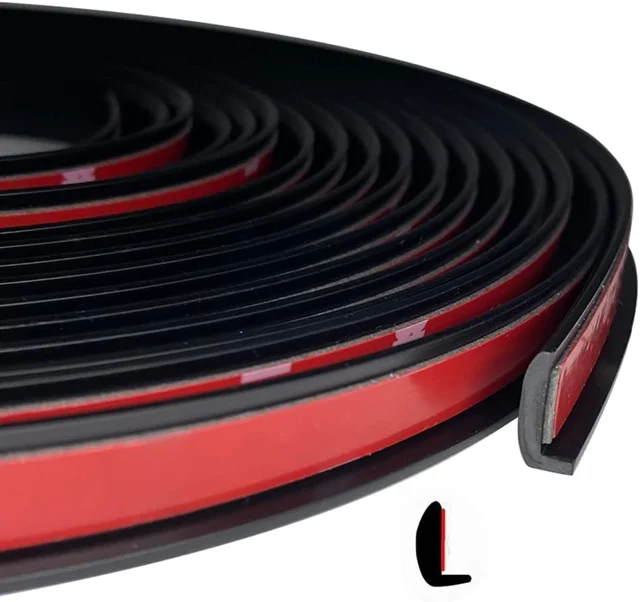
Tintvent Automotive Door Edge Trim Molding Kit with Tape, L Shaped Lip Guard for Car Fenders, Running Boards, Camper Shells, Spas, Mirrors Edge and More, Black(26Feet)
This adhesive-backed L-shaped trim covers an exposed edge with a flexible lip. Its black profile provides a finished border around an interior trim piece.
View On Amazon: Tintvent Automotive Door Edge Trim Molding Kit with Tape, L Shaped Lip Guard for Car Fenders, Running Boards, Camper Shells, Spas, Mirrors Edge and More, Black(26Feet)
REXBETI 25Pcs Metal File Set, Premium Grade T12 Drop Forged Alloy Steel, Flat/Triangle/Half-Round/Round Large File and 12pcs Needle Files with Carry Case, 6pcs Sandpaper, a Brush,a Pair Working Gloves
This set combines larger metal files and precision needle files with finishing accessories in a carrying case. During a camper-van build, the different profiles help smooth cut edges and refine small openings before parts are fitted.
View On Amazon: REXBETI 25Pcs Metal File Set, Premium Grade T12 Drop Forged Alloy Steel, Flat/Triangle/Half-round/Round Large File and 12pcs Needle Files with Carry Case, 6pcs Sandpaper, a brush,a pair working gloves
DEWALT Reciprocating Saw Blades, Bi-Metal Set with Case, 12-Piece (DW4892)
These reciprocating-saw blades support cutting and removal work during a camper-van conversion. The set provides different blade patterns for changing between cutting tasks.
View On Amazon: DEWALT Reciprocating Saw Blades, Bi-Metal Set with Case, 12-Piece (DW4892)Follow the Rest of My Build
The four original entries contain the step-by-step notes, additional photographs and videos: Diesel Heater Project Day 1, Diesel Heater Project Day 2, Diesel Heater Project Day 3 and Diesel Heater Project Day 4.
Browse Resources for more projects and tools, or explore how I planned the van with SketchUp.