Discover the Best Uses for 3 4 PVC Pipe Fittings in Your Home Projects
Introduction
Overview of PVC Pipe Fittings
PVC pipe fittings turn straight pipe into a useful route or framework. A coupling continues a line, an elbow changes direction and a tee adds a branch. Selecting those shapes becomes much easier when you identify the pipe size, connection type and intended application together. Start with what the project needs to do, then choose the parts that make that arrangement possible.
In this guide, “3 4 PVC pipe fittings” means fittings for nominal three-quarter-inch PVC pipe. The fraction is often written 3/4 inch. Nominal size is a product designation, so it differs from the outside diameter you measure with a ruler. Reading that distinction correctly helps you buy a matching pipe and fitting instead of choosing by appearance.
Home projects range from documented cold-water piping and irrigation layouts to small display frames and garden supports. Those applications use different product categories. A pressure-system fitting, a drainage fitting and a furniture connector may share a familiar shape while carrying different application information. Identify the category before comparing the package.
My own pipe-material purchases included three-quarter-inch PVC stock and one-and-a-half-inch slip couplings. The CVF Plumbing & Water collection keeps those purchases and their current Amazon options organized. They provide useful examples for separating nominal size, supplied length and connection format. The same distinctions apply when planning a home project.
This article follows those decisions through plumbing uses, garden and craft ideas, common fitting shapes and comparisons with larger sizes. The aim is a clear materials list: each part has a defined position, matching ends and a documented purpose. Once those details are established, measuring and assembly become easier to organize.
Importance of 3 4 PVC Pipe Fittings
Three-quarter-inch fittings are useful when that nominal size matches the planned system or framework. The benefit comes from having compatible shapes for straight runs, corners and branches. A small selection can produce many layouts, provided the connections and application category remain consistent throughout the project.
Begin by reading the pipe marking and measuring its outside diameter. FORMUFIT's size guide lists an outside diameter of 1.050 inches for nominal three-quarter-inch IPS PVC pipe. That measurement helps identify the size family. The full product marking then establishes the pipe specification and intended use.
For a garden route, size affects the pipe and fitting selection as well as the route's available space. For a craft frame, it affects the connector geometry and finished dimensions. For a replacement connection, the existing pipe and equipment establish the interfaces that must be matched. Choosing a familiar size is useful only when it fits those requirements.
Keep supplied length separate from diameter. A two-foot section and a longer section can share the same nominal size. A compact Amazon option can be convenient for a small cut list, while a larger project may call for longer stock. Compare the number of pieces, usable lengths and planned joints before choosing the package.
Plan the cuts on individual stock lengths. Suppose a craft mockup needs two twenty-two-inch members and two fourteen-inch members. The finished members total seventy-two inches, but three twenty-four-inch stock sections cannot supply that pattern. Each long member occupies its own section, and the two fourteen-inch members cannot both come from the remaining section. Four sections or a different stock arrangement are needed before allowing for the cuts themselves. Sketch those cuts on the actual lengths offered by the supplier. Include the cutting allowance and retain useful offcuts in the plan. This prevents a total-length calculation from becoming an order that contains enough inches but the wrong usable pieces.
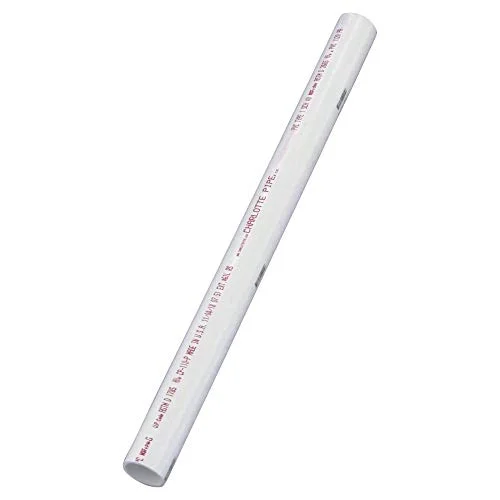
The following catalog example illustrates pipe stock in the three-quarter-inch size family. It is an Amazon option associated with my purchase record. Use the model information and the project requirements when deciding whether this particular pipe belongs in your materials list.
Charlotte Pipe 3/4-Inch PVC Pipe
This white Schedule 40 PVC pipe is supplied as a two-foot plain-end section. Its straight tube format provides stock for cutting individual pipe runs.
View on AmazonLabel the planned fittings with the same complete identification. “Three-quarter-inch elbow” describes only part of the choice. Add the angle, end connections, product family and intended application. That small amount of detail can prevent a confusing mix of socket, threaded and specialty parts when the order arrives.
A compact project worksheet can organize those decisions before shopping. Give the project a name, state its application and draw the finished outline. Mark the starting connection, every turn and each endpoint. Put a fitting number beside each change, then use the same number on the parts list. Record straight members separately from connectors, including the length supplied and the length needed. Finally, add the joining method and the planned assembly order. This worksheet works for a small garden route or a craft mockup because it keeps the purpose, geometry and materials together. When one dimension changes, the affected members and connectors are easy to find. Keep the revised worksheet rather than a collection of unrelated shopping notes.
Common Uses for 3 4 PVC Pipe Fittings
Plumbing Applications
Connecting PVC Pipe for Water Supply
For a water-supply project, identify the system requirements before choosing individual fittings. Record the intended water service, operating conditions and the exact pipe and equipment specifications. Select components documented for that application, including the necessary potable-water listing when the system carries drinking water. Keep those requirements attached to the drawing.
A retailer's broad category can contain several systems. Home Depot's PVC selection, for example, separates schedule, pressure and DWV categories as well as fitting shape and connection. DWV means drain, waste and vent. Use the application's documented component family to narrow the search before choosing a convenient elbow or tee.
Draw the route from the supply connection to the equipment it serves. Mark changes of direction, branches, valves and planned service connections. Identify every transition to another material or thread system. A drawing with labeled interfaces makes the shopping list more useful than a collection of pipe lengths alone.
For a solvent-cement socket connection, follow the selected pipe, fitting and cement instructions as one process. Oatey's solvent-welding guide separates cutting, edge preparation, fit checking, cleaning, primer, cement, assembly and curing. Keep those stages in the work plan. A joint's handling stage and the later testing stage can require different waiting periods.
Measure between the actual fitting reference points. Socket depth affects the cut length because part of the pipe enters each fitting. Use the manufacturer's dimensions and the intended assembled position to establish the required length. Mark the orientation of directional fittings so the route remains aligned when the joint is assembled.
For a worked geometry example, suppose the planned clear distance between two socket mouths is twenty inches. The chosen fitting drawing calls for one inch of pipe inside each socket in the completed assembly. That arrangement uses a twenty-two-inch pipe member: twenty inches exposed plus two one-inch inserted portions. If the measurement instead runs between fitting centerlines, use the appropriate centerline dimensions from the drawing. Name the measurement endpoints on the cut list. “Twenty inches between socket mouths” describes a different reference from “twenty inches between centers,” even though both notes contain the same number.
At equipment connections, include service access. Leave the specified space for valve handles, union nuts and removal of filters or other components. Position the connection so its fittings can be inspected after surrounding work is complete. Planning those movements early is easier than changing a finished route to reach a concealed joint.
My van-planning record offers a useful example of sequencing. The Day 87 notes placed shower-drain and water-tank openings ahead of later floor and wall work. That is a planning observation you can carry into a home utility space: identify the route and access requirements while the surrounding area is still open.
Finish the materials list with the joining products and the manufacturer's test procedure. Include the specified cure conditions before scheduling the next stage. Record the assembled route and component models so future changes begin with a recognizable system rather than unidentified white plastic parts.
DIY Projects
Garden Irrigation Systems
Garden irrigation begins with the watering plan. Mark the areas to be served, the supply connection and the equipment that controls each zone. Select pipe and fittings around the required flow, pressure, exposure and installation method. Three-quarter-inch components become useful when that size matches the planned route and the connected equipment.
Separate the main route from smaller distribution tubing on the drawing. A rigid PVC branch may end at a valve or an adapter to another irrigation component. Identify that transition precisely. A socket, a pipe thread and a hose connection describe different interfaces, even when a retailer lists similar nominal sizes beside them.
The Sprinkler Supply Store catalog distinguishes ordinary fittings, repair fittings, cement and primer. That organization reflects useful planning questions. Decide how the route will be assembled, which connections need later access and how a damaged section could be reached for repair.
For a raised-bed layout, sketch the bed edges and the proposed supply path separately. Mark valves, branch points and changes in elevation. Keep the route clear of the places you need for planting, soil work and moving containers. Put accessible controls where their operation fits the way you use the garden.
Assemble the materials list from the drawing: straight stock, couplings, directional fittings, branches and the specified transitions. Include the manufacturer's support and exposure requirements. Keep the selected outdoor product information with the plan so color alone does not become the basis for choosing replacement pipe.
For a simple planning exercise, imagine two raised beds supplied from one accessible control point. Draw the supply route first, then place a branch for each bed. Label the interface where each branch meets its selected irrigation equipment. Compare whether the controls can be reached while the beds are planted and whether containers or tools will occupy the same space. Now count fittings from that drawing, including transitions and planned service connections. This produces a materials list based on the complete arrangement. The two beds may look alike while requiring different branch lengths or endpoint positions. Keep each branch labeled so those differences remain visible when cutting and assembling the parts.
Home Craft Ideas
For a small display or craft frame, connector geometry can be the starting point. A rectangular tabletop display uses straight members and corner connections. A fabric-covered backdrop or plant-netting frame adds its own attachment and stability questions. Choose a documented furniture or craft system suited to the intended project, then develop the dimensions around its fittings.
PVC Fittings Online separates furniture fittings from plumbing and other product groups. That distinction is useful when appearance, repeated assembly or specialized multiway shapes matter. Identify the product family you want before comparing the visible finish or the number of connectors in a pack.
Start with a small mockup. Measure the occupied space, lay out the pipe and fittings, and check the finished footprint against the items it will hold or display. Include the connector body in the dimensions. The length of the straight pipe is only one part of the overall frame.
For a seed-packet organizer or lightweight craft display, arrange the compartments and attachment points before cutting every member. Make one representative section, check its dimensions and revise the cut list from that sample. This method keeps repeated parts consistent and lets the project develop from an observable fit.
For example, sketch a small rectangular display around the actual cards or fabric it will carry. Mark the usable opening separately from the outside footprint. Choose the corner connectors, add their occupied dimensions and determine the straight-member lengths from those reference points. Lay the parts on the work surface in their intended positions before joining them. Place the display material against the mockup and check the attachment spacing. Revise the geometry while the pieces are still easy to rearrange. Once the first section matches the plan, label it and use its measurements for any repeated sections.
Decide how the frame will be assembled and stored. Some systems provide their own removable connection methods; others use permanent joints. Match the method to the selected manufacturer's design. Keep parts for a removable project labeled by position so the frame can be assembled in the same arrangement later.
For an outdoor garden frame, include the manufacturer's exposure information and the way the complete structure will be supported. Plan attachment points for netting or fabric before choosing the connector layout. The covering changes how the frame is used, so it belongs in the project description from the beginning.
A good craft cut list includes more than lengths. Add the connector model, socket or insertion information, intended orientation and assembly order. Photograph the first successful section beside its labeled parts. That record makes a second matching section much easier to reproduce.
Types of 3 4 PVC Pipe Fittings
PVC Couplings
A PVC pipe coupling joins a straight route through its two ends. The important comparison is how those ends connect. A socket coupling accepts matching plain pipe ends through the specified joining process. A threaded coupling accepts matching threaded components. Repair and compression designs introduce other assembly methods and installation requirements.
Describe the ends separately on the parts list. “Socket × socket” identifies two sockets, while “female thread × female thread” identifies two threaded interfaces. A fitting can also change size between ends. Reading the complete end description is more reliable than choosing a white cylindrical part from a photograph.
The 430-010 coupling from PVC Pipe Supplies illustrates this distinction: it is a one-inch threaded fitting. Its size and connection differ from a three-quarter-inch socket coupling. Product numbers and end descriptions help keep those differences visible when a broad search returns similar shapes.
For a standard socket coupling, inspect the manufacturer's drawing and insertion requirements. Establish where the two pipe ends are intended to sit in the completed joint. For repair work between fixed pipe ends, include the movement needed to install the fitting. The available space can determine which documented repair arrangement suits the job.
Sketch the installation movement as well as the final position. A fitting that fits the finished gap may require additional travel to reach that position. Mark which pipe section can move, which end is fixed and where adjacent components limit access. Then compare the intended repair fitting's documented installation method with that sketch. Include the room for any nuts, clamps or tools used by the selected design. This makes repair selection a geometry problem you can examine before buying. Keep the manufacturer drawing with the route sketch so the final position and the required installation space remain connected.
Compare repair couplings by their actual design. Some differ in stops, travel or assembly method. A union, a compression coupling and a solvent-cement coupling also offer different ways to join a line. Identify the purpose and installation process of each candidate before treating them as alternatives for one repair.
For a straight stock connection, keep the pipe ends aligned as planned. Mark cut lengths and orientation from consistent reference points. Include the fitting body's occupied length and the insertion of both ends in the drawing. That gives the completed connection a defined position within the route.
U.S. Plastic's current Schedule 40 category groups socket couplings, threaded couplings, unions and other shapes separately. Use those labels as a browsing aid, then verify the precise component specification. A useful shopping line identifies nominal size, material, connection at each end and the intended system.
My purchased one-and-a-half-inch couplings appear later as a larger-size comparison. The same selection method applies at three-quarter inch: match the pipe family, the two interfaces and the installation space. Size changes the dimensions, while the questions about connection format remain useful.
PVC Elbows
PVC elbows change the direction of a route. Begin by identifying the angle and the space available for the turn. A ninety-degree corner, a smaller directional change and a longer swept bend create different layouts. Compare the exact fitting's geometry with the route on the drawing.
Then identify both ends. Two sockets accept matching pipe ends according to the selected system. A socket-by-spigot design has a different interface at one end. A threaded elbow changes the joining method again. Include those descriptions in the materials list so the neighboring parts match the intended turn.
For a tight space, compare the full fitting dimensions with the surrounding surfaces. Include the pipe insertion or thread engagement specified by the manufacturer. The visible corner of an elbow gives only part of that information. Its centerline and end positions determine where the adjoining pipe actually runs.
Use the project drawing to compare possible routes before adding extra bends. Mark obstacles, equipment access and the intended supports. For a water system, include the design requirements that determine the route and fitting selection. For a craft frame, include the occupied width and the position of every connected member.
A useful layout exercise is to draw the same corner in two ways using actual catalog dimensions. Compare where each version places the next straight run and how much space it occupies. Count the joints and identify which connections remain accessible. This makes the geometry visible before any pipe is cut.
Dry-fit and mark a directional assembly according to the component instructions. Establish the orientation of each elbow relative to the next fitting. Alignment marks help preserve that planned relationship during permanent assembly. Keep the cut list tied to those reference points so repeated sections finish consistently.
Check a route in more than one view when it changes elevation. A corner that looks aligned from above can turn the next member upward or sideways. Draw a top view and a side view using the same fitting labels. Mark the intended orientation on the actual parts before assembly. This is especially useful when a short member connects two elbows: that member's length and the rotation between the elbows together determine where the next run ends. Record both rather than relying on one photograph of the loose pieces.
The Ace plastic-fitting category includes elbows across several nominal sizes and connection formats. Narrow the product group to your system before comparing shape. A three-quarter-inch fitting belongs with its matching pipe specification and application, while a visually similar larger fitting belongs to another route.
For a small display frame, label corresponding corners before repeating the assembly. For a water route, keep the directional fittings identified on the final drawing. Both records make later changes easier because the actual part and orientation remain visible.
PVC Tees
PVC tees add a branch to a route or framework. A typical tee has a straight run and a perpendicular branch. Start by naming those positions on the drawing. Then identify the nominal size and connection at each opening. A three-ended fitting needs three matching interface decisions.
An equal-size tee keeps the same nominal size across its openings. A reducing tee changes one or more openings. Read the manufacturer's stated size order and drawing when matching a reducing fitting to the route. The sequence in a product title matters because it identifies which opening receives each size.
Use a three-entry check for every tee on the parts list. Identify the first run opening, the second run opening and the branch. Write each connection format beside its size. Then trace the part connected to each opening on the drawing. This check also identifies a missing adapter before the order is placed. It is particularly helpful when an equal-size main route connects to a smaller branch or a threaded component.
For irrigation, place the branch where the watering plan needs it, then connect that location to the required valve or distribution equipment. Include the selected adapter at the end of the branch. This keeps the tee from becoming an isolated purchase that still needs an unidentified transition.
For a craft frame, a tee can connect a cross member to a longer side member. Check how the connector's body and insertion dimensions affect the finished spacing. If several sections repeat, build one sample first and use its measured result to refine the cut list.
Distinguish pressure-system tees, drainage fittings and furniture connectors by their documented applications. Their internal geometry and product requirements can differ. The familiar three-way shape is a useful visual cue, while the product identification establishes which system the fitting serves.
The 247Garden reference category includes several fitting families and nominal sizes. Its supplied link focuses on one-inch products, so continue to the actual three-quarter-inch model when that is the size your project requires. Keep the selected model on the materials list to preserve the distinction.
| Fitting | Basic route | Details to identify |
|---|---|---|
| Coupling | Straight connection | Both end sizes and joining methods |
| Elbow | Change of direction | Angle, end formats and occupied space |
| Tee | Run plus branch | All three openings and branch orientation |
Before assembly, trace the complete route through every opening on the drawing. Label each change of size or material. That simple check turns a set of tees and elbows into an identified system of PVC pipe and connectors.
Comparing 3 4 PVC Pipe Fittings to Other Sizes
1 1/2 PVC Pipe Fittings
One-and-a-half-inch PVC fittings belong to a larger nominal size family than three-quarter-inch fittings. Retail listings sometimes write this as “1 1 2 PVC pipe fittings.” Treat that wording as one-and-a-half inch, then verify the marked size and the actual product specification before choosing the neighboring pipe.
Charlotte Pipe's dimensional guide lists an outside diameter of 1.900 inches for nominal one-and-a-half-inch IPS PVC pipe. The guide lists 1.050 inches for three-quarter-inch pipe. Those dimensions show why the nominal fraction is a size designation rather than a direct outside measurement.
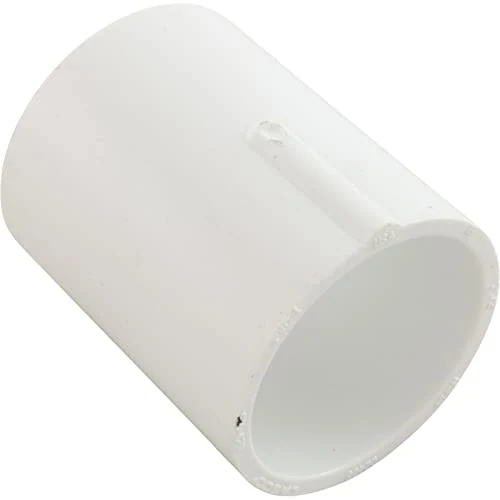
My pipe-fitting purchases included white one-and-a-half-inch slip-to-slip couplings. The catalog keeps the following LASCO product as an Amazon option for that connection format. It is a larger-size example, useful for comparing the two sockets and the dimensions needed around a straight joint.
LASCO 1.5-Inch Slip Coupling
This rigid PVC coupling joins two nominal 1.5-inch pipe ends. Slip sockets at both ends create a straight connection along the pipe route.
View on AmazonChanging the nominal size changes more than the pipe's appearance. The fitting body occupies a different amount of space, the sockets accept different pipe ends and the route needs matching transitions. Review the whole connection chain when changing sizes instead of replacing one item in an otherwise unchanged shopping list.
Schedule is another specification to keep separate from nominal size. Charlotte Pipe's guide shows Schedule 40 and Schedule 80 IPS pipe with matching outside diameters at a given nominal size, while their wall dimensions differ. Compare the actual pipe and fitting system rather than using the schedule number as a diameter label. For a water route, retain the documented operating requirements and component ratings throughout the selection. For a craft layout, retain the manufacturer's intended product family and joint geometry. Matching outside dimensions establishes one part of the fit; the complete specification identifies the component you are selecting. Keep that full specification on the materials list when substituting a different stock length or supplier.
For a system carrying water, select size from the documented design requirements. For a craft frame, choose the component family around its intended project and geometry. A larger component can offer a different framework format, but the finished arrangement still depends on the actual fittings and assembly method.
Keep the stock length separate in this comparison as well. A two-foot section of one-and-a-half-inch pipe and a two-foot section of three-quarter-inch pipe share a supplied length while belonging to different fitting families. The materials list should state both dimensions clearly.
| Nominal size | Outside diameter |
|---|---|
| 3/4 inch | 1.050 inches |
| 1 1/2 inches | 1.900 inches |
| 2 inches | 2.375 inches |
For more context, my coupling purchase page compares rigid and flexible connection formats. Use those examples to identify the interfaces and installation method you need. Keep the exact product documentation with the planned joint.
2 Inch PVC Fittings
Two-inch PVC fittings belong to another nominal size family. Charlotte Pipe's dimensional table lists a 2.375-inch outside diameter for two-inch IPS pipe. Match the fitting to the marked pipe and the intended application, then use the manufacturer's dimensions to plan the space around the assembled connection.
Differences in Use Cases
A larger nominal size can appear in larger water routes, drainage systems and other applications, but the actual product family determines its intended use. Select a two-inch pressure fitting for its documented pressure-system application, a DWV fitting for its documented drainage application, or a craft connector for its stated project purpose.
Compare the complete route when deciding between sizes. Include equipment connections, required flow, installation space and the system's specified operating conditions. For a frame, compare the connector geometry and finished footprint. Size is one design choice among several, so keep it connected to the purpose of the project.
Compatibility with Other Connectors
A change from two inches to another nominal size needs the specified transition. Identify the size and connection at every end of that transition. A reducing coupling, bushing or adapter can provide different arrangements, and the manufacturer's drawing shows how each joins the neighboring parts.
At threaded interfaces, identify the actual thread system. A nominal size on one connector does not by itself establish a match to another kind of thread. Keep pipe-thread and hose-thread connections clearly named on the drawing, and use the component maker's designated transition where the systems meet.
Spears' threaded-connection guidance calls for a sealant compatible with the plastic components and describes its own assembly method. Retain the exact product's instructions when planning a threaded joint. That keeps the joining material and tightening process matched to the fitting.
A broad search for “PVC pipe pipe fittings” can return socket, threaded, compression, drainage and furniture products together. Use the application, nominal size and complete end description to narrow that search. The right result is the component that matches the system on your drawing, not simply the first item with a familiar diameter.
Before ordering, trace every transition from the first component to the last. Confirm that the size, material and joining method match at each interface. This final pass is especially useful when a project mixes three-quarter-inch, one-and-a-half-inch and two-inch sections.
Conclusion
Summary of Benefits
Three-quarter-inch PVC fittings offer a convenient set of shapes when that nominal size suits the project. Couplings create straight connections, elbows change direction and tees introduce branches. Selecting the correct ends and application family turns those shapes into a useful route or framework.
Nominal size is the first distinction to remember. Three-quarter-inch IPS PVC has a different measured outside diameter from its name, and larger nominal sizes follow the same labeling principle. Read the marking, match the dimensional guide and keep the complete product specification on the materials list.
The next distinction is purpose. Water-supply, irrigation, drainage and craft projects can use different component families. Establish the application before selecting a size or shape. For each connection, identify the neighboring material, the end format and the joining method.
Planning makes the selection useful in practice. Measure the occupied space, include socket or engagement dimensions, mark orientations and leave the intended service access. A sample section can improve a craft cut list, while a documented route keeps a water-system materials list organized.
My own PVC purchase records illustrate the value of keeping size, stock length and connection format separate. Those details remain useful whether the next job is a home irrigation route, a small display frame or another planned component in a build.
Final Thoughts on Choosing PVC Pipe and Connectors
Start your next project with one clear description of its purpose. Identify the application, draw the route or frame and label the required interfaces. Then choose the pipe and fitting family that documents that use. This creates a reliable starting point for comparing the actual products.
Write each fitting as a complete shopping line: material, nominal size, shape, connection at every end and model. Add the pipe's supplied length and specification. Include the joining products and the assembly method so the order describes a complete project rather than a loose assortment of parts.
Record a revision whenever you change the size, material or connection format. Then trace the neighboring parts again so the drawing, cut list and shopping list continue to describe one arrangement.
Before repeating an assembly, verify the first representative section against the drawing. Check its dimensions, orientation and access. Update the cut list from that measured result, then keep the selected parts organized by location. Small corrections are easier to make while the project is still a sample.
Keep useful leftovers identified after the project. Save the package information for fittings and retain readable pipe markings with the stock. Separate sizes and connection formats in the organizer. For an assembled route, photograph the final arrangement and note the component models beside the drawing. A future alteration then starts with a known size and system. For a removable craft project, label the members by position and store the assembly sketch with them. Both records reduce the work needed to understand the project again months later.
For solvent-cement work, schedule the selected system's preparation, assembly and cure stages. For threaded or other mechanical connections, retain the exact component instructions. Record the completed layout and product models so the next maintenance or alteration begins with an identified system.
Visit my three-quarter-inch pipe purchase page and the Plumbing & Water collection for catalog examples and related options. Use them alongside the manufacturer's product information and your measured plan. Choose PVC pipe and connectors by the job, the dimensions and the matching interfaces, then keep the finished arrangement documented for the next project.