
Projects
- Cleaning, priming, and painting exposed metal edges of driver side bed capsule for rust prevention
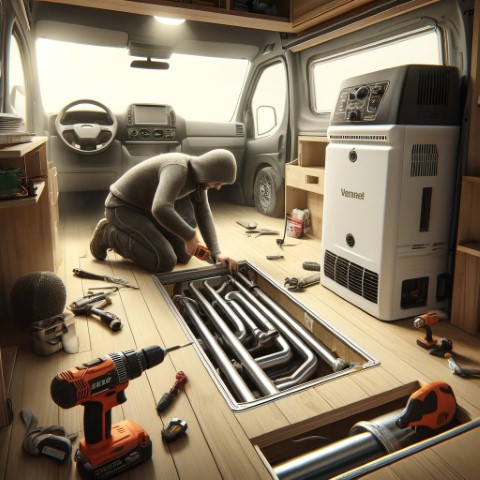
- Partial installation of diesel heater
Project Status
- Bed capsules are ready for more exterior sealant on top side and install of insulation and paneling inside
- Heater installation needs to be completed
Time Spent
12 Hours
Steps Taken
Driver Side Bed Capsule
- Clean metal edges around driver side bed capsule with Simple Green. Let dry.
- Spray primer on edges around capsule. Let dry. (x2)
- Spray paint on edges around capsule. (x2)
Heater
- Remove plastic trim piece (front seatbelt anchor cover) on passenger side of front passenger seat exposing seat belt bolt
- Remove seat belt bolt with (in order by attempt)1/4″ allen wrench, drill with 1/4″ hex bit, and socket ratchet fitted with 1/4″ hex bit [30 lb. ft. torque]
- Move seat all the way forward
- Remove two (2) front seat rear bolts [18 lb. ft. torque]
- Move seat all the way backward
- Remove two (2) front seat front bolts [18 lb. ft. torque]
- Remove seat from base
- Used needle nose pliers to loosen hex bolt of electrical box to disconnected seat from platform
- Set front passenger seat aside
- Cut away plastic flooring with scissors where heater will be installed
- Remove three (3) plastic hole coverings and set aside
- Use mounting plate to draw cutting guide lines with marker
- Draw rectangle around all pieces of heater that will go through the floor with marker
- Use power drill and step bit to start initial hole for cutting floor
- Use combination of drills, reciprocating saw, and disc grinder to cut out rectangle in floor
- Drill four (4) holes for attachment of mounting plate
- Sand entire area around hole to prepare for primer and paint
- Spray two (2) coats of primer on the area. Let dry.
- Spray two (2) coats of pain on the area. Let dry.
- Attach air intake, exhaust, and fuel intake pipes on heater with provided clamps
- Guide pipes through floor and seat heater in position to be mounted. Do not mount heater yet.
Tools and Materials Used
- Simple Green
- Dupli-Color EBFM02297 Perfect Match Automotive Spray Paint – Ford Oxford White
- Dupli-Color EBPR00310 Gray Perfect Match Scratch Filler Primer
- maXpeedingrods 12V 8KW Diesel Heater
- DEWALT DCG412B 20V MAX* Lithium Ion 4-1/2” grinder
- DEWALT 20V MAX Reciprocating Saw
- Dewalt DW4892 12-Piece Reciprocating Saw Blade Set w/ Telescoping Case
- DEWALT – DW8062 – 10,PK DW8062 4-1/2″x.045″x7/8″ Metal Angle Grinder Thin Cutoff Wheel, 10 Pack
- Dewalt DCD794B 20V MAX ATOMIC COMPACT SERIES Brushless Lithium-Ion 1/2 in. Cordless Drill Driver
- DEWALT Titanium Nitride Coated Drill Bit Set, Pilot Point, 21-Piece
- 9.0Ah Replacement for Dewalt 20v/60v Max Battery
- REXBETI 25Pcs Metal File Set
- Dura-Gold Premium – 40 Grit Gold – Hook & Loop Backing Longboard Continuous Sandpaper Roll
Notes
- The installation of the diesel heater started off well with no serious problems coming up.
- Two Dewalt metal reciprocating saw blades broke while cutting the rectangle in the van floor for the heater.
Pictures
Short Video
Plans For Tomorrow
- Finish installation of diesel heater
- Start installation of Undermount Air Conditioner