Discover the Best RV Rubber Sealant: Top Picks for Ultimate Protection
Introduction
Importance of RV Sealant
A good RV sealant choice begins with the detail you are sealing. A roof vent, a vertical trim joint and a broad roof surface present different shapes, materials and application requirements. Match the product to that detail, prepare the surfaces it will touch and plan how you will reach the entire joint. Those decisions matter as much as choosing a familiar brand.
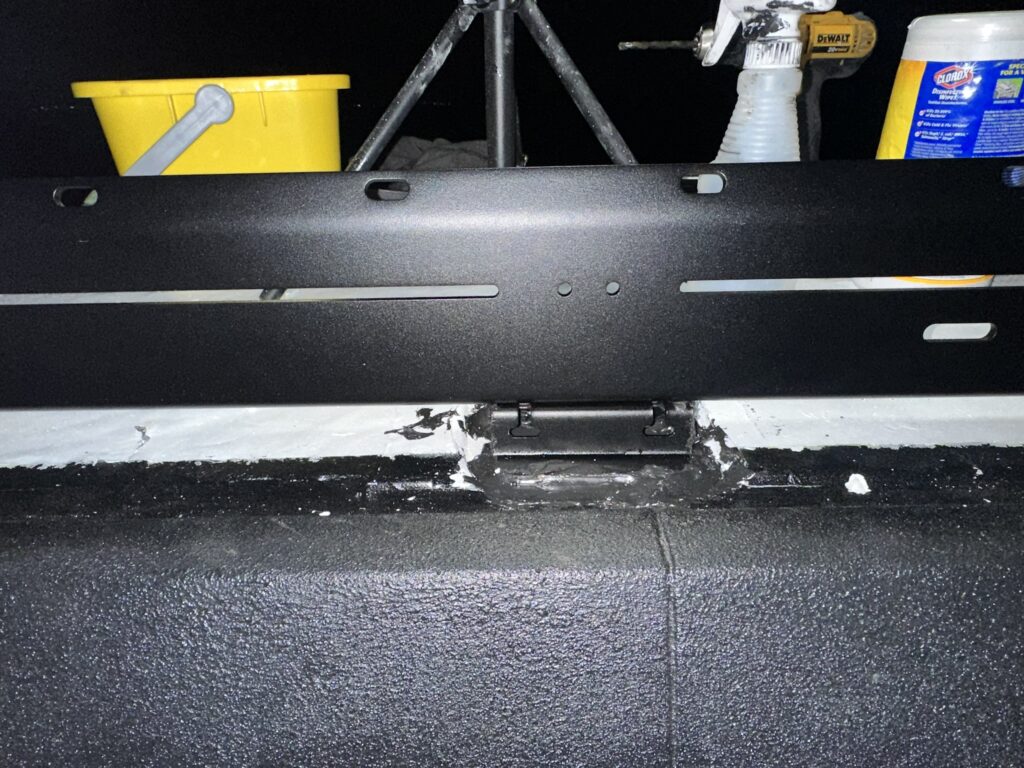
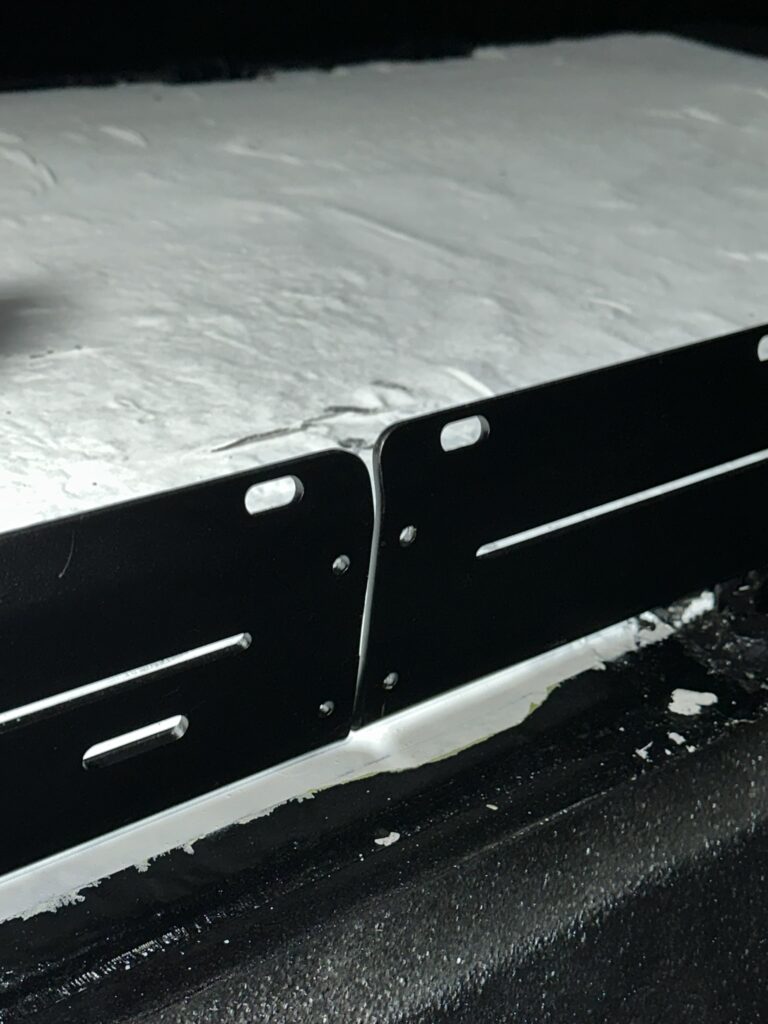
My own camper van build made access and assembly order memorable. In my Day 56 roof-rack diary, I recorded fitting the Flatline Low Pro rack to my Ford Transit. The job involved exposing the mounting points, preparing the recessed areas, bolting down the landing pads and assembling the rails, crossbars and fairing. Applying black sealant around those pads became awkward once the hardware occupied the working space.
I also applied sealant early enough that it got on my hands and other parts as the rack went together. The useful lesson from that session is practical: include the nozzle, your working position and the assembly sequence in the plan. A product selected for the right surface still needs room to be placed where the detail requires it.
This guide brings that build experience into a broader comparison of RV roof sealing products. The choices below distinguish cartridge-applied roof sealants from a wide repair tape, with separate discussion of full-roof coatings. Start with the roof material and the shape of the work, then compare the product format and its application instructions.
The three featured products come from the existing CVF equipment catalog: Dicor white self-leveling lap sealant, a Kohree cartridge alternative and black butyl repair tape. They offer different purchasing and application formats. My build photographs show the rack installation and its working clearances, while the product sections explain what to compare before choosing material for your own RV.
Overview of RV Rubber Sealant
People use “RV rubber sealant” to describe several products. Sometimes they mean a sealant for a rubber roof membrane. Sometimes they mean a flexible liquid coating. A search can also bring up repair tapes, flange-bedding materials and ordinary caulking cartridges. Give the search a specific job description so those different formats become easier to compare.
Begin with the roof identification recorded for the vehicle. EPDM and TPO membranes have their own product requirements, while fiberglass and metal introduce other surfaces and finishes. Include accessories in that identification: a sealant around a roof fitting may contact the roof, a flange and existing material at the same time. The complete combination determines the product comparison.
Next, describe the coverage shape. A lap-sealant bead follows a roof detail. A non-sag bead holds its shape on an appropriate raised or vertical joint. A tape creates a strip with defined edges. A coating covers a larger prepared area. Each format requires its own placement method and surface preparation.
RecPro's sealant category illustrates how these formats sit beside one another: self-leveling cartridges, non-sag products, butyl tape, roof tape and coatings. That variety is useful once you know the job. Keep the exact model and instructions beside your roof-material notes rather than treating every item in the category as interchangeable.
For an efficient shopping list, write down the vehicle and roof material, the fitting or seam, the existing coating, the intended coverage and the access available. Then record the candidate product's model, color, package and preparation requirements. This gives you a comparison based on the work instead of a collection of similar-looking tubes.
| Work description | First selection question | Format to investigate |
|---|---|---|
| Horizontal accessory perimeter | Which product documents this roof and flange? | Suitable self-leveling lap sealant |
| Raised or vertical trim joint | Which material holds the specified bead shape? | Suitable non-sag sealant |
| Localized strip repair | Where will the complete adhesive footprint sit? | Compatible roof repair tape |
| Bedding beneath a fitting | What does the component's installation detail specify? | Specified bedding material |
| Broad roof renewal | Which complete system matches the existing surface? | Documented primer and coating system |
Types of RV Sealants
RV Roof Sealant
RV roof sealant often means the material applied around roof edges, vents, pipes and fastener details. On an appropriate horizontal surface, a self-leveling lap sealant flows after application to form its intended coverage. A raised or vertical detail may call for a non-sag product that remains where the bead is placed. Identify the orientation before choosing the cartridge.
Dicor identifies its 501 family as self-leveling material for horizontal surfaces. Its product information lists the roof membranes and other substrates covered by that family. Keep the selected model with the specific roof and accessory information for the job. A brand can sell several formulations that need different preparation.
A sealant detail also has a position within the assembly. The bedding beneath a flange and the exposed bead around its perimeter can serve different parts of the sealing arrangement. Draw those layers before removing an accessory. Record the fasteners, the flange's contact area and the exposed edge so the replacement materials can be chosen as a coordinated detail.
A full-roof coating introduces a different scope. The Liquid Rubber RV coating system, for example, specifies substrate-dependent primers and separate treatment of roof details. Compare the complete system: preparation, primer, seam treatment, coating quantity and cure conditions. A pail and a cartridge can belong to the same project while doing different work.
For a localized job, photograph the detail from several angles and measure the area around it. Include the path of runoff and the space for a nozzle or roller. Those observations let you decide whether the work is a bead, a strip or a broader coating application before you compare package sizes.
RV Trailer Roof Sealant
Choosing RV trailer roof sealant follows the trailer's actual construction. A travel trailer and a fifth wheel can have different membrane products, roof accessories and edge details. The useful starting point is the roof identification and the component you are working around. Record the make, model and material information together before selecting a sealant.
Separate a roof-edge project from a vent project on the shopping list. An edge may include termination trim, fasteners, bedding and an exposed joint. A vent includes its own flange and mounting arrangement. Even when one lap sealant is suitable for both exposed details, the preparation and access can differ.
For a trailer stored under cover, inspect the same details that will be exposed while traveling and camping. Look along the edges of existing beads, around accessory flanges and at transitions between materials. Photograph the location and give it a simple label on a roof sketch. This turns a general intention to “reseal the trailer” into a set of identifiable jobs.
Plan how each job will be completed within the selected product's working conditions. Include cleaning and drying, the application itself and the waiting period afterward. A forecast that suits the application hour may leave a different set of conditions during curing. Put the complete window on the work plan rather than scheduling around only the time needed to squeeze out a bead.
Buying extra cartridges becomes more useful when they match a documented roof system. Label the reserve with the product model and the intended trailer detail. Retain the packaging and storage directions so a later touch-up begins with the same identification. Organized materials reduce the chance of choosing a replacement by color alone.
Motorhome Roof Sealant
A motorhome roof can bring together vents, skylights, antennas, air-conditioning equipment and transitions to front or rear body sections. Map those features before choosing motorhome roof sealant. Identify which details share the same substrate and which introduce a different accessory material, existing coating or joint shape.
For a larger roof, access and sequence deserve a written plan. Group compatible preparation tasks, then arrange application so completed areas remain undisturbed. Keep tools and supplies positioned for the work you can reach. If an accessory blocks a bead path, resolve that access question before opening the cartridge.
Make the roof sketch readable from a single reference direction. Mark the front of the vehicle, label each accessory and give every planned job a number. Use the same number on close photographs and material notes. An observation such as “lifting edge at vent two, rear corner” is easier to revisit than an unlabeled close-up. Add the date when each location is prepared and completed. This simple system also distinguishes adjacent jobs that use different products.
The difference between a cartridge repair and a full-roof system becomes especially important on a motorhome. Estimate localized work by the relevant joint or patch geometry. Estimate a coating by the manufacturer's coverage method for the complete specified system. Include the required coats and preparation products in that estimate so the quantities describe the finished application.
The RV Roof Magic coating information and FlexArmor's installed roof system illustrate two other approaches within the broader roof-maintenance market. Compare them as complete systems with their own installation processes and substrate information. Keeping the scope clear makes a small cartridge job easier to distinguish from a roof-wide project.
My Transit rack installation reinforces the same access principle on a smaller vehicle. Once the rail and pad occupied the roof detail, the nozzle had less room to approach it. On any vehicle, study the finished arrangement as well as the bare roof. The best application plan accounts for the components that will surround the sealant when the assembly is complete.
Camper Caulking
Camper caulking includes details beyond the main roof surface. Exterior trim, windows, access doors and body joints can require different products and bead shapes. Identify the materials on both sides of the joint, its orientation and the component's installation detail. The word “caulk” describes a format more readily than it identifies a suitable formulation.
For an RV caulk comparison, separate the brand from the product family. A manufacturer may offer a self-leveling roof sealant, a non-sag trim sealant and a coating under related names. Read the precise model and application description. This matters when a store search groups several cartridges on one page.
Geocel's Pro Flex RV information, for example, identifies particular exterior substrates and applications. Its different Hybrid Repair Sealant has its own substrate list. Treat each formula as an individual selection. Matching the full product name keeps a familiar brand from becoming a shortcut around the actual material comparison.
For visible trim, also compare color, paintability and the intended finished bead. For removable components, record how the joint can be reached during future maintenance. For narrow recesses, check the nozzle path with the component in place. These details help choose a product that can be applied and maintained in the real assembly.
The useful habit is to divide the camper into identifiable joints. Give each one a location, substrate description, component model and selected sealant. When a cartridge is later replaced or a fitting is removed, that record explains the original choice and the preparation needed to reproduce the detail.
Key Features to Consider
Weather Resistance
Weather resistance begins with the environment the finished joint will face. A roof detail receives sunlight, temperature changes and water exposure. A vertical trim joint sheds water differently from a broad horizontal area. Describe that exposure before comparing a product's weather-related features.
Read the manufacturer's information for the exact formulation. Terms such as UV resistance, application temperature and water exposure belong to a particular product and set of conditions. Compare those statements with the material and location on the vehicle. Keep the technical document with the project notes so a future purchase uses the same basis.
Separate conditions during application from conditions after curing. A product may have one set of requirements while it is being applied and another description of its cured performance. Record the application conditions, any recoat interval and the required waiting period as separate entries. That prevents a service-temperature statement from being mistaken for an application-temperature range.
For a coating job, include the roof's actual surface conditions in the plan. A roof in direct sun can present a different working environment from the surrounding shaded air. Choose the working period and material handling around the selected system's directions. Organize sections so you can complete the intended coverage without interrupting the process halfway through a detail.
For quantity planning, separate measured area from product coverage. A rectangular section measuring ten feet by six feet has sixty square feet of plan area. Record that measurement first, then use the selected coating's method to determine the complete material requirement. Include the specified coats and detail treatment in the calculation. The area measurement stays useful even if you change products, while the coverage calculation changes with the selected system.
For a cartridge job, plan enough time to prepare, dry and seal the entire connection. Check the perimeter before putting away the tools, then record the conditions and completion time. The result is a practical maintenance record: you know what was applied, where it was applied and which application window was used.
My nighttime rack session is a reminder that timing affects more than the weather forecast. Working position, visibility and assembly access all influence the job. A well-chosen work window gives you room to follow the product's process and see the detail clearly as it is completed.
Adhesion Quality
Adhesion quality depends on what the new material actually touches. Under a familiar-looking bead there may be a roof membrane, an accessory flange, old sealant or a coating left from previous maintenance. List those surfaces individually. Then compare them with the product's documented substrate and preparation information.
Surface preparation is therefore part of product selection. Identify the compatible cleaner, any primer and the condition required before application. Keep the steps in the order specified for the chosen system. A shopping list that includes the sealant but omits its preparation materials describes only part of the job.
Existing material deserves its own inspection. Determine whether the work calls for a documented touch-up over sound material or removal and rebuilding of the detail. Record lifting edges, dirt, cracks and the state of the surrounding surface. Use those observations to define the preparation rather than simply covering the visible outline with more material.
A manufacturer's specified adhesion check can be useful when comparing a system with an existing surface. Follow that check's preparation, waiting period and evaluation method. Record its location and result with the exact product identification. This provides a repeatable observation instead of relying on how sticky the uncured material feels.
My rack diary records preparing the mounting recesses before installing the landing pads. The broader lesson is to keep preparation visible in the work sequence. Photograph the cleaned detail before it disappears beneath a fitting or bead. Later, that photograph explains which surfaces were exposed and what the finished assembly covers.
For a tape, examine the full area its adhesive will contact, including the perimeter of the intended patch. For a bead, follow the joint continuously around corners and fasteners. The contact surface extends beyond the most obvious center of the repair, so inspect the whole planned footprint.
Flexibility and Durability
Flexibility and durability are most useful when related to the joint. A sealant may need to accommodate movement between neighboring materials while maintaining its intended contact and shape. Compare the manufacturer's joint information with the actual gap and the way the component is attached.
Look at the completed assembly as a system. Fasteners position a flange, bedding fills its specified interface and an exposed sealant detail protects the intended edge. Identify those functions in the drawing. Giving each material a defined job makes the product comparison more specific than choosing the tube with the largest durability claim.
Compare test values only when their methods and conditions match. A percentage on one product page can describe a different test from a number on another. For everyday selection, begin with the documented substrate, application format and joint requirements. Save the detailed values with their technical sheets when they are relevant to the design.
Durability also includes the ability to inspect and maintain the finished work. Keep the joint accessible where the design allows it, photograph its initial condition and record the selected material. A clear original photograph makes later changes in bead edges, tape contact or surrounding finish easier to recognize.
The rack detail in my photographs shows why inspection access belongs in the plan. The landing pad, rail and nearby roof surface create a compact arrangement. Think through how you will see the perimeter after assembly as well as how you will apply the material before assembly. Both views are useful when deciding the work sequence.
A practical durability comparison therefore considers the whole ownership process: application, curing, inspection and the next maintenance step. The useful product is one that fits the current joint and leaves you with a clearly identified detail to maintain later.
Top RV Rubber Sealant Products
Product 1: Overview and Benefits
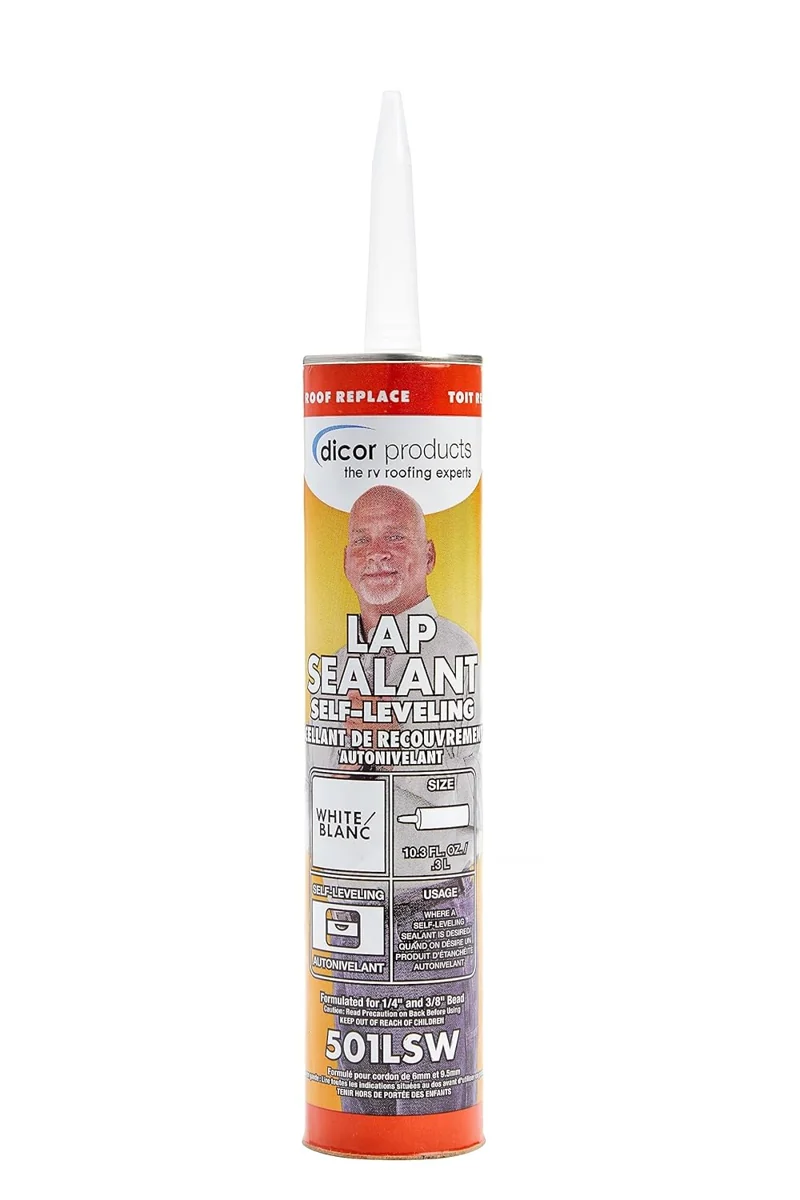
Dicor White Self-Leveling Lap Sealant: the cartridge option in my purchased kit. The catalog identifies this item as Dicor 501LSW-1. Its self-leveling format makes it a candidate to compare for documented horizontal roof details. Start with the roof membrane, accessory and existing surface, then match the exact product information to that combination.
Dicor White Self-Leveling Lap Sealant
Dicor 501LSW-1 is a white self-leveling lap sealant supplied in a cartridge. Its nozzle dispenses a bead for horizontal RV roof sealing work.
View on AmazonThe main purchasing benefit is a clearly identified model in a familiar cartridge format. Keep that identification on the materials list instead of writing only “white roof caulk.” It gives you a precise item to compare when checking preparation instructions, replacement stock and the detail you intend to maintain.
Compare the product by the geometry of your job. A horizontal perimeter around a fitting calls for different handling from a vertical trim seam. Identify where the bead begins, where it ends and which surfaces it contacts. Then check the selected cartridge's instructions for preparation, application and curing.
For my own equipment list, Dicor sits alongside other roof-sealing supplies. The practical experience documented in the roof-rack diary concerns black sealant around the Transit landing pads. Keeping the purchase list and the project sequence identifiable gives you two useful references: the product details and the access problem illustrated by the photographs.
Choose this format when the documented job calls for a self-leveling cartridge bead and the exact formulation matches the surfaces. Build the materials list around that detail, including the preparation products and applicator. For the original catalog entry and two related options, see my Dicor equipment page.
Product 2: Overview and Benefits
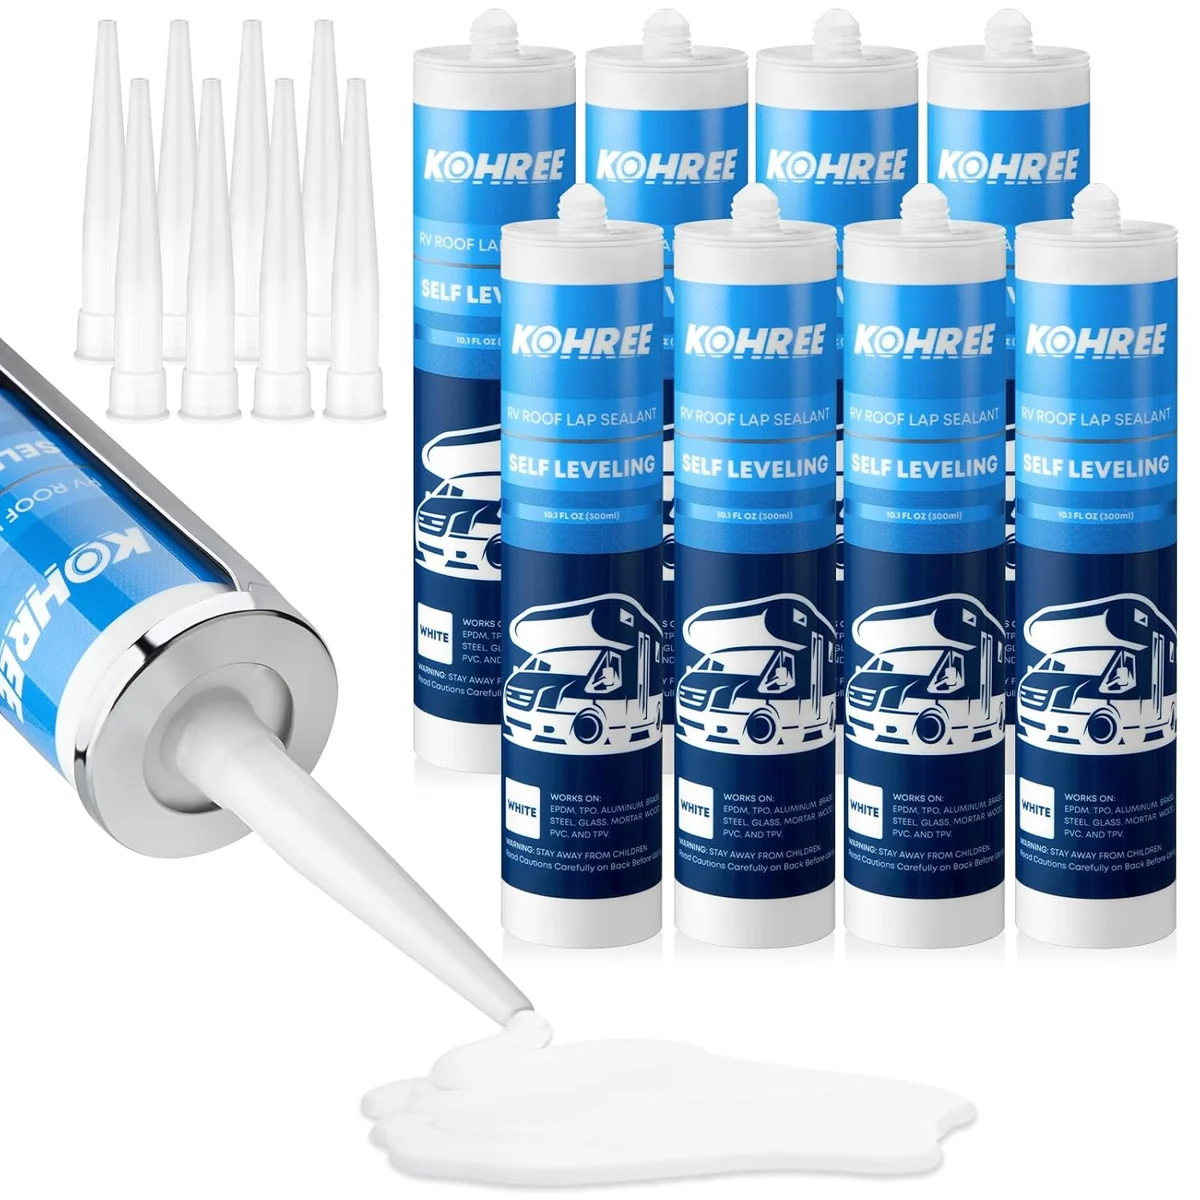
Kohree White RV Lap Sealant: a cartridge alternative for comparison. The CVF catalog includes this product as an alternative to the Dicor item. Its package groups white self-leveling cartridges for roof work. Compare the precise listing and manufacturer information with the surfaces and amount of work on your project.
Kohree White RV Lap Sealant
This white self-leveling sealant is packaged in cartridges for RV roof work. The multi-cartridge set supplies material for applying beads around roof details.
View on AmazonKohree's product information lists several roof substrates and package options. Match the selected variant, color and cartridge count when comparing the Amazon destination. This keeps a multi-cartridge purchase separate from a single-cartridge comparison and makes the quantities easier to evaluate.
The useful benefit to examine here is the package format for repeated roof details. Count the vents, seams and other compatible locations on your work plan, then estimate material using the product's own guidance. A larger set is most useful when those cartridges serve identified jobs and can be stored according to the package directions.
For application planning, retain the same questions used for Dicor: what the bead touches, whether the surface is horizontal, how the nozzle will reach it and how the curing window fits the schedule. Compare the exact instructions for each candidate rather than transferring a working time or preparation method from the other brand.
Kohree is a researched alternative in this comparison. Its role is to provide another product and package to evaluate against the job. Record the deciding feature in your notes, whether that is the documented surface combination, the selected variant or the quantity needed for a planned maintenance session.
Product 3: Overview and Benefits
Black Butyl RV Repair Tape: a wide-strip option from my purchases. This catalog item supplies a four-inch-wide, fifty-foot roll with a release liner. Its format creates a different application footprint from a cartridge bead. Compare that strip with the size and shape of the repair and the product's documented surface information.

Black Butyl RV Repair Tape
This black adhesive repair tape comes as a wide roll with a release liner. The purchased format is four inches wide by 50 feet long.
View on AmazonThe practical distinction is coverage geometry. A cartridge lets you place material along a shaped detail, while a tape brings a defined width and an edge around the patch. Plan where that edge will sit and how the full adhesive footprint will contact the prepared surface. Include corners, overlaps and nearby hardware in the layout.
Keep a wide repair tape separate from a narrow flange-bedding tape on the materials list. The width, backing and intended installation method matter. Product names can include the same word “butyl” while describing different formats. Record the exact roll and its role so the shopping list identifies the intended application.
For an irregular fitting, compare whether a strip can be positioned and pressed across the complete required area. For a broad localized detail, measure the intended footprint before cutting. Follow the selected tape's method for liner removal, pressure and edge treatment, and organize the work so the adhesive reaches a prepared surface.
This option belongs beside the cartridge choices because it gives a genuinely different format to consider. My butyl repair-tape page keeps the original item and its related cartridge alternatives together. Choose between them by the documented joint and coverage method, then keep the selected material clearly labeled in the repair kit.
Before choosing among these three products, make a short comparison for one actual repair. Put the location at the top, then list the roof material, accessory material, existing surface and available application space. Under each candidate, record the documented fit and the preparation materials it requires. Next compare the finished coverage: the bead around a fitting, the complete coverage path or the perimeter of a strip. Include the time needed before the next planned operation and the quantity required for the complete job. This comparison makes the purchasing decision visible. You can explain why one option matches the detail, what must be prepared and how the work will be completed. Keep the completed comparison with the photographs so the choice remains connected to the roof location when you return for inspection or another maintenance task. A clear record simplifies later product replacement.
Application Tips
Surface Preparation
Prepare the work by identifying the surface and the complete sealing detail. Gather the roof information, accessory instructions and selected product directions. Photograph the area before cleaning or removal so the original arrangement is recorded. Include a wider view that shows the fitting's position relative to the rest of the roof.
Set out the required preparation materials before opening the sealant. Choose cleaners, primers and tools for the selected system and substrate. Give the roof, flange, existing material and surrounding finish separate attention. The goal is a continuous prepared footprint wherever the new material is intended to adhere.
For removal work, follow the roof and component instructions to expose the intended surface. Keep debris away from areas already prepared. Inspect what becomes visible as the detail is opened, then update the work plan if the condition differs from the initial photographs. This keeps the application matched to the actual assembly.
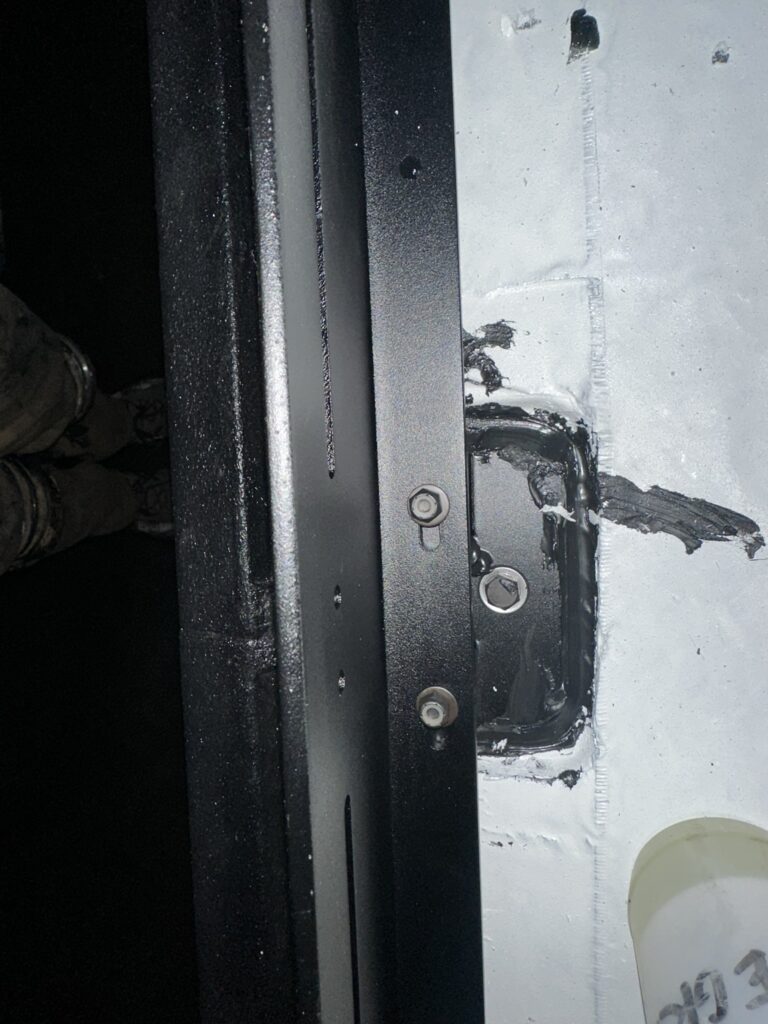
My landing-pad project included exposing the roof mounting locations and preparing the recessed areas before the pads were fitted. The diary records the sequence alongside the later access difficulty. Those two observations work together: preparation happens at one stage, while nozzle access depends on the arrangement at the next stage.
After cleaning, allow the surface to reach the condition specified by the chosen product. If a primer is required, record its application and waiting period as a separate step. Keep dust and handling away from the prepared area while the next materials are arranged. Finish the preparation check before moving to the bead or strip.
A simple checklist helps: correct surface identification, required old-material treatment, compatible cleaning, specified primer, completed drying and clear applicator access. Tick those items for each location on the roof sketch. Repeated jobs become easier to manage when the preparation state is visible.
Application Process
Dry-run the application with the component and applicator in their working positions. Check where the nozzle can approach, where your hand will fit and where the next assembly step will occur. For tape, check the intended strip and the room needed to press it into contact. Resolve those movements before exposing uncured material or adhesive.
My roof-rack session shows why this matters. I applied sealant directly after fitting the landing pads, then continued with rails and crossbars. The material got on my hands and other parts during that work. I also found that the tube tip could not reach fully beneath the installed pad. Those are concrete access and sequencing observations to carry into the next project.
For a new installation, use the component's specified assembly sequence and coordinate the sealing stages with it. Identify bedding, fastening and exposed finishing as separate operations when the system includes them. Lay out the required materials in that order. This makes the sealing process part of the installation plan from the beginning.
For a cartridge, prepare the nozzle and apply the material using the selected product's bead and tooling directions. Follow the whole detail continuously, including the intended treatment around fasteners and corners. Stop to inspect the first completed location before repeating the same setup elsewhere on the roof.
For a tape, follow its specified layout, overlap, liner-removal and pressure method. Keep the adhesive footprint aligned with the prepared area. For a coating, follow the complete system sequence and coverage method, including the specified treatment of roof details. Each format has its own process, so keep its instructions beside the materials.
Before clearing the work area, photograph the completed application and record the product, location and time. Include a close view of edges and transitions. That gives the curing and maintenance stages a clear starting record.
The original rack session ran from ten at night until seven in the morning, with nine hours recorded. That timing helps explain why the notes focus on awkward spaces and a messy sequence. For a future work plan, separate the hardware dry fit from material application and reserve a clear interval for each. Put the component instructions, sealant directions and roof sketch within reach before starting. The aim is a sequence you can follow without changing the plan while handling uncured material.
Curing and Maintenance
Curing belongs on the work schedule alongside preparation and application. Record the selected product's required conditions and waiting periods before starting. Distinguish the time to form a surface skin, the time associated with water exposure and the time for later work or service. Use the milestones given for the exact formulation.
Keep the completed area undisturbed for the specified period. Plan the next assembly or coating stage around the relevant instructions and observed conditions. If the process includes another coat, record the required interval and preparation between coats. This turns curing into a planned stage rather than an unspecified pause at the end of the job.
A useful completion record has four entries: application finished, required waiting period, conditions observed and next permitted operation. Fill those entries for each product used. A tape and a liquid coating may sit near each other on the roof while following different processes. Keeping their records separate makes it easier to schedule the next task and identify which material was used at a particular location.
For maintenance, return to the roof sketch and the completion photographs. Look around accessory perimeters, fastener details, tape edges and transitions. Compare the same locations with the original views. Record lifting, gaps or other changes by location so the next action addresses an identifiable detail.
Keep the product label and application record with those observations. A later touch-up can then begin with the exact material and the manufacturer's maintenance method. When a roof accessory is replaced, update the drawing and photographs so the record continues to describe the current assembly.
Organize the remaining supplies around that record. Keep unopened cartridges and rolls with their original labels, note the intended locations and follow the listed storage conditions. Check the package condition and product dating before planning another session. Put the roof sketch and instructions with the repair kit, or keep a clearly named digital copy alongside the photographs. The next maintenance job then starts with identified materials and a recognizable roof layout.
The central lesson from my van build is to connect the material with the real working space. My purchased sealants and tape provide product options; the rack diary provides a memorable example of nozzle access and messy sequencing. Together they point toward a useful selection process: identify the joint, choose the documented product, prepare the footprint and plan the application through to inspection.
Explore the Adhesives & Coatings collection for the catalog entries, and return to my original roof-rack notes for the project photographs. A clear record of the material, method and finished detail makes the next maintenance session easier to organize.