The CURT 14012 in my Ford Transit equipment purchases has a two-inch receiver. That sounds like a complete answer until you start comparing hitches, rear accessories and the space behind a converted van. I separate the square opening from the hitch class, the vehicle limits and the shape of the equipment attached to it. Those are different decisions, even when several products share the same nominal size.
Start With The Opening, Then Define The Job
A receiver hitch has a square socket that accepts a matching accessory shank. Receiver size describes the inside opening, rather than the width of the crossmember running beneath the vehicle. CURT lists four standard opening sizes: 1¼ inches, 2 inches, 2½ inches and 3 inches. Its receiver-size and class reference also shows why one opening can appear across different classes. Size identifies an interface; the specific equipment and vehicle establish the rest of the combination.
For a camper van, I would write the intended job beside that measurement immediately. Pulling a trailer, carrying equipment and providing a rear step create different packaging questions. A trailer connection needs room for its connecting equipment and movement. A carrier occupies space behind the doors. A step changes the route into the rear of the van. A square socket by itself does not describe any of those arrangements, so I start with a sentence about the job rather than a shopping list.
That sentence should describe an actual load or routine. For example, a planned carrier might need to accommodate a particular container while allowing access to a rear storage compartment. Write down the container, the required access and where the carrier will go when it is removed. This gives the receiver comparison a useful purpose. Otherwise it is easy to buy an accessory because its shank fits and only later discover that it occupies the space needed for a different part of the build.
Read The Size Without Confusing It With Other Dimensions
Measure the clear inside width and height of the receiver opening. On a nominal two-inch receiver, those are the dimensions that identify the square interface. The outside of the steel tube is larger because it includes the tube walls, and its reinforcing collar may be larger again. Measuring across that collar answers a different question. Record exactly which surfaces you measured so that a later comparison does not mix an outside dimension with the nominal inside opening.
The opening is only the first entry on a useful measurement sheet. Add the distance from the hitch-pin hole to the rearward obstruction, the available insertion space and the location of the surrounding bumper. Those are physical fit questions to resolve against the particular accessory drawing. Two accessories with nominally matching shanks can place their working parts in very different positions. A short straight shank and a long raised assembly do not occupy the same envelope behind the van.
For that pin-hole measurement, I would draw the receiver face and the hole centre as separate reference lines. Then I would use the same reference lines on the accessory drawing. A dimension taken from the outer collar cannot be compared directly with one taken from the end of a shank unless the different starting points are accounted for. Include the proposed pin and any locking hardware in the access check as well. A connection can be easy to sketch from the side while leaving awkward hand space for inserting or removing the actual retaining hardware. Photographing the checked arrangement gives that small detail a place in the record.
I also keep inches and millimetres consistent in my notes. If a drawing uses one system and my layout uses another, I retain the original dimension alongside its conversion. Rounded numbers are fine for an early sketch, but I would return to the exact drawing before making a purchase decision. This is particularly helpful when a photograph makes two openings look similar. The image shows the arrangement; the dimensioned record identifies the interface I am actually comparing.
Separate Receiver Size From Hitch Class
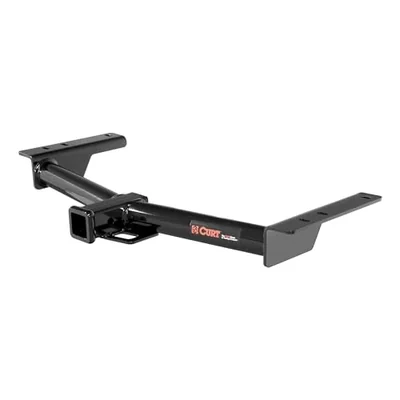
My catalog gives a concrete comparison: the CURT 14012 is Class 4, while the CURT 13193 is Class 3, yet both have two-inch receivers. The 14012 manufacturer page and 13193 manufacturer page identify those products separately. I would not infer that their capacities, mounting plates or installation details are interchangeable from the shared opening. That distinction is the most useful starting point when several Transit hitches look broadly similar in small shopping photographs.
Class is a product category, not a substitute for the actual part number. I keep a separate line for the receiver opening, the class and the exact manufacturer model. The opening helps narrow accessory fit. The model leads to the correct drawing, application information and ratings. Keeping those fields separate also makes a comparison easier to revisit. A later model change does not silently inherit the details of the hitch that happened to be on the original shortlist.
For my build records, the dedicated CURT 14012 equipment page remains the destination for that purchase and its installation document. This guide deals with the broader selection problem around it. I want the comparison to explain what to measure and what to compare, while keeping the original product identity intact. A different class or current listing should not rewrite which part appears in my purchase history.
Compare The Four Opening Sizes As Interfaces
I treat the four common sizes as separate accessory families rather than a ladder of automatically better choices. A 1¼-inch opening and a two-inch opening take different nominal shank sizes. The larger 2½-inch and three-inch openings are different interfaces again. The useful question for a camper build is which verified combination serves the intended job on the particular vehicle. Starting with the largest number can lead away from that question and toward equipment that was never intended for the application.
When browsing, I would sort candidates by opening first, then compare within the appropriate group. This removes obvious interface mismatches early. The remaining work concerns the exact accessory, its instructions, the vehicle application and the physical space. It is a more efficient comparison than keeping every superficially similar product on one list. I can then spend time reading the drawings for a few plausible options instead of repeatedly revisiting products with the wrong basic interface.
An adapter introduces another named component and another set of instructions. I would record its model, orientation and stated effect on the proposed assembly rather than treating it as invisible space between two parts. It also changes the physical envelope that needs checking. The practical comparison is the complete arrangement, including any adapter, with every relevant limit and dimension carried through. An adapter should not disappear from the drawing simply because its purpose seems obvious.
Do Not Mix The Receiver Opening With The Trailer Ball
A trailer-ball dimension names a different connection from the receiver opening. The ball mount has a shank at the receiver end and a ball attachment at the other end. Keeping those two ends separate in the notes avoids a surprisingly easy shopping mistake: reading a size in a title and assuming it describes the square opening. I would label each dimension with the part it measures instead of leaving a bare number in the comparison.
For a proposed trailer arrangement, write the receiver interface, the selected ball mount and the trailer's coupling requirement on separate lines. Then add the planned connecting height from the relevant equipment information and physical measurements. This turns a vague search for a hitch into a defined chain of connections. It also makes clear which part changes if the trailer changes later. The receiver may stay the same while the connecting equipment requires a fresh comparison.
The same naming discipline helps when organizing parts after delivery. Keep each model's document with the matching component, and photograph identifying marks before they become difficult to see in the assembled arrangement. Record any separate connecting pieces as separate pieces. When returning to the project months later, the useful record is one that identifies the actual parts and dimensions, rather than one that merely says the van has a two-inch hitch. That small amount of organization makes the next accessory decision much easier to understand.
Keep The Hitch Rating And The Van Record Separate
The CURT 14012 installation sheet identifies an 8,000-pound weight-carrying trailer rating and an 800-pound tongue rating for that hitch. Those are hitch figures, not a claim about what my converted Transit can tow. The distinction matters because the completed van has its own configuration and loading. I keep the equipment document beside the vehicle information rather than replacing the vehicle calculation with the largest number printed on a product page.
A practical planning sheet needs separate entries for the vehicle configuration, the hitch, the connecting equipment and the proposed load. If a field is still unknown, I leave that field open while continuing the independent layout work. That is much clearer than copying one rating into every row. It also makes the next research step specific: identify the missing vehicle configuration or accessory model instead of reopening the entire hitch search from the beginning.
Conversion equipment belongs in the vehicle loading record. Water, batteries, cabinetry, passengers and carried supplies all contribute to the vehicle as it will actually travel. I would use the completed loading picture when considering a rear accessory or trailer plan. A comparison made around an empty cargo van is a different starting point from one made around a furnished camper. The same named hitch can appear in both discussions while the overall vehicle arrangements remain different.
Give Rear-Door Clearance Its Own Drawing
The most useful rear-access drawing has more than a rectangle behind the bumper. I would show the closed doors, their opening movement, the receiver and the complete attached accessory. Then I would mark the part of the interior that needs access. Reaching a small compartment and fully opening the rear doors are different requirements. Naming the required action helps decide which clearances matter instead of assuming that every open position is equally important.
A rear carrier can be physically separate from the doors and still interrupt the route used to unload the van. Think through where you stand, where the removed item goes and which hand needs to reach a latch. That turns a nominal clearance into a usable routine. For a camper with equipment stored close to the rear opening, the route between the storage area and the ground deserves as much attention as the accessory's advertised dimensions.
I would make a simple full-size space check before committing to a complicated accessory arrangement. Represent the proposed envelope using something temporary, then open the doors and rehearse the access task. Record the checked position with photographs and dimensions. The purpose is to identify a conflict early, while moving a temporary outline is easy. My full-size layout mockup checklist explains the wider method for connecting a drawing with the space inside and around the van.
Consider Reach, Height And Ground Space Together
Accessory reach changes where equipment sits relative to the rear of the vehicle. I would measure that position with the intended load included, rather than relying on the empty accessory's closest visible edge. A box, bicycle or other carried item may project beyond its support. Keep the complete outline in the plan. This makes the drawing useful for parking and loading decisions instead of describing only the metal frame that happened to be easiest to measure.
Height deserves the same treatment. Note the receiver location and the highest and lowest parts of the proposed arrangement. Then consider the places where that envelope will matter: the storage position, the loading position and the route away from the parked van. These are layout observations to establish for the actual combination. They are more informative than assuming that a raised accessory automatically solves every clearance issue because one part appears higher in a photograph.
I also plan the uninstalled state. A removable accessory needs somewhere to go when it is taken off, and the handling route should fit the way the van is used. If removal means unloading unrelated equipment first, that dependency belongs in the decision. A compact travelling arrangement can still be inconvenient when its changeover routine has not been considered. I prefer to compare the travel state and the parked state together before calling an arrangement practical.
Read The Mounting Drawing Before Comparing Appearance
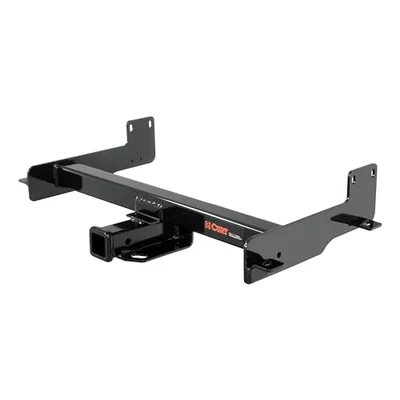
The receiver socket is the most obvious feature in a listing photograph, but the side plates and crossmember explain how the hitch occupies space beneath the vehicle. I look at those parts together. Their shape, mounting locations and relationship to the surrounding body are the reason an application-specific drawing matters. A matching socket does not tell me whether another hitch follows the same path through the rear underbody area or uses the same attachment arrangement.
For a comparison, I would place each drawing beside a rear-underbody photograph taken for that purpose. Label the vehicle and the view so that the record can be understood later. The important task is associating the drawing with the actual area being considered. A generic underbody photograph may show useful working conditions, but it cannot establish the fit of a particular hitch at the rear. That association needs to be explicit in the project record.
Keep installation planning separate from product appearance. A black crossmember may look discreet in one photograph while its mounting plates raise different access questions. Conversely, an appealing finish does not answer the hardware or application question. I use the manufacturer's drawing to identify the connection details, then return to the vehicle plan to understand access. This keeps a comparison grounded in the specific interface rather than a general impression that two products look alike.
Compare My Purchased Hitch With The Two Catalog Alternatives
My current comparison set contains the purchased CURT 14012 and two alternatives: CURT 13193 and Geteen's Transit receiver hitch. The first is identified as Class 4; the latter two are Class 3 options with two-inch receivers. That gives the comparison a clear purpose. All three illustrate how the same nominal accessory opening can sit within different product identities. I keep their matching images and descriptions together in the product section below.
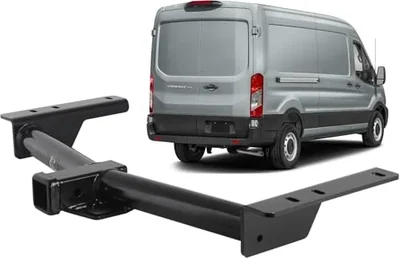
The two alternatives are research options, not additional purchases or parts I used in my van. I would compare their current application information, drawings and complete connecting arrangements before selecting between them. Their photographs help identify the form of each product, while the exact destination preserves which option is being discussed. I do not substitute one model's document for another just because both names include Transit and both openings are two inches.
For the same reason, I would avoid deciding solely from class. A useful shortlist explains the intended load, the vehicle application, the mounting arrangement and the rear-access routine. Those fields provide a reason for keeping or removing a candidate. A list ordered only by the largest rating skips the relationships that make a camper conversion usable. The best comparison is the one that leaves you with a clearly specified arrangement and a short list of remaining checks.
Keep Towing, Carrying And Pulling Questions Distinct
A receiver can appear in several very different plans. A trailer creates one set of connections, a carrier creates a supported equipment arrangement and a winch introduces a pulling question. I would start a separate entry for each proposed use rather than letting one successful fit check stand for all three. The physical socket is shared, but the equipment, loading information and manufacturer instructions needed to describe the whole arrangement can be different.
My existing hitch-mounted winch explanation covers that more specific rating question. I keep it linked rather than turning this receiver-size guide into a second winch article. Here, the useful takeaway is organizational: identify what the receiver will support or connect, then assemble the information for that job. A familiar-looking opening is the beginning of the comparison, not its conclusion.
That approach also keeps shopping focused. If the immediate need is rear access, a towing-oriented specification alone does not describe the step position. If the need is a trailer connection, the appearance of a carrier does not answer the connecting-height question. Write the purpose above the comparison table and remove candidates that do not serve it. This is a simple way to prevent a long accessory search from drifting away from the actual work planned for the van.
Build A Short Comparison Record You Can Reuse
My preferred comparison record begins with the exact vehicle and the intended task. The next entries are the hitch manufacturer, part number, receiver opening and class. After those come the accessory identity, its drawing and the relevant vehicle and component limits. Keeping the fields in that order makes the record readable: the task explains why the equipment is being considered, and the remaining entries explain the particular combination rather than a collection of unrelated products.
Add a physical-space section containing the rear-door task, accessory reach, height, insertion arrangement and removed-equipment storage location. Attach the photographs or mockup notes that answer those questions. A dated private note can identify when the information was checked, while the public product name remains stable. This makes later changes manageable. When an accessory changes, revisit its fields and the clearances it affects instead of treating the entire build plan as invalid.
Finally, record the next concrete action. That could be obtaining the correct drawing, confirming the vehicle configuration or checking a loaded outline beside the rear doors. A specific action is more useful than a general note saying more research is needed. I use the same principle in my van build decision log: tie the unresolved question to the decision it affects and preserve what has already been established.
Questions I Would Answer Before Buying
The first question is whether the opening and proposed shank belong to the same nominal interface. The second is whether the exact hitch and accessory documents describe the intended arrangement on the particular vehicle. The third is whether that complete arrangement leaves the rear of the camper usable for the required routine. Answering those in order prevents a clear two-inch measurement from being stretched into an assumption about every other aspect of the purchase.
I would also ask what changes when the van is loaded for travel. Use the same planned equipment and supplies in the loading discussion, the storage drawing and the rear-access mockup. If those three records describe different versions of the van, the comparison becomes confusing very quickly. A single working configuration gives each question a common reference and makes later changes easier to trace through the relevant parts of the plan.
For my Transit records, the CURT 14012 provides the concrete two-inch example. The broader lesson is to keep size, class, part identity, vehicle loading and practical access in separate fields, then bring them together for the actual job. That gives the receiver measurement the right role: a useful interface dimension within a complete camper-van plan. The product choices below let you compare the named equipment without losing that wider context.
Compare The Catalog Options
My Purchased Hitch And Two Alternatives
CURT 14012 Transit Trailer Hitch — My Purchased Model
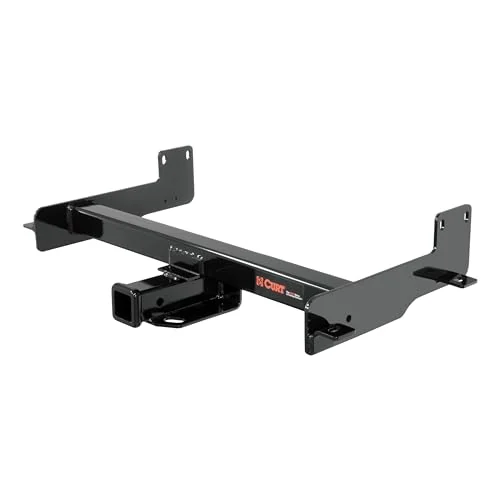
The CURT 14012 is a frame-mounted trailer hitch with a two-inch receiver opening. Its side mounting plates connect the receiver crossmember to the vehicle.
View On AmazonCURT 13193 Transit Hitch — Alternative
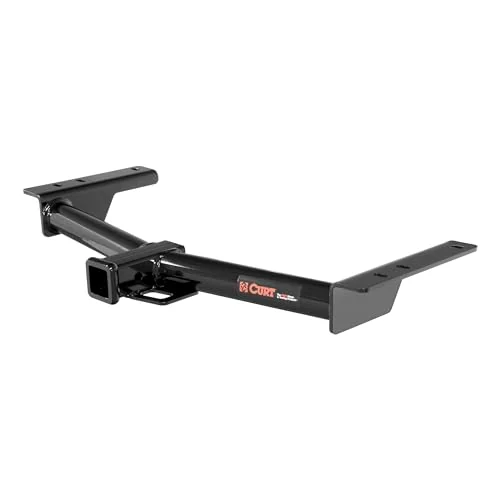
The CURT 13193 is a Class 3 receiver hitch for listed Transit applications. Its crossmember carries a two-inch receiver opening.
View On AmazonGeteen Transit Receiver Hitch — Alternative
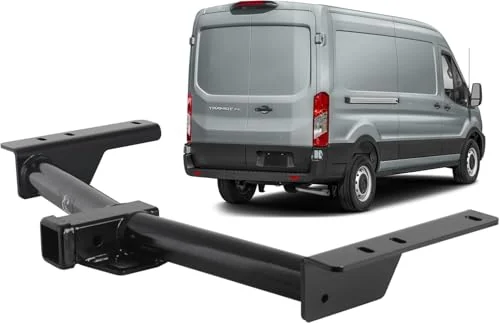
This Geteen hitch is a Class 3 design for listed Transit applications. It carries a two-inch receiver within a frame-mounted crossmember.
View On Amazon