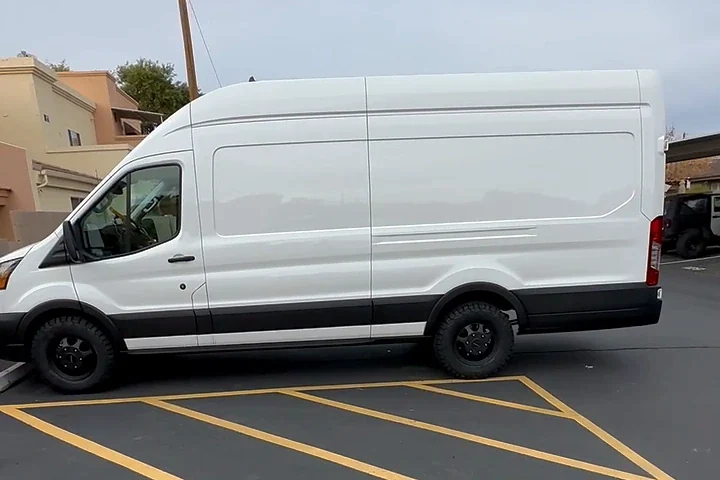
My camper van is a 2023 Ford Transit 250 high-roof extended. Its fixed shell is part of the space I have been building inside, while the roof itself became a work area for equipment, brackets and cable routes. Comparing that arrangement with a pop-top starts with a practical question: when is the extra space available, and what has to happen before and after using it?
Compare A Fixed Shell With Two Moving-Roof States
I would draw a pop-top candidate twice, once closed and once open, and put the fixed-roof layout beside those drawings. The three views make the comparison concrete. They show which activities fit in each state, which parts move, where a sleeping platform sits and what must be put away before closing. A photograph of an open roof tells only one part of that story. The closed arrangement deserves the same attention because it is the configuration the interior returns to between stops.
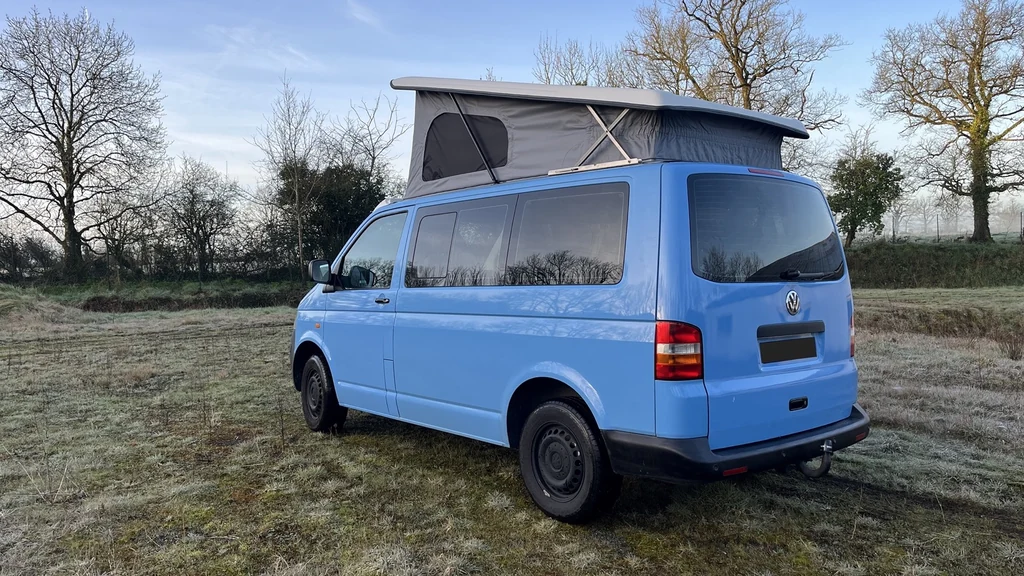
A fixed high roof keeps its outer shape. An elevating roof creates an additional state, with its own opening, supporting mechanism and closure arrangement. Those basic differences are useful without assigning a performance score to either design. They affect the places where someone can stand, the position of furniture and the sequence for changing from travel to living space. I would describe the actual arrangement before comparing features, so a roof that provides extra headroom is not automatically treated as an extra bedroom.
The manufacturer roof-type overview distinguishes sleeping roofs, smaller elevating sections and fixed high roofs. That distinction matters more to my planning than the broad label pop-top. I would identify what the selected opening is intended to provide, where the roof is highest when raised and what occupies the opening when a bed is in place. Those observations create a usable brief. They also keep two physically different roof systems from being compared as if they were the same package.
Use My Transit As The Fixed-Roof Reference
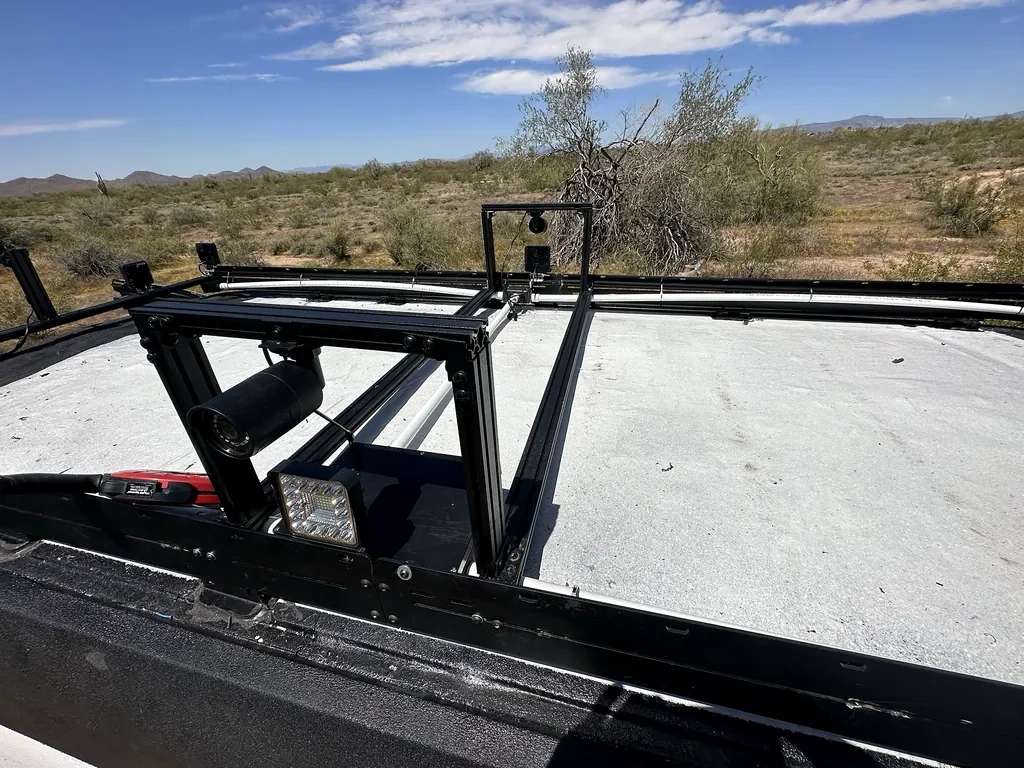
My build diary records separate jobs around the Transit, including roof wiring and devices. The photograph at the top shows the fixed high-roof body during the wheel-and-tire project. Its role here is the shape of the van, rather than a measurement of interior clearance. The roof-equipment photograph later in this guide shows another part of the same comparison: the upper surface became an area for installed equipment and its connecting routes, with a different set of access questions from the interior.
I would keep those two views together when planning a roof choice. Inside, I want to know where a person and the intended furniture will fit. Outside, I want to know what occupies the upper surface and what projects above it. A roof decision touches both drawings. Treating the interior as finished before considering the exterior can leave the equipment plan competing for the same space as an opening or moving section. Working in both views makes that relationship visible much earlier.
The fixed shell also gives me a consistent boundary for the interior model. That does not make every part of the inside equally tall or useful. The floor, ceiling, wall shape and furniture still determine the finished space. I would use my van as a concrete reference for that distinction, then measure the actual candidate rather than transfer a number between vehicles. My usable-space guide explains why an overall body dimension and the space available for a particular task are different entries in the plan.
Put Headroom Where The Activities Happen
Standing clearance is a location-specific question. I would mark the places where I expect to stand for dressing, preparing food, moving through the entrance and reaching storage. Then I would check each location in the relevant roof state. A tall point above the center of an aisle does not establish the same space above a counter farther forward. Similarly, a raised section can be useful for one activity without changing the headroom throughout the entire interior. The drawing should show that difference instead of reducing the roof to one maximum number.
For a fixed roof, I would record the interior boundary after the intended floor and ceiling layers are included. For an elevating roof, I would add the closed and open boundaries separately. A hinged opening may create a sloping upper space, while another arrangement may lift differently. I would use the chosen roof's own drawing for that shape. This is a good point to make a full-size representation of the area where a person will stand, because the useful clearance depends on where the activity actually takes place.
I would also include seated positions. A roof choice can affect the area above a seat, the reach to a shelf and the room available when leaning over a work surface. Those are different movements from standing straight in the aisle. On my planning sheet, I would give each activity a location, a roof state and a brief description of the movement. That produces something that can be checked in the candidate vehicle. A general impression that the cabin feels spacious is much harder to turn into a specific furniture decision.
Separate Extra Headroom From An Upper Bed
An opening that provides headroom and an arrangement that provides a sleeping platform are different things to evaluate. I would first identify whether a bed is included in the particular design, where it sits and how it is accessed. Then I would check the lower interior with that platform in its intended positions. A bed above the living area changes the vertical relationship between two activities. The plan needs to show both the sleeping space and the space that remains below it, rather than counting an extra berth without drawing its effect on the cabin.
Access deserves its own small sequence. I would mark the starting position on the lower floor, the route upward and the space required at the entry to the sleeping area. The same exercise should include getting back down and reaching any items needed during the night. A convincing photograph of a mattress does not answer those access questions. They are especially important when another part of the interior remains occupied. The route should be understandable with the other furniture in place, not only with the van cleared for a demonstration.
I would then compare that arrangement with the intended lower bed. My fixed-versus-convertible bed guide looks at the setup work associated with those choices. A roof bed adds another relationship to the comparison: what happens upstairs may affect the standing or seated space below. I would list the positions of both beds and work through the transitions between them. That is more informative than counting sleeping places alone, because it shows which combinations of activities the interior can actually support at the same time.
Work Through Opening And Closing As Real Tasks
For an elevating roof, I would give the changeover a place in the everyday routine. What needs to be moved before opening? Where are the controls or handles reached? What changes inside when the roof is raised? Those questions belong beside the living-space drawing, because they can influence the position of a shelf, a cushion or an overhead item. I would observe a complete demonstration of the selected arrangement and make notes in the same order as the actions, rather than guess the process from a closed exterior photograph.
The clamp-lock roof manual provides a useful example of why the exact document matters. Its closing sequence involves the bed and mattress position, fabric folding and locks. I would turn the applicable tasks into a planning checklist for that particular system. The point is to understand what needs space and attention during the transition. I would not borrow the sequence for a different mechanism merely because both products are described as elevating roofs.
Closing should receive as much attention as opening. I would ask what remains in the upper area, what is brought down into the cabin and where those things go while the roof changes state. If an item needs temporary storage, that storage is part of the interior plan. A convenient permanent place for something while parked may not be its place during travel. Drawing both states exposes that difference and gives each moved item a destination, instead of leaving it as an unnamed pile on the nearest seat.
Measure The Actual Travel Envelope
The exterior comparison starts with the actual vehicle in its travel configuration. I would include everything that remains attached above the body, then keep that total separate from the original vehicle specification. The highest point may be an attachment rather than the roof skin. That is true whether the body has a fixed high roof or an elevating section. I would record how the measurement was made and which equipment was in place, so a later change does not leave an old figure attached to a different arrangement.
I would compare that figure with the specific places the van needs to enter. A statement that one roof type is lower does not settle an actual opening, garage or storage location. The useful comparison is between two measured boundaries with the travel configuration identified. If a route has several overhead constraints, each needs its own entry. This approach avoids making the roof choice depend on a general description of compactness when the decision really concerns a particular doorway or a particular place where the vehicle will be kept.
There is also a difference between the parked body outline and the space needed to raise or reach a roof. I would draw the open envelope separately, including the direction of movement shown in the selected system's documents. That gives the parked arrangement a physical boundary of its own. The two-state method is valuable because it separates a vehicle that fits in travel configuration from a location where the roof can be used as intended. Those are related checks, but they are not the same measurement.
Give Roof Equipment Its Own Footprint
My roof-wiring photographs show that the upper surface of a van can become an involved project area. Brackets, cables and equipment occupy more than the outline of the largest item. Their connections and access points also need room. In a roof comparison, I would put those footprints on the drawing before deciding that the remaining surface is available. My roof-vent planning guide discusses the relationship between roof openings and the equipment around them. Here, I would add any moving-roof envelope to the same view.
For an elevating section, I would check what moves with it and what stays on the fixed body. The relationship between those two areas needs to be explained by the selected arrangement. I would not assume that an equipment location from a fixed roof can simply be carried across to a moving section. On the plan, I would distinguish attachment points, moving boundaries and connecting routes. That gives the installer or supplier a specific drawing to respond to, rather than a list of items with no positions.
Access after assembly belongs in that drawing as well. I would show how a fastener, opening or connection is reached once nearby equipment is present. A layout can fit all the visible items yet make the next service task unnecessarily complicated. I would check the route to the item and the room needed around it, then note which adjacent parts would have to move. This is one place where an existing build photograph is useful: it reminds me that the equipment and the work around it share the same limited surface.
Include Interior Finish And Storage Boundaries
A fixed shell and an elevating section create different boundaries for interior finish. I would mark where permanent panels and storage end, then show the space reserved for any moving mechanism or folded material. The drawing should explain that interface at the front, rear and sides. A cabinet that looks clear in an open-roof photograph could occupy space used in the closed state. Checking the boundary in both positions is more useful than deciding that a particular style of cabinet always belongs with a particular roof category.
Overhead storage deserves the same treatment. I would define what must be reachable, what remains in place during roof operation and which openings need to stay clear. Then I would draw the actual stored items rather than use an empty cabinet volume as the final answer. A shelf can be physically present but awkward to use if another part has to move first. Putting the contents and their access into the plan makes the trade-off visible, especially when the roof arrangement is also being used to create a sleeping space.
I would describe the interior finish surface by surface: the ceiling above the aisle, the edge around an opening, the area behind storage and any moving boundary. The practical questions are how those surfaces meet and how they remain accessible. The selected construction and materials can then be matched to the actual locations. Keeping that surface list with the roof drawing helps explain which work is permanent, which parts move and where a removable finish or access piece belongs in the completed arrangement.
Compare Cleaning, Drying And Service Access
I would add a care-and-access page to the roof brief before finalizing surrounding furniture. It would identify the surfaces and moving parts described in the chosen document, then show how each is reached in the completed interior. The useful result is a set of access paths, not a generic statement that one roof has more maintenance. If a task needs the roof open, I would note that state. If an item is reached from outside, I would show that route separately from the interior approach.
Fabric handling, where present, introduces a storage-state question. I would ask the supplier how the selected fabric and closure arrangement are managed after use, then include the applicable drying and packing steps in the intended routine. The task list should come from the actual system rather than a guessed interval. This is also a reason to consider the surroundings of the stored van: a care task may need space or a particular roof state that differs from the normal travel position.
For my fixed-roof comparison, I would work through the equivalent access questions around openings, finishes and added equipment. The photographs show installed roof work, but the planning principle is broader: an item that is easy to place on a drawing still needs a route for inspection or adjustment later. I would keep the access view with the equipment view so that a future addition can be checked against both. That creates a more durable record than a single photograph taken when every part happened to be easy to reach.
Price A Complete Scope Rather Than A Roof Label
I would write the comparison scope before collecting prices. It would identify the base vehicle, the selected roof arrangement, the installation work, the interior transitions and the equipment affected by the choice. That gives the estimates a common boundary. A bare component price and a finished installation price describe different amounts of work. My conversion-cost planning guide explains the same separation between an item, its associated tasks and the surrounding project. The roof decision benefits from that separation because it crosses the exterior and interior drawings.
I would also distinguish included work from work that needs a separate decision. For example, the roof opening and a sleeping platform should appear as separate scope entries when they are separate selections. So should the finishing around the opening and the equipment that will share the upper surface. The purpose is to make an estimate readable, rather than assume an appealing package name describes every interface. A written response to the same scope makes two offers much easier to compare without filling the gaps with guesses.
Timing belongs beside that scope. I would identify the decisions that need to be settled before other interior work begins, then mark the tasks that depend on them. A change to the roof arrangement can affect the positions of furniture, openings and routes. Keeping those dependencies visible helps explain what a later change would involve. This is a project-management comparison rather than a price prediction: I want to know which decisions remain open and which parts of the build would need revisiting if one of them changes.
Common Roof-Choice Questions
Can I use the interior with a pop-top closed? I would answer that activity by activity in the closed-state drawing. Sitting, reaching a drawer and preparing a bed can require different amounts of vertical space. Mark the intended activity at its actual location and check the movement there. This produces a more useful answer than treating the whole interior as either usable or unusable. It also shows which tasks depend on raising the roof and which can happen in the travel configuration.
Does a roof bed replace a lower bed? I would compare the complete sleeping arrangements, including access, bedding storage and the way each affects the space below. An upper platform may be one part of the intended plan, while another plan may use both levels at different times. The choice should be shown as an actual combination of furniture positions. My comparison would include the route into each bed and the position of anything that must move before the next person uses the cabin.
Should I decide on the roof before drawing the cabinets? I would establish the roof boundaries and moving envelope first, then develop the furniture against them. The two drawings can evolve together, but each change needs to be carried across. If the opening moves or the bed position changes, the overhead cabinet and its access deserve another check. That is why I would keep both views in the same revision rather than finish one drawing and assume the other will work around it.
What would I ask to see during a demonstration? I would request the complete open-to-closed sequence with the normal mattress and intended interior arrangement present. I would observe the handles, locks, fabric position and the destination of items brought down from the upper space. Then I would compare those movements with my own proposed furniture. Watching the whole transition gives the checklist a concrete basis, while noting the starting and finishing states helps me reproduce the same questions when considering another candidate.
Make A Two-State Brief You Can Actually Check
My final comparison sheet would contain a fixed-roof view, a closed elevating-roof view and an open view. Under each, I would list the activities it supports: standing at the relevant location, reaching storage, using a sleeping area and moving through the entrance. Then I would add the transition tasks between the two moving-roof states. The result is a practical brief that can be checked against a real vehicle or a supplier's demonstration. It turns a preference for one roof style into a set of observable requirements.
The most useful questions are specific. Where does the bed sit when someone is standing below it? Which items change location before closing? What is the complete measured travel height with the intended attachments? How is the roof equipment reached after the interior is finished? Each answer should point to a place on the drawing, a product document or a demonstrated movement. If the answer is only a general adjective, I would make the question more concrete before using it to select the arrangement.
My takeaway is to choose around the complete roof routine. A fixed high roof gives the interior a consistent outer boundary. An elevating arrangement adds open and closed states that can serve different purposes. Neither description replaces the actual layout check. Using my Transit as the fixed-roof reference, I would compare the space, sleeping access, equipment and changeover tasks together. Once those parts are visible, the decision can reflect the way the van will be used, with the roof choice connected to the rest of the build rather than sitting above it as an isolated feature.