My camper van purchase records include a YITAHOME portable flush toilet. Looking at that purchase alongside dry separating and composting-style alternatives brings the decision down to something more useful than a list of popular toilets: what has to happen inside the van, and what has to leave it afterward. The container, the water, the access and the emptying routine belong in the comparison together.
Start With The Routine, Then Choose The Toilet
A toilet takes up space even when nobody is sitting on it. There is the body itself, the room to open it, the route for removing its contents and the supplies that need to stay nearby. I would put those four things on the same planning sheet before deciding that one format is compact or convenient. A small body can still need a large working space around it. Conversely, a larger assembly might work well where its access is unobstructed. The useful comparison starts with the complete routine rather than the photograph on the product page.
For this comparison I am using three examples with different arrangements: my purchased YITAHOME portable toilet, a Nature's Head standard self-contained toilet and a Trelino Evo L separating toilet. The latter two are researched alternatives. Each helps explain a different way of managing the same everyday need. I am comparing their arrangements and the decisions they create for a van build, rather than assigning a universal winner. The question I want the comparison to answer is straightforward: which set of tasks has an actual place in the plan?
That makes the first step surprisingly simple. Write down where the toilet would be used, where it would be stored, what would be moved for access and what would be carried out for servicing. Then picture the van with the bed, drawers and counter in their working positions. A plan that depends on an empty aisle should be considered in the same occupied state as the rest of the interior. This is also a good way to discover whether a drawer, door or seat would be doing two jobs at once.
What My YITAHOME Purchase Establishes
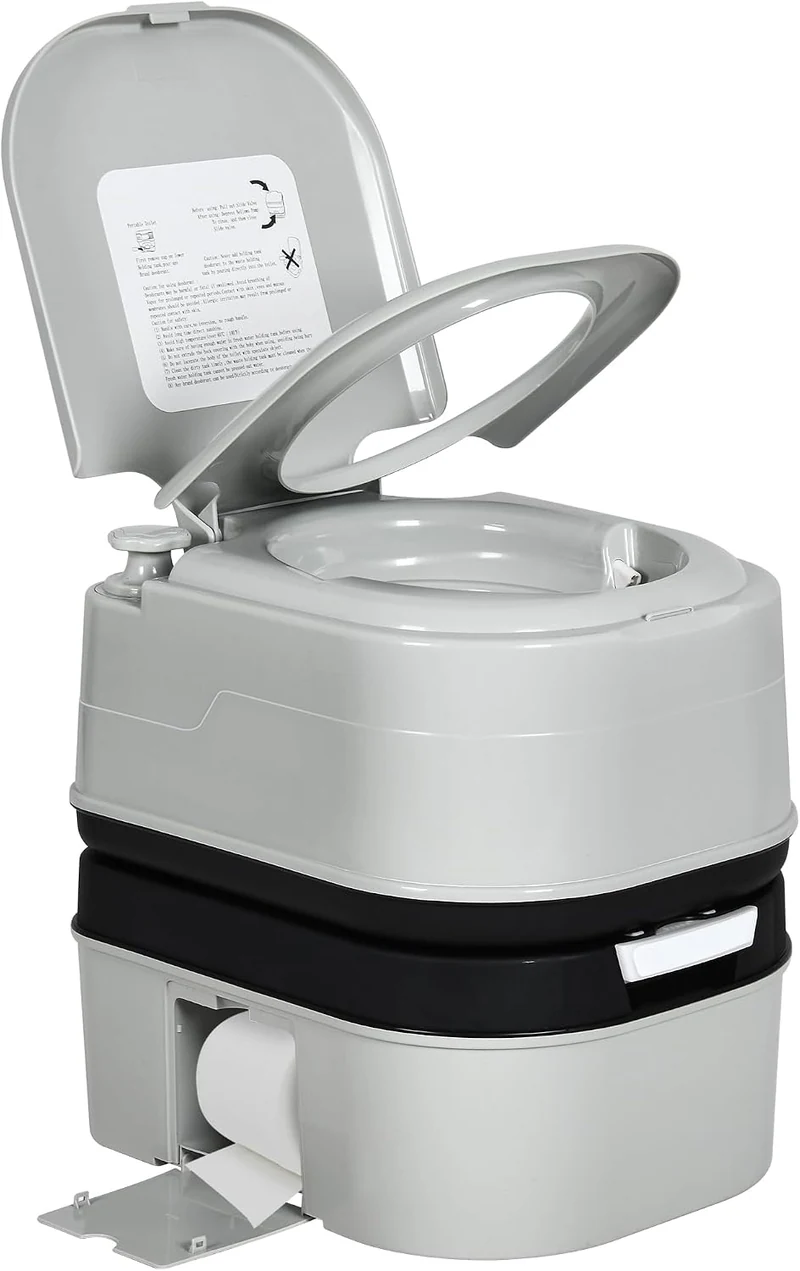
The YITAHOME portable-toilet page keeps my purchase record and the specific product details together. Its arrangement is an upper seat-and-flush section over a detachable lower holding tank. The matched product has a hand-operated flush pump and an emptying spout. Those physical features are the starting point for this comparison. They create a recognizable sequence: provide flush water, use the assembled toilet, separate the holding section when it needs service and carry that section to an appropriate emptying location.
I find that sequence more useful for planning than the word portable by itself. Portable does not tell me whether the whole unit or one section needs to come out. It does not show whether the lifting handle is accessible inside a cabinet. It also does not describe the space required to release the sections. On a drawing, I would show the assembled toilet and the detached tank as two separate access checks. That catches a different set of questions from simply drawing a rectangle around the base.
There is a second distinction worth keeping clear: a purchase record and a floor-plan decision answer different questions. The record identifies the item I bought. The floor plan still needs to show how its parts move through the finished interior. My shower-and-toilet layout guide covers that room-planning side. Here, I am concentrating on what changes when the format changes, so a reader comparing alternatives can keep the physical servicing work beside the product choice rather than discovering it after building the enclosure.
Three Formats And What They Change
The portable flush format uses water and a detachable holding tank. A dry separating format directs liquids and solids into separate containers. An agitated composting-style design adds another arrangement for the solids chamber and, in the Nature's Head example here, a fan and vent path. Those are meaningful differences for a camper van. They affect the supplies, the pieces that are removed, the space around the toilet and the connections that may be built into the vehicle. The marketing category alone does not give the whole picture.
YITAHOME Portable Toilet
This portable toilet separates into an upper seat-and-flush section and a lower holding tank. A hand-operated pump and emptying spout are built into the assembly.
View On Amazon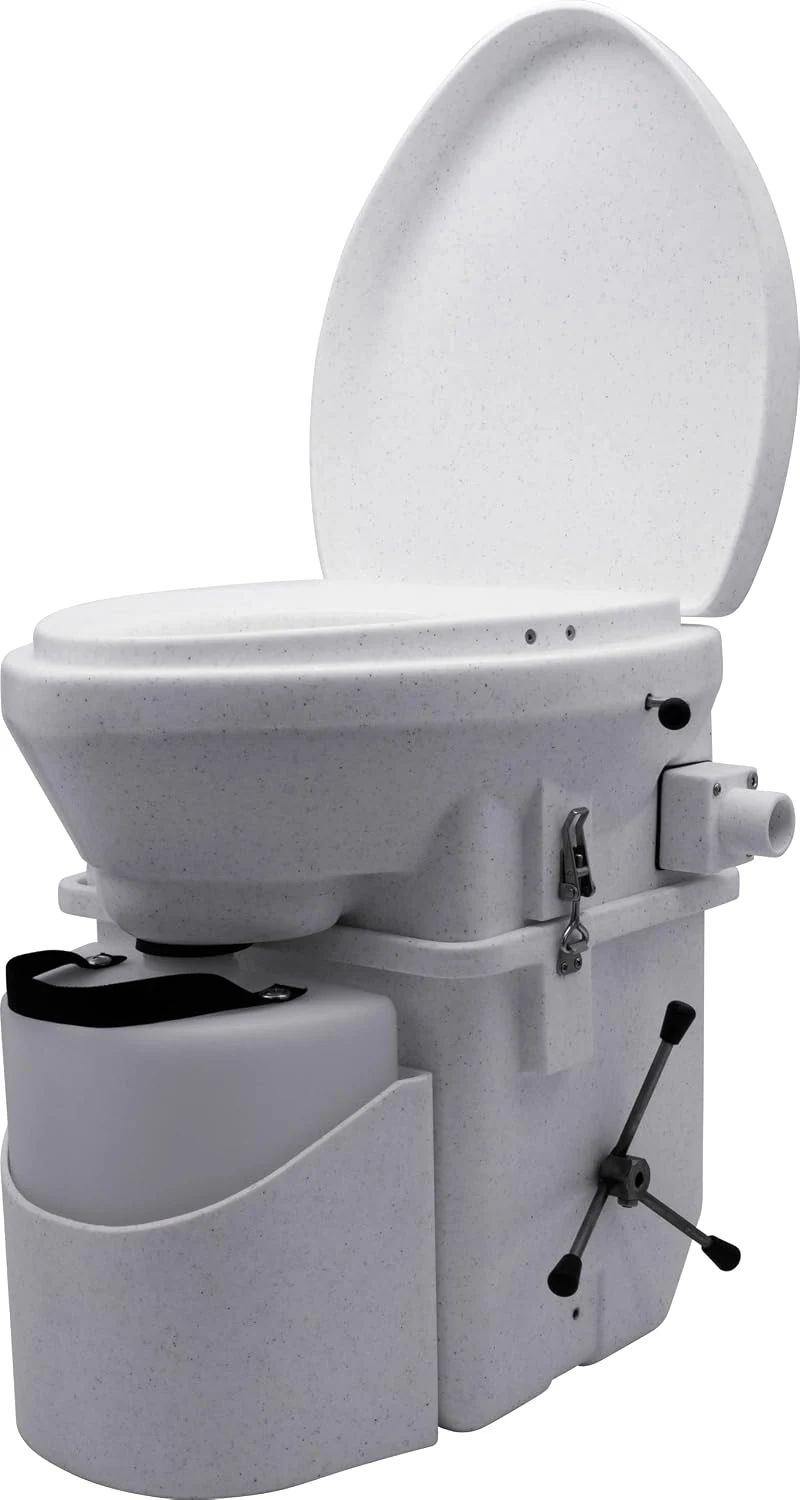
Nature’s Head Standard Toilet With Spider Handle
This self-contained toilet separates liquids into a removable bottle and has an agitated solids chamber. The standard arrangement includes a fan and a vent connection.
View On AmazonTrelino Evo L Gray Separating Toilet
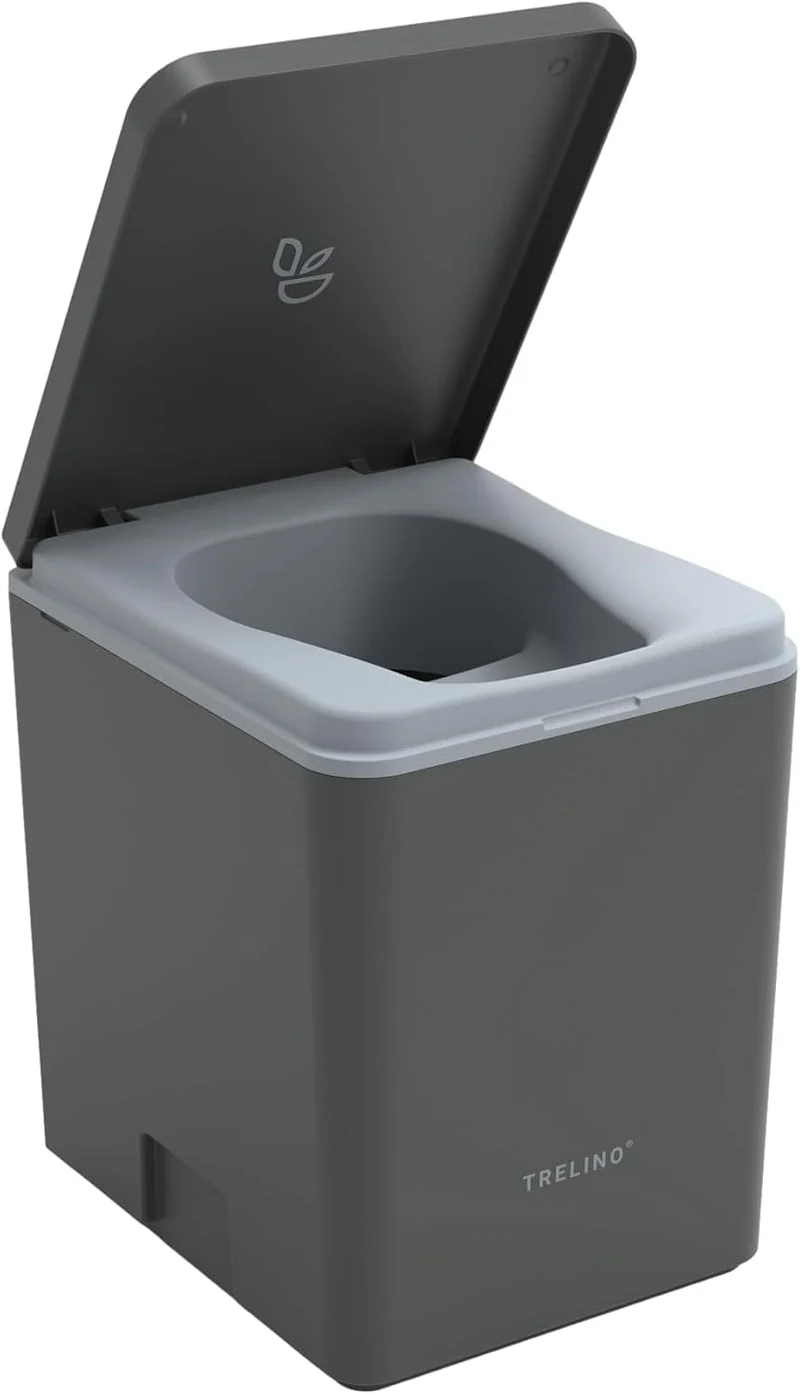
This dry toilet separates liquids into a canister and solids into a bag-lined container. Its removable insert provides access to the two containers.
View On AmazonI would compare the formats in a consistent order: first the waste path, then the water or covering material, then any power and venting, then the removal path. Keeping that order prevents one feature from dominating the decision. Avoiding flush water, for example, changes one part of the routine; it does not answer how a liquid container will be reached or where supplies will go. Likewise, a detachable tank is a useful feature only if its release points and carrying route remain accessible in the actual interior.
The two dry alternatives in this article are distinct products with distinct workflows. I would not treat either as a drop-in replacement for the YITAHOME, or assume that two toilets sold under a composting heading need the same enclosure. The comparisons are useful precisely because they expose those differences. They give me three concrete arrangements to work through instead of an abstract debate about whether one broad category is better. That is a stronger basis for choosing dimensions, access panels and storage locations later in the build plan.
Portable Flush: Follow The Water And Tank
With a portable flush toilet, water is part of the system. That means the plan needs a way to refill the upper section as well as a way to remove and empty the lower one. I would keep these as separate tasks on the checklist. A convenient emptying route does not automatically create a convenient refill route. If the toilet sits inside a cabinet, the lid and filling access need to be considered with the surrounding counter and walls, rather than with the toilet standing alone on a shop floor.
The lower tank is the other major moving part. I would draw its route from the assembled toilet to the van door, including any turn around a cabinet corner. The critical moment may be the first few inches of movement, when there is still limited room to get a hand around a handle. A large open aisle farther away does not solve a blocked release point. This kind of access check costs very little during planning and can prevent an enclosure from making an otherwise simple product awkward to service.
For the YITAHOME example, the matching Amazon listing provides the product's user manual. I would keep that exact document with the model record rather than substitute instructions for a similar-looking portable toilet. The planning value is in understanding which sections separate and how the product is arranged. Then the van drawing can show those movements. I would use the same approach for another model: identify its actual components first, and only then decide whether the available space accommodates them.
Separating Toilets: Plan For Two Containers
The Trelino Evo L illustrates a different arrangement. Trelino's manufacturer FAQ describes a separating insert, a urine canister and a solids container lined with a bag and covering material. For a van plan, the immediate implication is that there are two removal routines to accommodate. I would show access to each container, including the room needed to lift the insert or open the body. The surrounding furniture needs to work with those parts, not just the closed outer shell.
This format also changes the nearby storage list. Instead of treating flush water as the only relevant supply, I would include the bags and covering material used with the chosen arrangement. The useful question is where those supplies can be reached during the actual routine. A container stored under something else may be fine for occasional spare stock, but the everyday supply wants a different location. I would distinguish the two on the drawing so that the space calculation includes more than the toilet itself.
The word separating is particularly helpful here because it describes the physical job. It points me toward the insert and the two containers, which are things I can check against a floor plan. It also keeps the discussion focused on the arrangement rather than promising a finished material or a particular emptying interval. For my comparison, the relevant question is how the separate streams are handled and accessed. Those practical differences are enough to explain why this format needs its own planning exercise beside the portable flush option.
Nature's Head: Include The Vent And Service Space
Nature's Head identifies its standard model separately from its Weekender and external urine-diverter models. Its manuals and installation page identifies a removable liquids bottle on the standard version and explains the fan's venting and power choices. For this comparison I am keeping to that standard self-contained arrangement. That avoids carrying a feature from another model into the drawing simply because the brand name is the same. The exact model matters when deciding what is removable and what connects to the van.
The visible side handle is another reason to consider the space around the assembly. A floor outline alone does not show the room needed beside a moving control. I would put that working space on the plan along with the lid movement and bottle-removal path. These are different clearances serving different tasks. A wall that leaves the lid free may still crowd a side control; a clear side may still leave the front bottle behind a furniture rail. Drawing each movement separately makes those conflicts easier to recognize.
The vent route then becomes its own line on the build plan. It needs an actual destination and a path through the surrounding interior. Power is another separate interface. I would identify both before calling the toilet space finished, rather than assume they can be fitted around completed cabinetry afterward. This is the same reason I separate equipment from its connections elsewhere in the van: the body of a product is only one part of the installation footprint, and the route to the rest of the vehicle can be just as important.
Compare Access In The Finished Interior
My first physical comparison would be made with full-size outlines in the proposed location. I would mark the toilet body, then mark the lid sweep, container-removal space and any side controls in a different color. The extra outlines should represent movements rather than arbitrary padding. That produces a useful distinction between permanent occupied space and temporary working space. A temporary service area can overlap another area at a different time, but the plan should show what has to move and where it goes.
Next I would repeat the check with the interior in its different everyday configurations. A bed extended across an aisle, a seat in use or an open drawer can change the route. This is particularly important when a toilet is stored in one location and brought out somewhere else. Both locations count, and the carrying path between them counts too. I would not let the storage drawing stand in for the use drawing. They answer different questions about the same item, and a workable plan needs both.
Finally, I would check the first and last movements of servicing. The first movement is releasing or opening the assembly inside the enclosure. The last is putting it back without trapping a hose, blocking a latch or losing access to a handle. Those small transitions can be missed when attention goes straight to the large open floor area. I find it helpful to describe them in plain verbs beside the sketch: open, release, lift, carry, replace. If a verb has no clear physical path, the layout needs another pass.
Keep The Supply List Beside The Space List
Each format brings supplies that need storage. The right comparison includes those supplies in the same location study as the toilet. I would separate everyday items from refill stock, then decide which needs to be reachable while the toilet is out. This keeps a compact toilet from quietly borrowing several unrelated storage spaces. It also makes the trade-off visible: a body that takes less floor area may still need a useful nearby compartment for the things that make its routine work.
Water, bags and covering material should not be reduced to a single generic maintenance line. They occupy different kinds of space and are handled differently. I would record the chosen product's actual requirements and then draw a storage place for the relevant supplies. That is a planning comparison, not a claim that one format always uses less total room. The answer depends on the enclosure, the number of spare supplies carried and the way the interior is used between servicing stops.
Cleaning access belongs on that list too. I would look at whether the surrounding surfaces can be reached when the toilet is removed and whether the storage enclosure has corners that make the task awkward. This is a furniture decision as much as a toilet decision. A finish that looks neat with the unit in place should also leave a straightforward space when it comes out. Considering the empty enclosure gives a more complete picture than studying only the assembled product in a finished interior photograph.
Compare Total Scope Rather Than Sticker Price
I would start a cost comparison with the same scope for each format: the selected toilet, its required connections, the enclosure and the supplies that belong to the chosen routine. That gives the numbers a common boundary. Comparing one bare unit with another unit plus its venting and mounting work can make the result misleading before the prices are even entered. My conversion-cost planning guide uses the same principle of keeping the work boundary visible alongside the purchase list.
The furniture can be a substantial part of that boundary even without putting a number against it here. A sliding compartment, a removable panel and a fixed open location create different projects. I would choose the arrangement that serves the use and removal paths, then price that actual arrangement. Otherwise the estimate can reward an enclosure that is inexpensive on paper but obstructs the task it was supposed to accommodate. The comparison should include the work required to make the selected product usable in its intended position.
Ongoing supplies belong in a separate column from the initial build. That makes it easier to see the difference between a one-time connection and a recurring item without pretending to know everybody's travel pattern. I would fill that column with my own intended routine and the exact product instructions. The purpose is to make the decision legible, not to manufacture a universal savings figure. A reader can then change the assumptions without losing track of what each number is supposed to cover.
A Practical Comparison Before Buying
I would make a short written answer for each candidate: what fills it, what comes out, what stays connected, what must open and what supplies sit beside it. That produces a useful comparison even before detailed dimensions are added. If two options appear identical in the notes, I would look again at the actual containers and access points. The aim is to describe their routines accurately enough that another person could follow the plan, rather than to collect a longer list of selling points.
Then I would compare the notes with the intended trip pattern. A toilet planned as an occasional backup may occupy a different place in the interior from one intended for regular use. That is a difference in the planning brief, not a reason to assume different performance from the product. I would write the intended role at the top of the sheet. Keeping that role visible makes it easier to reject a feature that sounds attractive but does not solve a problem in the actual layout.
The final check would be a deliberate removal rehearsal using the full-size layout. Even a simple box representing the container can reveal a tight turn or a blocked grip. I would include the door opening and any furniture that remains in place during the task. This is where a paper comparison becomes a practical build decision. The preferred option should have a complete route through the interior, with a clear explanation of what happens before, during and after servicing rather than a promising footprint alone.
Questions I Would Answer In The Build Plan
Can a portable toilet fit under a seat? The useful answer comes from the actual model and the complete sequence. I would check the stored body, the opening through which it moves and the location where it is used. A suitable storage height does not establish usable access. If a lower holding tank has to be detached in place, that movement needs its own check. If the entire assembly comes out first, the carrying route and its destination need to be shown instead.
Does a separating toilet need the same connections as an agitated composting-style model? I would compare the specific product documents. The Trelino and standard Nature's Head examples show why the broad category is insufficient: their container arrangements and surrounding interfaces differ. I would list the chosen model's venting, power and removal requirements individually. That keeps an optional accessory or a different model's feature from silently becoming part of the build. It also makes later changes easier to evaluate because the original assumptions remain visible.
Which format would I put first on a shopping list? I would start with the routine I can actually accommodate. My YITAHOME purchase provides a concrete portable-flush reference; the two researched dry alternatives provide different arrangements to compare against it. I would work through access, supplies and connections before ranking them. A toilet choice becomes much clearer when the surrounding tasks have places in the van, and much less clear when the decision rests on a category name or an isolated product photograph.
Put The Chosen Format Into The Wider Van Plan
The toilet decision connects to the rest of the interior through space, access and the travel routine. I would carry the selected model and its service movements into the main floor plan, then keep the product document beside that drawing. This avoids solving the toilet in isolation and discovering later that a bed support, drawer or counter has taken its working space. The full-time-living planning guide puts those everyday tasks into the wider discussion of how the van will be used.
My takeaway is to compare complete arrangements. The portable flush option brings a water-and-holding-tank routine. The separating example brings two containers and their supplies. The standard Nature's Head example brings its own chamber, controls, vent and power planning. Those differences give a builder useful things to measure and rehearse. Once each task has a place, the choice can be made around the actual interior and intended role, with the product record, purchase history and researched alternatives kept clear.