Compare a Finished Wall Assembly
The original notes below name two different panel products. They are a starting point for a comparison, rather than a tested ranking or confirmation that either suits every van. Keep the archived product dimensions separate from current supplier specifications and from the dimensions of the finished wall you intend to build.
Compare the complete assembly in one location: panel, finish, edge treatment, attachment parts and any necessary access opening. A sheet-only comparison leaves out details that can change the usable interior space and the work required to remove a panel later.
These two panels were listed in the original interior notes. Compare thickness, finished weight, fastening requirements and finish compatibility for your layout. Check current dimensions and product specifications before ordering.
Panels Listed in the Original Notes
- Falken Design Aluminum Composite Panel Black, 24"x 36", 1/8" Thick
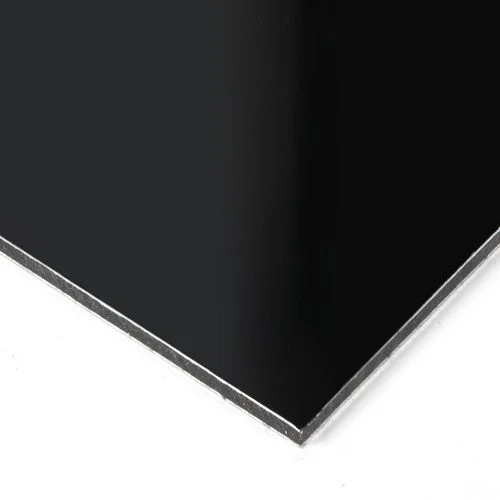
Alternative: Falken Black Aluminum Composite Panel
This black aluminum-composite panel provides flat sheet material for interior fabrication. It can be cut into panels, covers and other shaped components.
View On Amazon: Alternative: Falken Black Aluminum Composite Panel- 1/8 in. x 4 ft. x 8 ft. Eucalyptus White Hardboard
- View At Home Depot
- The original notes considered a black wall finish and white ceiling panels; check finish compatibility before painting.
Make the Same Record for Each Candidate
- Finished envelope: note the panel thickness together with any backing, trim and intended clearance.
- Weight: use the exact supplier’s published value or a measured sample; mark an estimate as an estimate.
- Edges and openings: show visible edges, corners, sockets and other cutouts on the layout.
- Attachment and access: document the intended mounting arrangement and which fasteners remain reachable.
- Finish: record the panel manufacturer’s requirements for surface preparation, coatings and cleaning.
- Service access: identify anything behind the wall that you expect to inspect or repair.
Separate the Color Decision from the Material Decision
The original black-wall and white-ceiling idea describes an appearance preference. Keep the intended color, the actual substrate and the proposed finish system as separate entries until their compatibility has been checked.
Before extending one choice across the whole interior, resolve the details on a small representative section or sample. Record what was actually checked, including edge finish and fastener access. A visual sample is useful evidence about appearance.
Use the layout measurement worksheet to record the space the finished wall will occupy. Compare adjoining countertop details and the framing references before finalizing cabinet clearances.
Reference guide expanded October 20, 2026. Original publication date and archived references retained.
Watch: Wall Panel Assembly Planning
My narrated planning guide follows the decisions and references on this page.
Press Play To Start The Video.
Read The Video Transcript
Hey, I'm Steve Smith with Camper Van Freedom. A wall-panel choice affects more than the surface you see. My interior notes compare the complete wall assembly: the panel, finish, edge details, attachment parts and access openings. Start with one location in the van. Put each candidate into that same space so the comparison answers a useful layout question.
Start the comparison record with the finished envelope. Record the panel thickness, any backing, the trim and the clearance you intend to leave. Keep the purchased sheet dimensions separate from the finished pieces. The space occupied by the wall affects nearby cabinets, the countertop and the aisle, so show those layers in the layout model.
For weight, use the exact supplier's published information or a measured sample, and identify an estimate as an estimate. Include the finish and associated parts when comparing a finished assembly. A sheet-only figure leaves some of the build out of the record. Keep the source of each number beside the material and the size it describes.
Draw the exposed edges, corners and planned openings on the wall layout. Include sockets, removable covers and other cutouts that belong in that location. Keep the edge treatment with the selected material information. A flat sheet sample can show a surface, while a representative corner or opening helps explain how the finished detail will look.
The mounting plan needs to show attachment and access together. Record the intended arrangement and the fasteners that will remain reachable. Then identify the equipment or connections behind that wall that you expect to inspect or repair. Draw how the relevant panel or cover comes away, including the room needed to move it.
Keep the color decision separate from the substrate and finish system. My original notes considered black walls and white ceiling panels. That describes an appearance idea. Record the selected panel's preparation, coating and cleaning requirements with the choice. Check a representative section before extending the detail throughout the interior, and record exactly what that sample answered. Thanks for watching. I'm Steve Smith with Camper Van Freedom. Compare the finished wall, including the space it occupies and the access it leaves. See you next time.
Watch On YouTube
Watch On YouTube · English Captions (VTT) · Download The Transcript