HD Ridez N-Series Running Boards: My Passenger-Side Transit Install
I bought the HD Ridez N-Series running boards on Amazon for my Ford Transit. Here is my passenger-side installation, from loosening the lower trim and attaching the brackets to the finished step beside the doors.
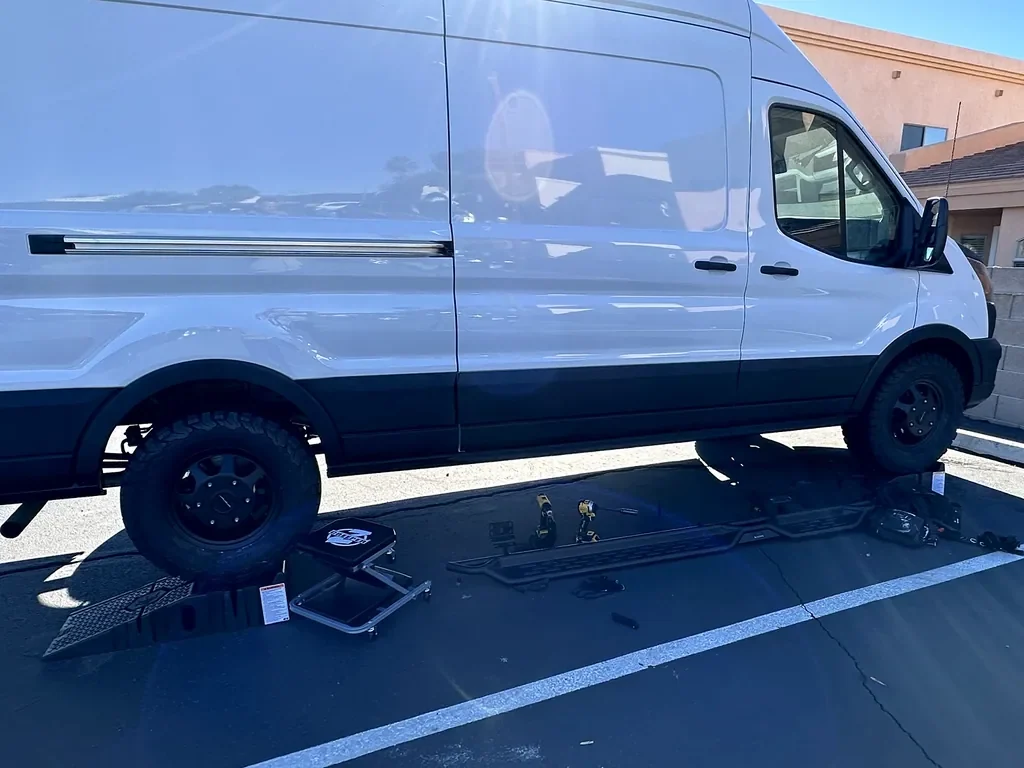
The photographs and clips follow that one side of the van. They show the board laid out before mounting, the trim clips I loosened for access, the prepared holes and studs, and the bracket attached underneath. The finished result was the part I was most pleased to walk around and show.
Watch My Running-Board Project
HD Ridez N-Series Running Boards: My Ford Transit Passenger-Side Installation — Landscape
HD Ridez N-Series Running Boards: My Ford Transit Passenger-Side Installation — Portrait
Introducing the Ramps and Laying Out the Work
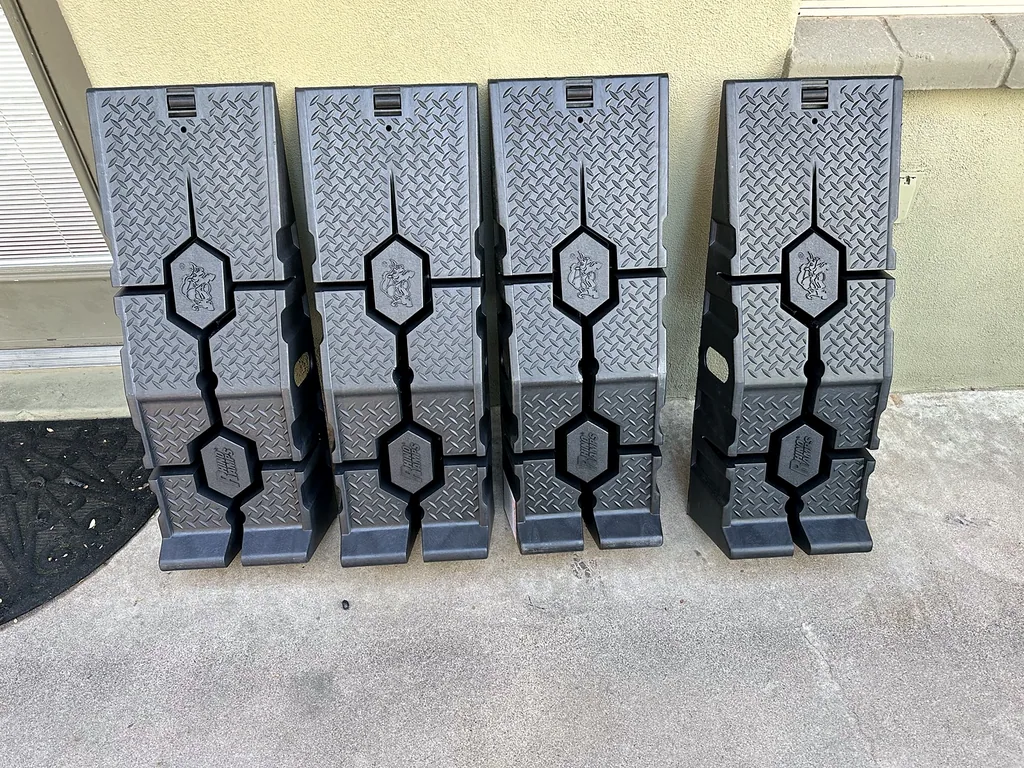
I began with four molded ramps standing against the wall. In the opening recording I introduced them beside my 2023 Ford Transit 250 and explained that I was using them for this work on the van. The photographs show their tread faces and the raised ends before the view changes to the van in the work area. My RhinoRamps MAX experience page includes my recorded cracking-and-breakage review.
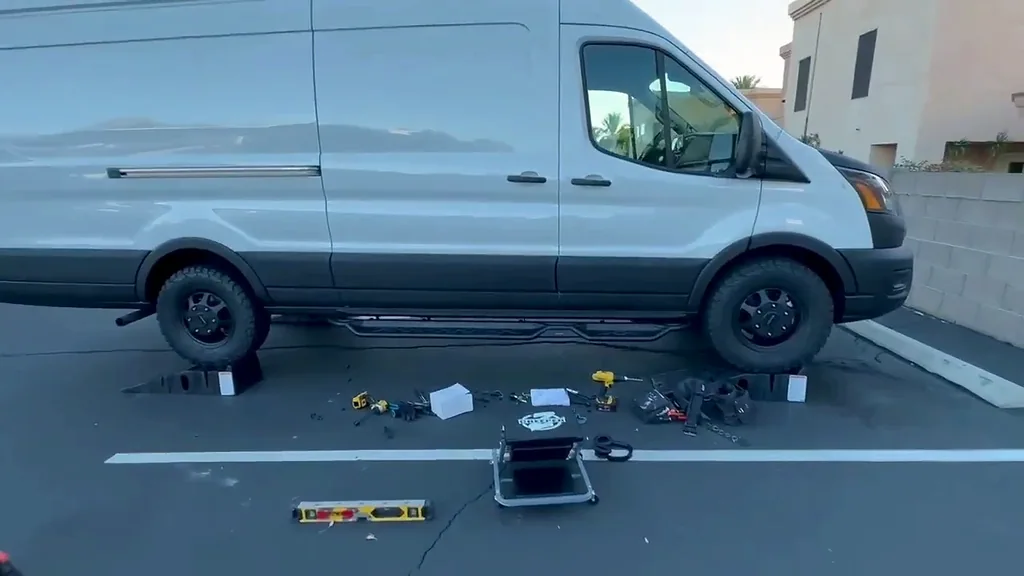
My passenger-side setup photograph is a useful starting point for the rest of the story. The long black board is still on the pavement, parallel to the van. Separate mounting pieces and yellow cordless tools are spread beside it, with the creeper seat nearby. The lower trim is already black, so the board and the area it would sit below are visible together before anything is attached. My Pro-Lift C-2036D creeper-seat notes connect the labeled box and assembled seat to this setup.
That overall photograph helps make sense of the closer views later. The board starts as a separate piece alongside the body; the next recordings move underneath to the places where its brackets connect. Keeping those stages together makes the change easier to follow than a finished side view alone.
Loosening the Lower Trim Clips
Under the passenger side, I started by loosening the plastic clips along the lower trim. In the recording I explained that the instructions I was following called for loosening the trim rather than taking it off. That appealed to me because I had already coated the trim with bedliner.
I tried working a flathead tool into the gap, then used my fingers as the clip began to move. The camera was close to the underside of the van, so this part of the film is much tighter than the setup photograph. It shows the small access space around the trim and the retainer rather than the whole side of the vehicle.
Trying to demonstrate that while holding the camera made it awkward. I said I would need two hands to continue. That is where this part of my recording leaves the trim-access work, before the next view of the prepared mounting points.
The Prepared Mounting Points
When I returned to the camera underneath the van, the mounting points were ready to show. I pointed out a factory hole, the inserted fastener and its retainer, then moved to the holes and clips nearby. I also showed the factory studs used by the bracket.
I talked through the holes I had drilled, with the holes already present in the recording. The useful detail in this passage is their position beside the retained trim and the other mounting points. The film then moves forward to the bracket attached in that area.
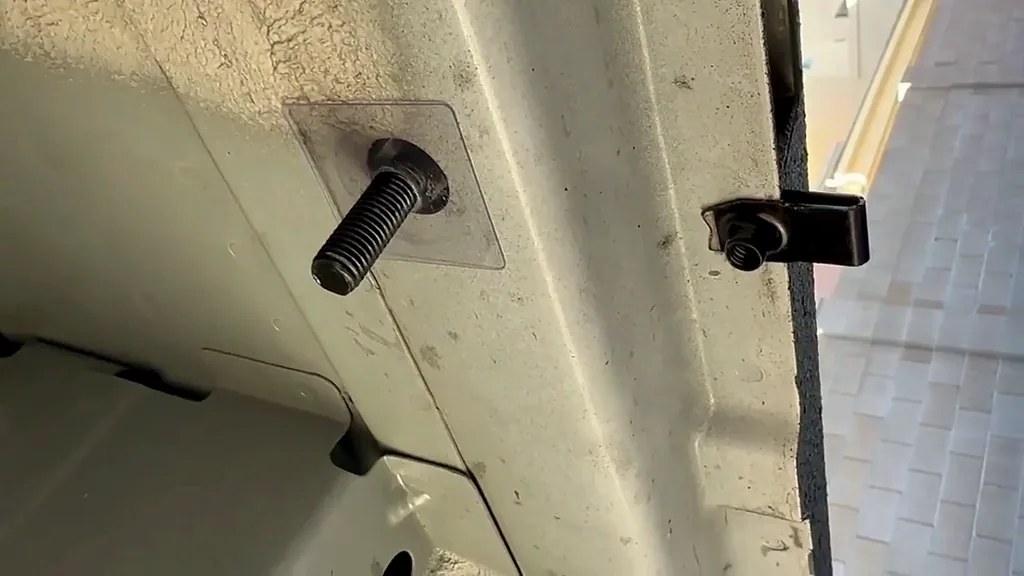
This was the transition from gaining access to seeing how the board would be held. In the earlier photograph, the mounting pieces were on the pavement. Here, the camera is underneath the body and close enough to distinguish the studs, the fastener and the clips I was describing.
The Bracket Attached Beneath the Passenger Side
The following recording shows the black mounting bracket in place. I moved the camera along its upper plate, where the studs, washers and nuts are visible, then around the other connection points behind the trim. The board is now connected to the bracket rather than lying separately beside the van.
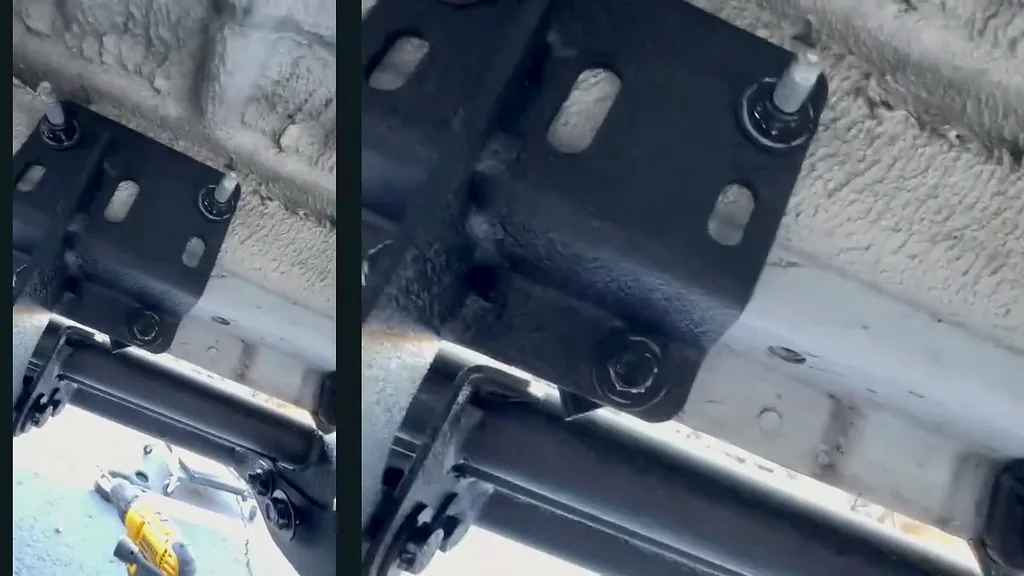
I followed the bracket down toward its connection with the board. That change of camera angle is useful: one view shows the attachment at the van, while the next follows the hardware toward the underside of the step. The full film preserves that movement between the two.
Putting the prepared-point view beside the attached-bracket view is the clearest process comparison in my photographs. The same area goes from exposed points to a visible bracket and board connection. It is a record of the arrangement I showed on this passenger side.
The Passenger-Side Result
Back outside, I walked along the finished running board. I was very happy with how it looked against the van. To my eye, its dark textured finish matched the bedliner on the lower trim so well that I no longer felt I needed to coat it to get the appearance I wanted.
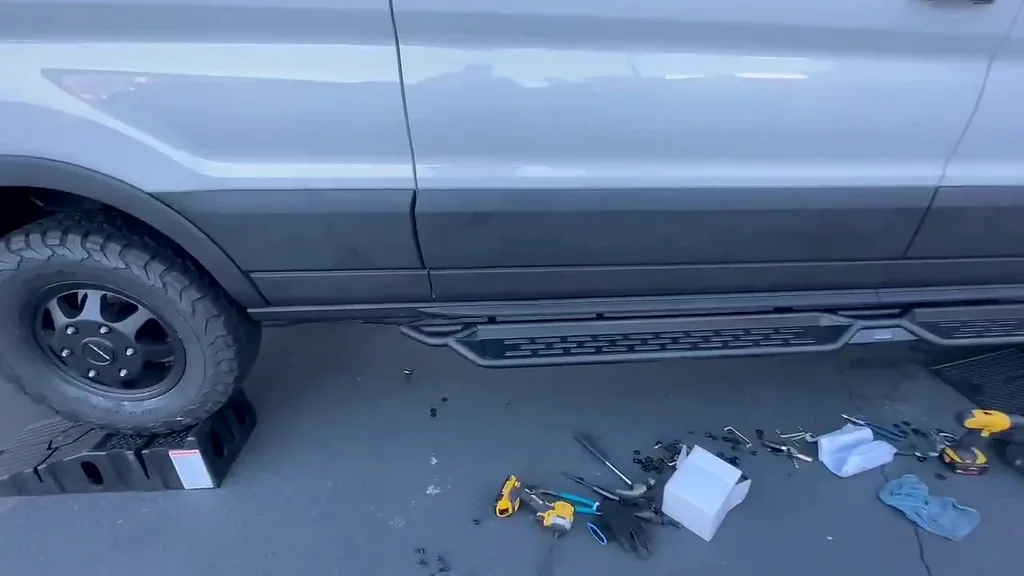
I also pointed out where the board ended. My Transit is the extended version, and the board does not run all the way to the rear tire. What I liked was how it lined up with the doors. The wider view puts that length and position in context with the whole passenger side.
The Project Sequence at a Glance
| Stage in my project | What the photographs and film show |
|---|---|
| Introduction and setup | Four ramps, the van in the work area, and the board, tools and creeper laid out. |
| Trim access | My close-up attempt to loosen the plastic lower-trim clips. |
| Prepared points | The inserted fastener, clips, holes already present and factory studs. |
| Bracket attached | The upper plate and fasteners, followed down to the board connection. |
| Passenger-side result | The dark step beneath the doors and my reaction to its appearance. |
| Work remaining in the recording | The driver-side installation. |
My Takeaway from This Stage of the Build
The best part of keeping the process footage is being able to connect the finished appearance with what was underneath it. The setup photograph shows the long board as a separate part; the close-ups show the access and mounting area; the final walkaround shows how the step sits against the doors and black lower trim.
My reaction was about the result I could see. I liked the finish and the way the board lined up with the doors, even though it stopped short of the rear tire on my extended van. I ended the recording pleased with the completed passenger side and still needing to do the driver side.
The black coating has its own sequence of preparation, spraying and roller correction in U-POL RAPTOR Black Urethane Bedliner Kit Project. The Method Race Wheels MR701 Project records another change visible in these views. Follow those projects, or return to my build diary for the wider conversion record.
Read the Project Diary
My project diary records the work, photographs and videos behind this project.
Define The Side And Scope Before Comparing Running Boards
The scope of this project is the passenger side of my extended Transit. Keep that scope beside the product name when using the page as a reference. My closing recording explicitly leaves the driver side for later. That matters because a finished passenger-side view does not describe the work or access on the opposite side, even when both boards belong to the same purchased set.
Start a running-board comparison by identifying the van configuration and the doors the step is intended to serve. Record the body and length configuration with the exact product reference. A listing photograph can make two boards look similar while their lengths, shapes and mounting arrangements differ. Keep the original purchase identity separate from any current alternative so the installation record is not silently transferred to a different board.
Describe the result you are comparing. In my walkthrough, I liked the alignment with the doors and the dark finish against the lower trim. I also pointed out that the board did not reach the rear tire on the extended van. Those observations belong together: the rear wheel is a visual reference, while the doors explain the part of the body where I wanted to see the step. A full-side photograph lets the reader judge that relationship.
Separate appearance preferences from the physical installation record. The finish matched my bedliner to my eye, so I no longer felt a need to coat it for that appearance. That is my reaction to the photographed result, not a statement that every board or coating has the same texture. Keep the daylight result, the product image and the lower-trim project available as different views of the comparison.
For your own project notes, record the side, intended doorway coverage, exact board reference and the photograph that shows the whole arrangement. Then keep the mounting documentation beside that record. This avoids choosing by a close-up of the tread alone and only discovering the overall length or mounting scope after the parts have arrived.
Follow The Photographs From The Work Area To The Step
The setup photograph is the best starting point for locating the rest of my footage. The board is on the pavement beside the van, with mounting pieces, tools and the creeper seat nearby. It establishes which side is being worked on and shows the board before it is attached. Use that view before opening the trim close-up; otherwise the small underside detail has very little surrounding context.
The trim-access sequence then explains why the work moves under the van. I wanted to loosen the lower trim rather than remove the already coated piece. The camera follows a small gap and retainer, and I comment on the difficulty of filming while using one hand. Keep that moment in the process record because it explains the change from a wide setup view to a very close working view.
The next view shows prepared mounting points. I describe the factory hole, retained fastener, nearby drilled holes and factory studs with the preparation already present. The following attached-bracket view is the meaningful comparison: it shows the bracket occupying that same area. Comparing the two views lets you follow the relationship without treating the film as a continuous recording of every preparation step.
Follow the bracket from its upper connection down toward the board. That movement connects the underside view with the step visible from outside. The bracket is no longer a separate piece on the pavement. A photograph that includes both the bracket and its board connection is useful because it bridges the gap between the small fastener details and the full passenger-side result.
Finish with the exterior walkaround. Look at the doors, the board ends and the lower trim in the same frame before returning to a tread close-up. This order answers three different questions: what was laid out, what connection I showed underneath and how the finished passenger side looked. The full film preserves that sequence, while the stage clips make it easier to revisit one part of it.
Prepare A Mounting-Point Record For The Actual Board
A useful preparation sheet starts with the exact instruction set associated with the board being fitted. Keep its part reference and revision, if supplied, beside the purchased product identity. The product record linked on this page preserves the HD Ridez listing and its supplied manual reference. That is a more specific starting point than treating every Transit running board as the same mounting project.
Give the mounting positions names that can be used in both the instructions and photographs. Record where each bracket belongs along the selected side and which view shows it. Keep the board's orientation obvious. A long dark component photographed on the pavement can be difficult to interpret later unless its front and rear relationship to the van is clear.
Use separate fields for the body feature, the hardware shown and the bracket being connected. In my recorded mounting area, factory features and prepared holes appear together. Keeping their identities separate helps explain the view without collapsing every visible opening into one type of attachment. Add the source photograph to the row so the written description can be checked against the actual area.
Record access as part of the task. The lower trim and its clips were important in my sequence because I had already applied bedliner. Include the current finish and trim condition in the preparation notes, with a photograph before work. That connects the access question to the real van instead of treating the body as an empty diagram with no existing coating or nearby pieces.
End the preparation sheet with the next check for each mounting position. It might be identifying the matching bracket, locating the instruction detail or obtaining a photograph that shows the fitted relationship more clearly. Keep those questions in the work record. The goal is a traceable project plan for the actual board and side, with the product instructions and the observed vehicle features easy to compare.
Compare The Step With The Doorway And Lower Trim
Use a full-side view to compare the board with the doorway rather than judging it only by its distance from the rear tire. My extended van makes that distinction visible. The board stops before the rear wheel, yet I was pleased with how it lined up with the doors. A photograph that crops away the doorway would lose the relationship I was describing in the walkthrough.
For a layout comparison, note which doorway the step serves and where the intended approach would be. Keep the door open position in the plan when considering access to the interior. The outside step and the inside furniture meet at the same entry route. If a cabinet or storage arrangement changes that approach, return to the door-opening and usable-space checks before treating the entry layout as settled.
Photograph the finish in a view that includes both the board and the existing trim. In my result recording, the dark textured board sits immediately below the black-coated lower body. That is the basis for my appearance comparison. A product photograph against a white background explains the board's shape but cannot show how that particular finish looked beside my bedliner on the van.
Keep the other exterior changes identifiable. The black lower trim and the Method and BFGoodrich wheel-and-tire project contribute to the wider side profile, but they are separate projects. Linking them makes the overall appearance easier to follow without implying they were installed as one kit or that their installation details belong to the running board.
A useful comparison set therefore includes the board beside the doors, the lower-trim finish and a closer view of the step itself. Keep the photographs at their native proportions so the relative lengths remain understandable. Describe what the views actually show and preserve my original reaction beside them. That lets the reader see both the detail and the reason I liked the finished passenger side.
Keep The Finished Side And Remaining Work Separate
At the end of a project session, write down the side completed in the recording and the work still ahead. My film ends with the passenger board shown in place and the driver side still to do. Keep that ending attached to this project, even if a later session continues the build. A later update can link forward to its own photographs without changing what the original walkthrough established.
Retain the setup, mounting-area and result photographs as a small sequence rather than saving only the most attractive exterior view. The setup identifies the parts and work area; the mounting detail explains the connection I showed; the result gives the step its place beside the doors. Each view has a purpose, and together they are more useful when returning to the van after another project.
Put the board reference, instruction reference, side, photograph labels and remaining task in the same project folder. If another board is considered later, keep that comparison separate from the purchased HD Ridez record. The original installation story then remains coherent while the current product page can explain available alternatives with their own matching pictures and descriptions.
For the wider conversion, carry the finished passenger-side view into the exterior project record and keep the next-side task on the build list. The practical lesson from my footage is how the access detail, underside connection and doorway alignment belong in the same story. Preserving all three makes the page useful beyond a simple before-and-after photograph.
Compare Current Options Without Replacing The Original Project
The purchased board and the alternatives have different roles on this page. My photographs and recorded installation belong to the HD Ridez N-Series board. The APS aluminum and stainless-steel boards are comparison options with their own product images and listing descriptions. Keep those roles visible when moving between the project story and the current product links.
Begin with the shape of the step. My board has a tubular, slotted appearance, while the aluminum alternative is described with a broad, flat step surface. The stainless-steel alternative has its own split-board description. Those distinctions help explain why a matching photograph matters: an image of my installed board would not show the shape of a different current option.
Then compare the work included with each exact offering. Put the board reference, stated vehicle application, supplied mounting parts and instruction reference in separate columns. Keep any questions beside the particular listing rather than attaching them to the whole running-board category. The historical instruction reference on my HD Ridez record belongs to that product, not automatically to either APS alternative.
Use the full passenger-side photograph as the appearance reference for my choice. For another board, compare its actual dimensions and shape with the intended doorway and the specific van configuration. A listing's six-inch description or material name does not explain every aspect of the finished position. The useful comparison combines the exact offer with the space and work it is meant to serve.
Keep the decision with the project notes: original board and installation history, current option being considered, relevant documentation and the next measurement or listing detail to confirm. This lets the shopping comparison remain current while the filmed installation stays a clear record of the board I actually bought and the passenger side I completed in that session.
The Product I Bought
This is the product behind my recorded project. The original photographs, video and installation details below show its role in my build.
HD Ridez N-Series Running Boards
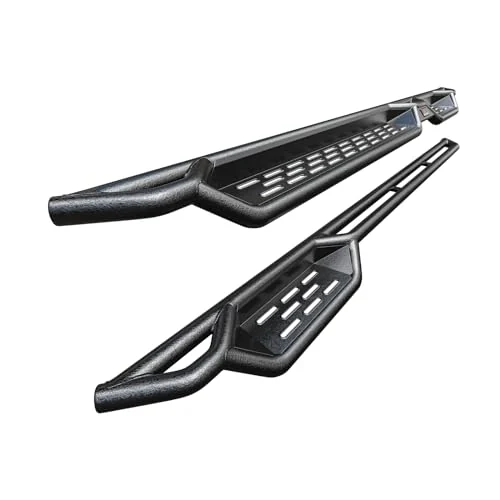
These black HD Ridez N-Series running boards use tubular frames with slotted step plates. The Amazon listing supplies an NB1 Overland manual identifying part WB-FN425MD.
View On Amazon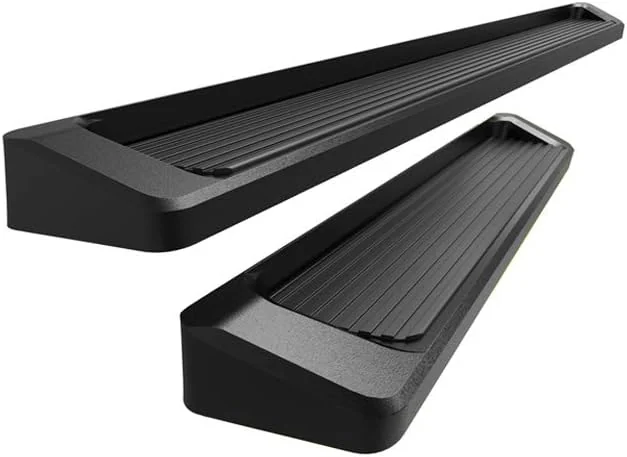
Aps Premium Six-Inch Aluminum Running Boards
These APS running boards use six-inch aluminum step surfaces with black powder coating. Their broad, flat tread differs from the tubular, slotted drop-down design shown in Steven’s project.
Alternative To Compare
View On Amazon
Aps Premium Six-Inch Stainless-Steel Running Boards
These APS running boards use black-coated stainless steel and full-length step pads. The listing describes a split board design, distinct from both the one-piece aluminum alternative and the tubular drop-down board in Steven’s footage.
Alternative To Compare
View On AmazonRead the Mounting Detail Beside the Wider Passenger-Side View
The close views show what I had exposed and the bracket position beneath the passenger side. The result clip then steps back so the board can be seen in relation to the doors and lower trim. Drilling is discussed and prepared holes are visible in the project record; the filmed action used here follows the mounting area and attached bracket. I keep the setup, mounting and result clips separate because each answers a different question about the work I recorded.
Watch The Additional Finished Edit
HD Ridez N-Series Running Boards: My Ford Transit Passenger-Side Installation — Landscape
Read This Video’s Spoken Transcript
Hey everyone, this is a review of RhinoRamps. I have four four of them here so that I can prop up all four wheels in my 2023 Ford Transit 250 and I'm going to be using them today to install some things in my van and giving a review. Now these are the RhinoRamps MAX. So, to install the running boards it wants me to loosen these plastic clips on the trim here underneath the passenger side of my Transit.
And so I'm going to go ahead and see if I can record myself doing that. It says don't take off the trim but just loosen it which is good because I bedlinered my trim. But it says I should just be able to stick a flathead in here. And then pull this down. It's a little difficult to do with one hand. That saying once I stick the flathead in there it should just kind of come down.
It appears like it is loosening up. It's almost like you have to pry it a little bit off. It definitely can get my fingers in that small space there. Interesting. So that's what you do. I'm going to have to try to do it with two hands here. So, I'm underneath the passenger side of the van and installing the running board here. And I'm just showing you how it's installed.
So, you have, this is a, this is a factory hole here. And then you have the bolt. This is being held by this plastic retainer. But also, there's something behind there that basically catches inside. And then I drill these two holes and we have these clips here. So, then I'm going to put this, I'll show you after I'm done, I'm going to put the bracket on there that's attached to the running board.
And then these are the factory studs and the bracket mounts on those. So, I'll show you all this when I'm done. So you can see here we got our bracket. These are the two factory studs. There's a washer and then a nut there and then I drilled those holes and you use these retainer clips. I clip onto the metal there right behind the plastic trim and there's a locking washer and a regular washer and a nut or in a bolt and so then you fasten that on to the chassis there.
And then this whole mounting bracket as you can see mounts to the running board. So that's how it attaches to the underside here. I'm on the passenger side. So here's the finished product on the passenger side with the running board. I'm very happy with the way it looks. And the finish on it actually matches the bed liner perfectly. Looks like they put on some bed liner themselves.
And so looks really nice. So one thing about this is it doesn't run all the way to the back tires because I have the extended version. But it still looks fine and it matches up with the the the doors really well where you would do it. So overall really happy with it. Still needs to do the driver side though.
Explore My Ramps And Side Runner Bars Video Collection for the films, stage clips and viewing guide.
Questions from This Project
Which Side Was Finished In This Film?
The passenger side is shown with the running board attached. At the end I say the driver side still needs to be done.
Which Clip Shows The Bracket Detail?
The mounting clip concentrates on the lower trim, mounting points and bracket stage. The full film connects that detail to the ramps and equipment setup before the work.
Where Can I See The Board Against The Whole Van?
The result clip returns to the passenger-side exterior. My project article and Passenger-Side Running Board diary keep that result alongside the earlier setup and mounting photographs.