U-POL RAPTOR Black Urethane Bedliner Kit: My Transit Trim And Hood
I bought U-POL RAPTOR Black Urethane Bedliner Kit on Amazon for my Ford Transit. This project follows my actual preparation, installation details and recorded result.
The result was more even and shinier than the matte appearance I had originally wanted. I was happy with how the van looked when I removed the masking and walked around it. These are my preparation photos, the change in application method and the finished result.
Watch the Trim-and-Hood Project
U-POL RAPTOR Black Urethane Bedliner Kit: My Transit Trim and Hood Project — Landscape
U-POL RAPTOR Black Urethane Bedliner Kit: My Transit Trim and Hood Project — Portrait
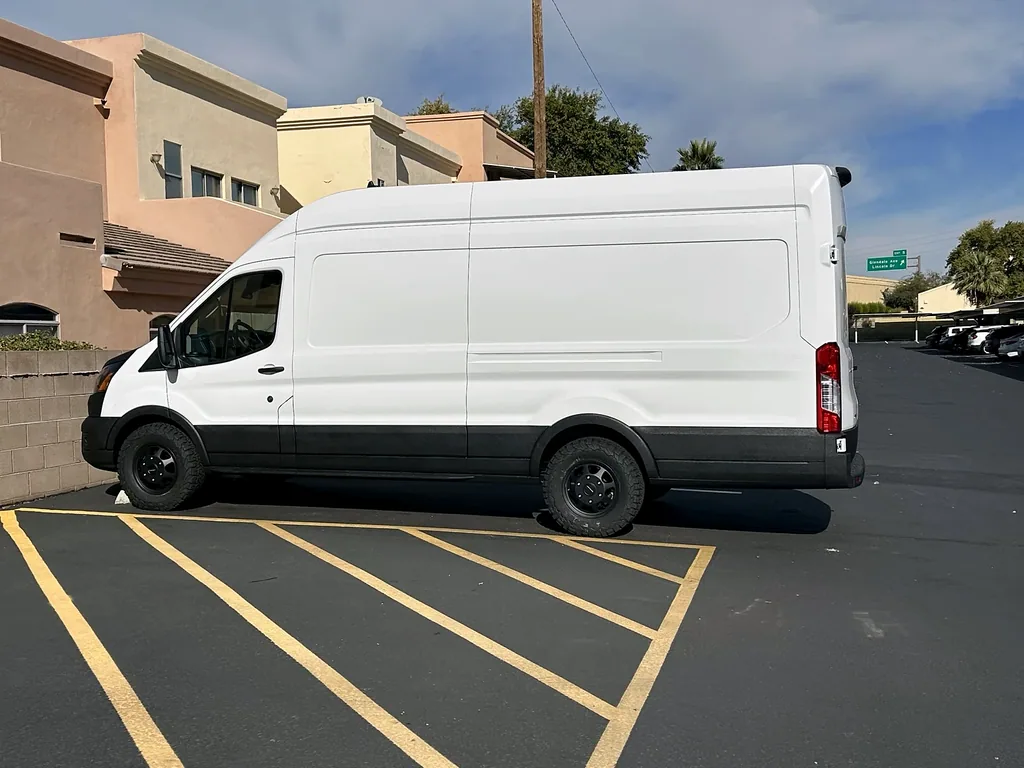
What I Coated on My Transit
Before I started, the hood was white, and a narrow white strip ran below the dark side molding. My opening walkaround follows that strip, the wheel arches and the front bumper before I describe coating the hood. The finished black band would join areas that had looked like separate pieces around the bottom of the white van.
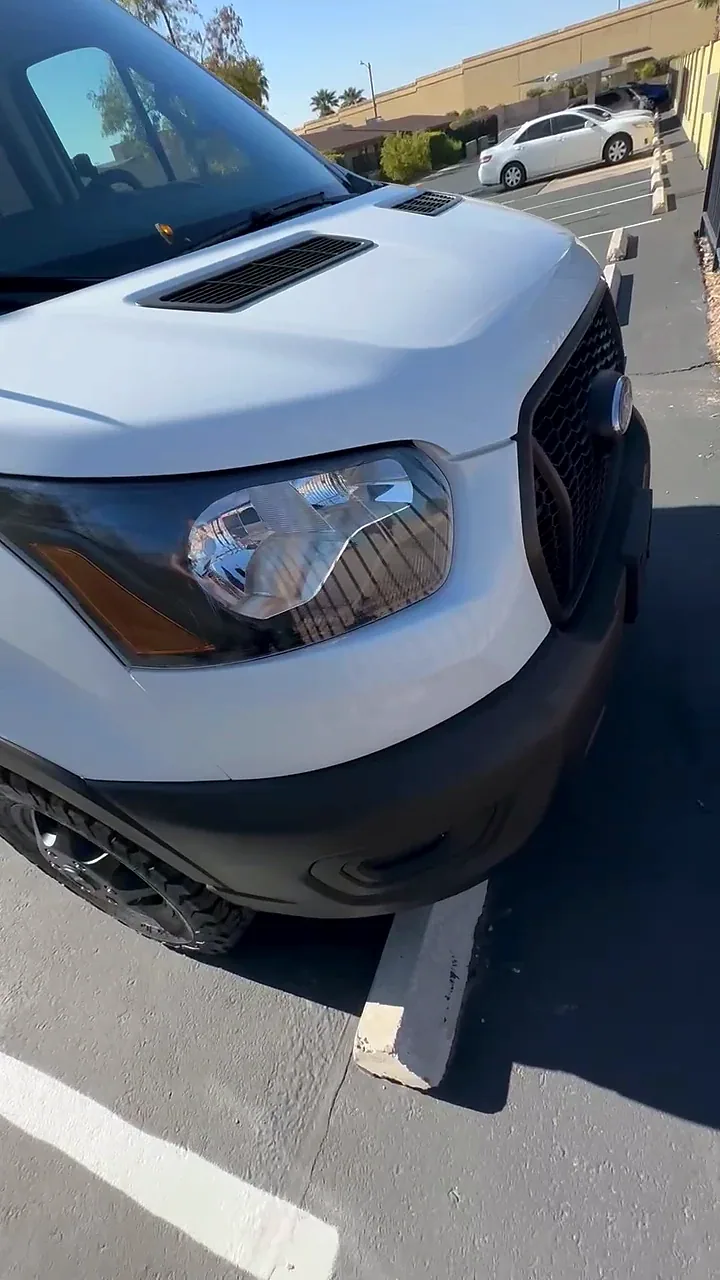
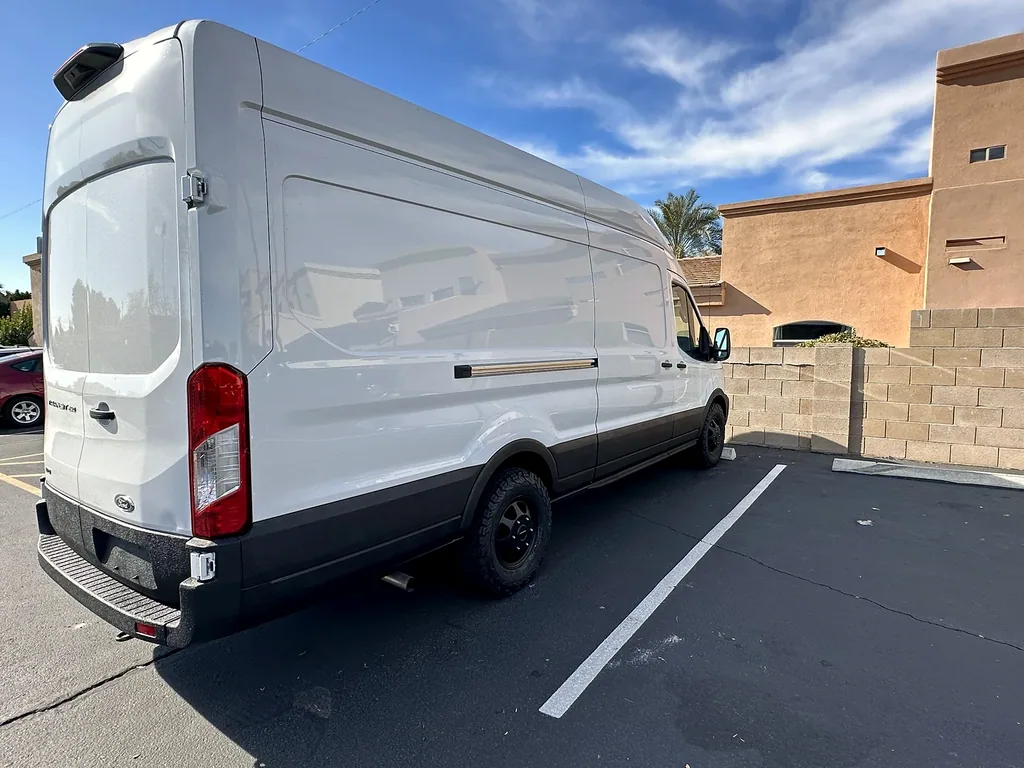
This project brought the lower side trim, rocker areas, arches, bumpers and hood into the same black textured finish. The photographs show the contrast between the large white body panels and the darker band around the bottom of the van. At the front, the hood became a much larger textured black surface.
The work is separate from my white-bedliner project. That article follows the white coating and its own masking and finish problems. Here, the product packaging, application footage and final photographs belong to the black RAPTOR trim-and-hood project.
My Method Race Wheels MR701 Project is another part of the exterior story. Those black wheels are visible in the finished photographs here; the coating work follows its own preparation and correction sequence.
Masking the Edges and Preparing the Surfaces
Before the black coating went on, the van looked very different. Blue tape marked the borders, while paper and plastic covered adjacent areas. Around the front, I masked the lights, grille, hood vent inserts and windshield edge. The scuffed white hood was still visible inside that masking.
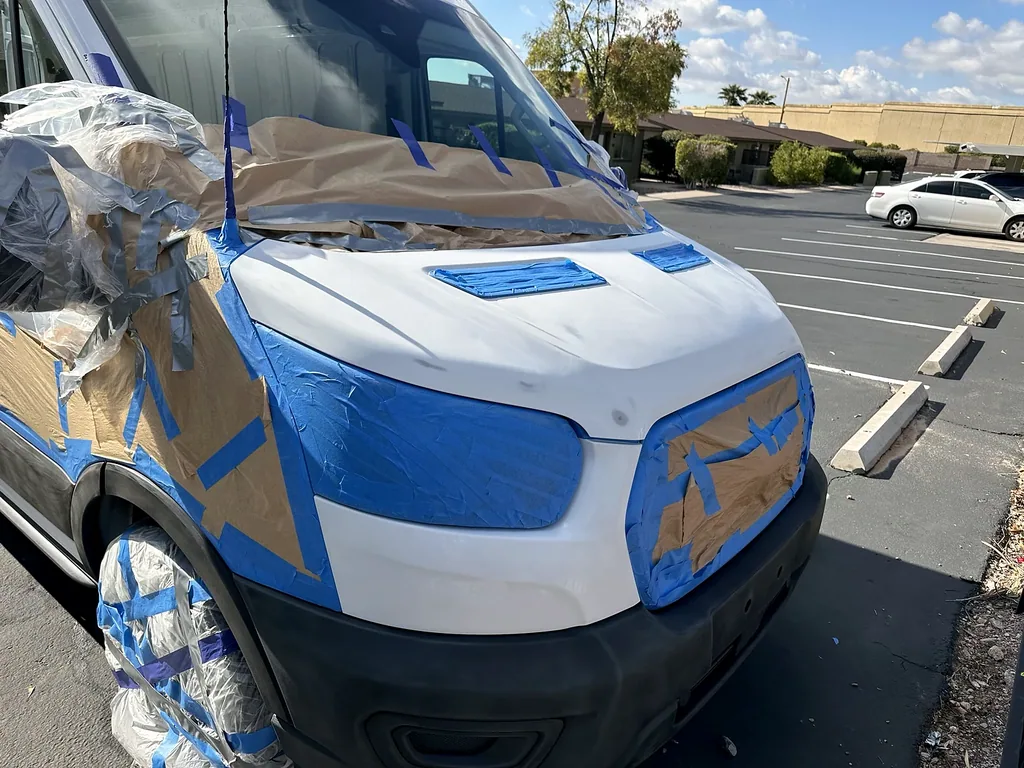
The preparation involved washing, degreasing and sanding as well as masking. My recordings also document rain and moisture interrupting the work. By the next morning I was looking over the masked surfaces as they dried and preparing to continue.
I used a tack cloth to collect debris and the little red fibers left by my drying towel; my tack-cloth preparation notes show the HDX packet and used cloth. I also introduced the Dupli-Color can for the plastic trim in my adhesion-promoter preparation notes.
I used both Dupli-Color plastic adhesion promoter and U-POL adhesion promoter during my black RAPTOR project. The Dupli-Color can appears in my preparation footage, and the U-POL UP2096 purchase remains a separate item in my build records.
One thing I like about keeping these photographs is that they show the amount of surrounding detail involved in a seemingly simple change of color. The hood has vent inserts and borders near the windshield; the side coating meets long edges below the white panels. The tape and coverings make those boundaries visible before the final finish hides the preparation.
The Primed Hood Before the Black Finish
The next clear stage in my photographs is the gray-green primed hood. Paper, plastic and tape were still in place around it. Comparing that image with the scuffed white hood makes the progression easy to follow: preparation, primer, then the black textured surface.
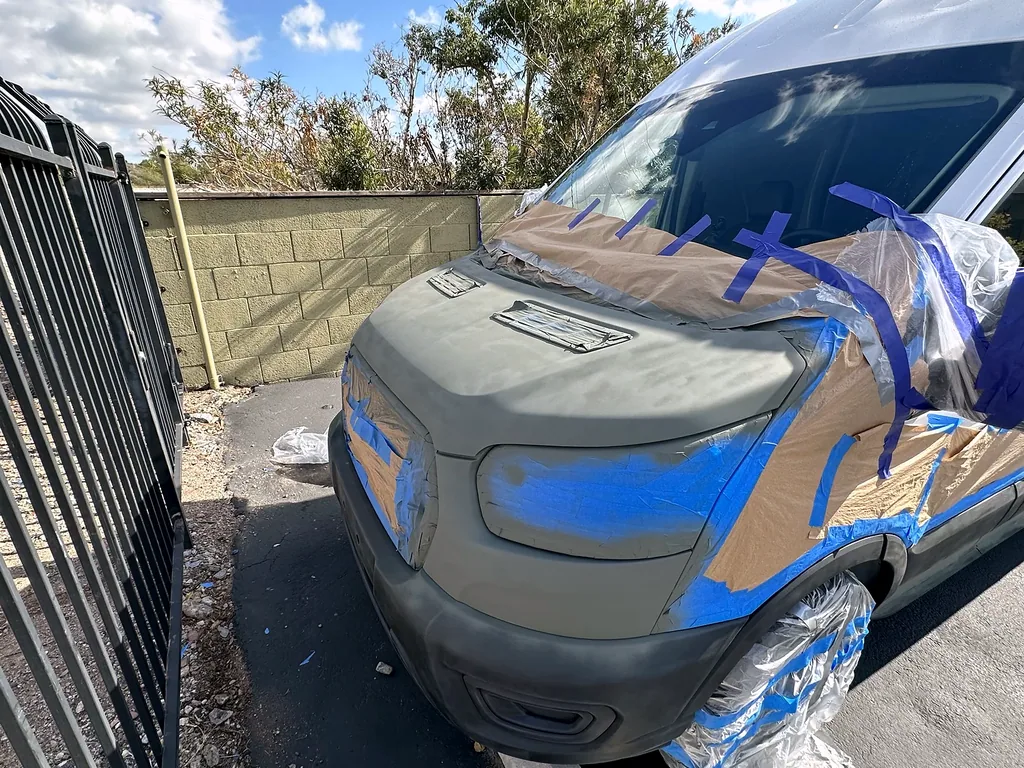
My Rust-Oleum self-etching primer page brings together the primer record, primed-hood view and preparation sequence from this project.
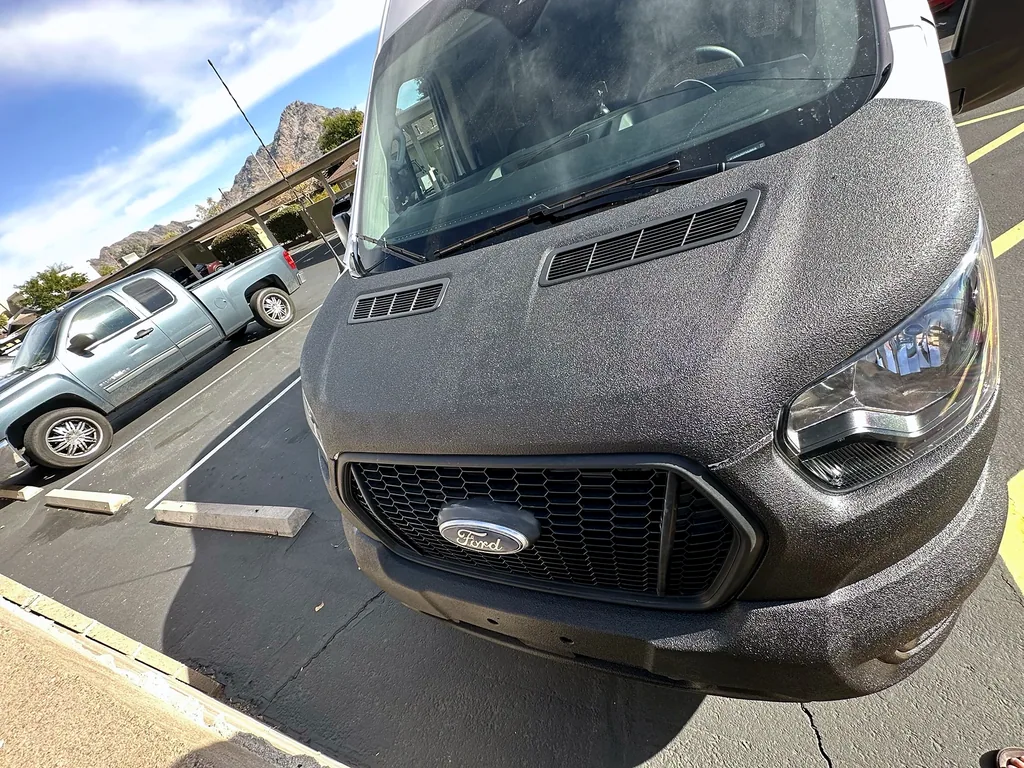
The finished hood photograph matters just as much as the intermediate one. It shows the texture across a broad panel and the edges around the vent inserts. The inserts and grille remain visually distinct from the newly coated hood.
I Sprayed the First Black RAPTOR Finish
My initial plan included a roller, but I used the spray setup for the first black coating. The project photographs show the black RAPTOR packaging, and my equipment walkthrough shows the coating bottle and the gun supplied with the kit connected to an air line.
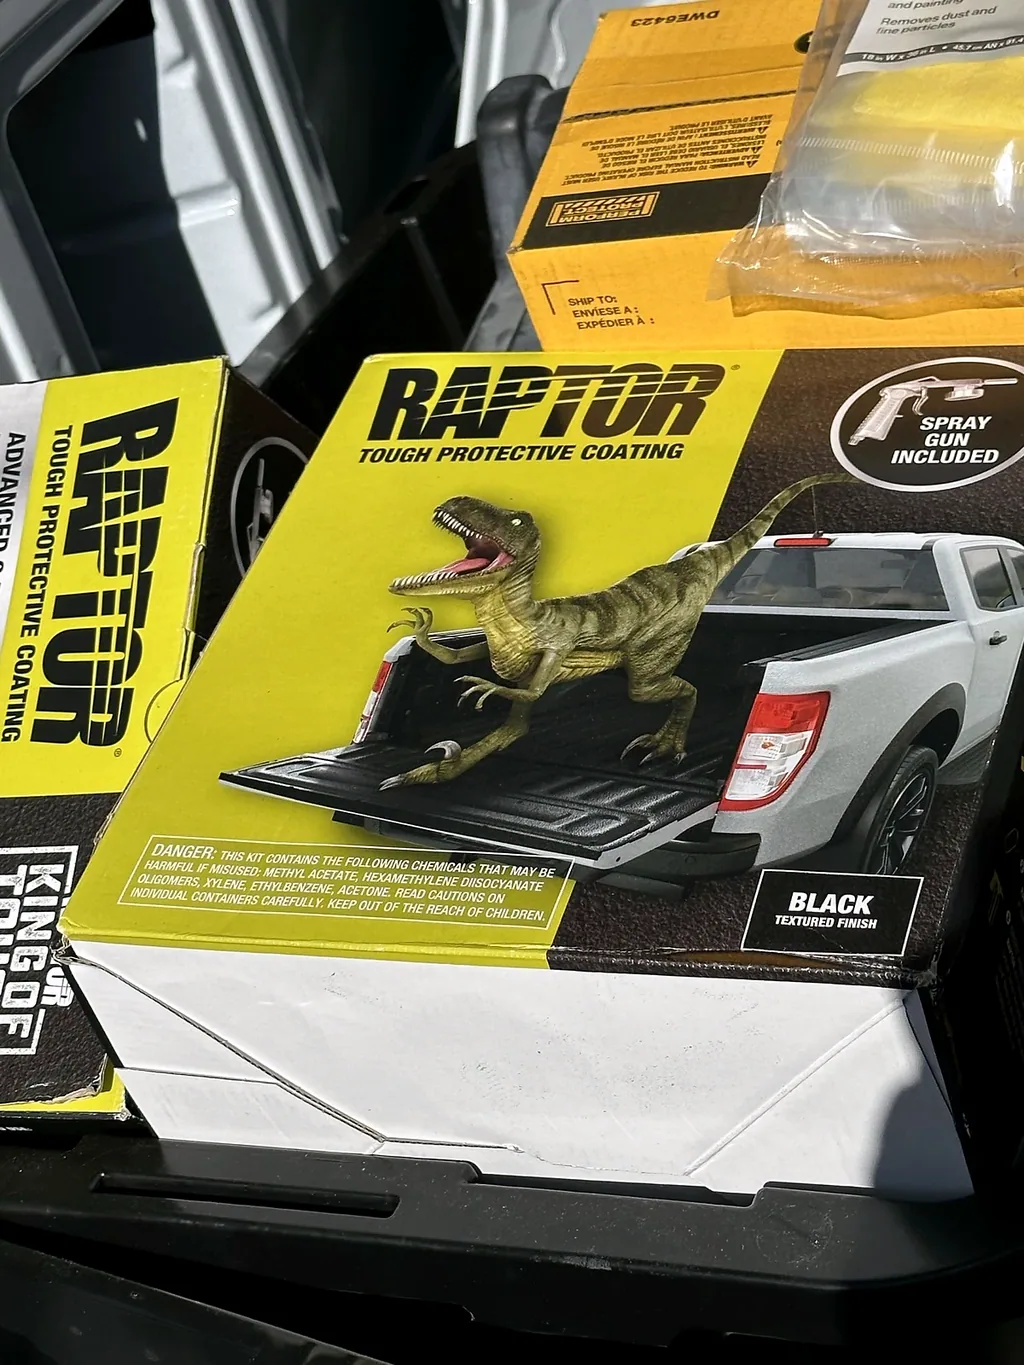
My BOSTITCH compressor and air-setup notes connect the visible air setup to this project and distinguish it from the bottle gun supplied with the RAPTOR kit.
Getting the van coated did not finish the story. The next useful check happened in daylight, when I could look along the sides and compare how the surface reflected light. That view exposed a difference I had not been happy with: some sections looked flatter, while others had more sheen.
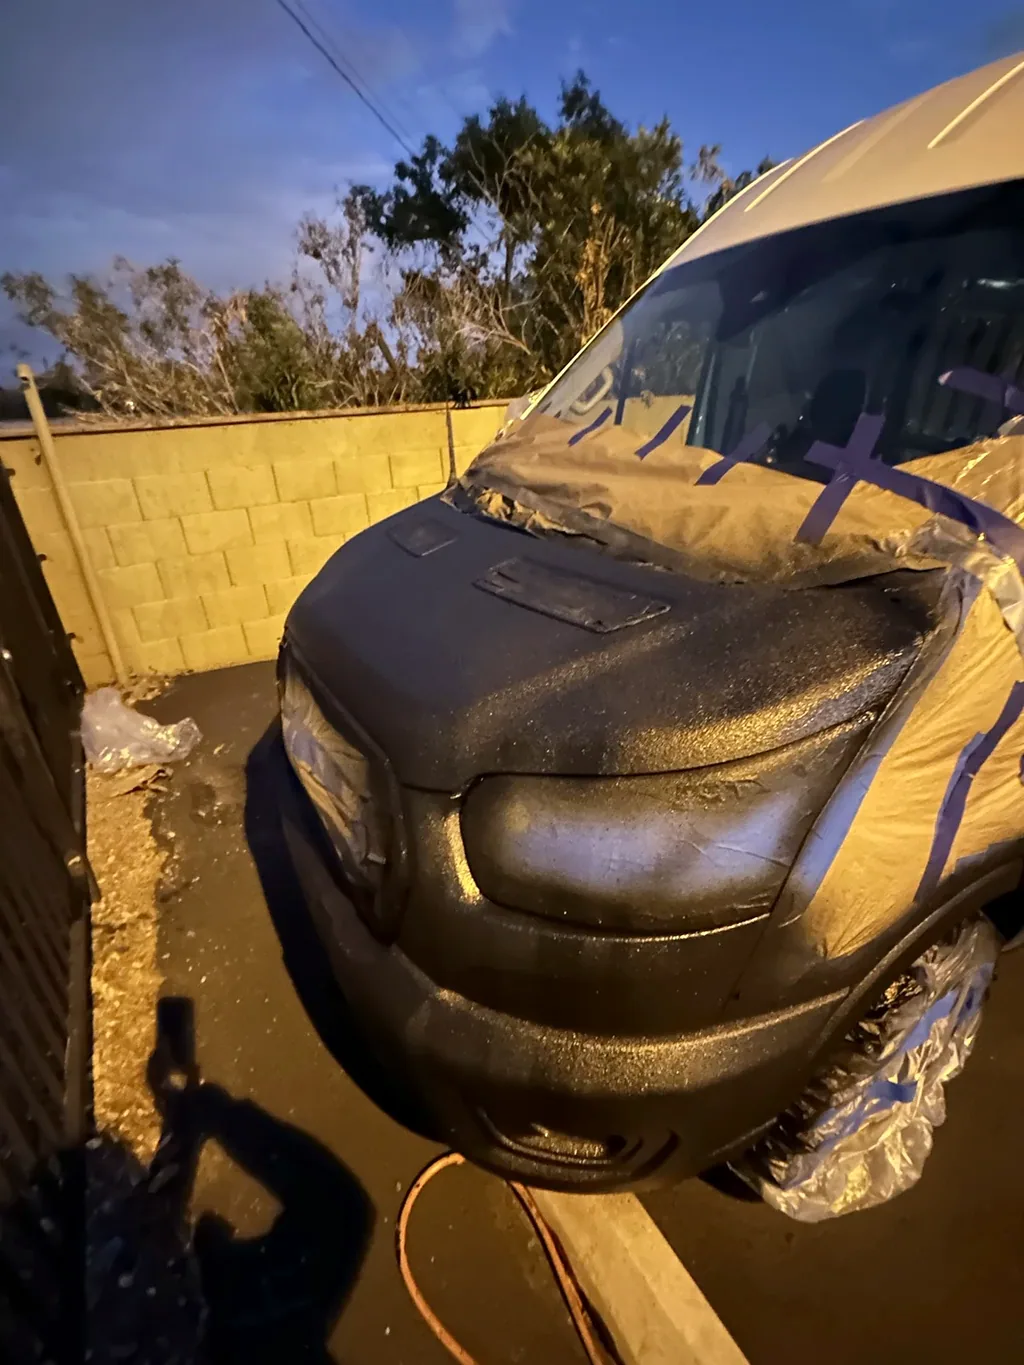
The Uneven Sheen That Sent Me Back to the Roller
The sides were the area I wanted to improve. In my recorded inspection, I pointed out the variation and decided to add more RAPTOR with a roller along those visible side surfaces.
The later application footage shows a black-handled textured roller and tray beside another RAPTOR kit. It then shows me rolling coating onto the already sprayed lower side trim. That is the corrective step, distinct from the roller I had shown earlier without using it for the first application.
For this early RAPTOR work, I used the roller and tray supplied with the RAPTOR kit. I later used other rollers, trays and foam rollers bought on Amazon for more RAPTOR and other bedliner work on the van.
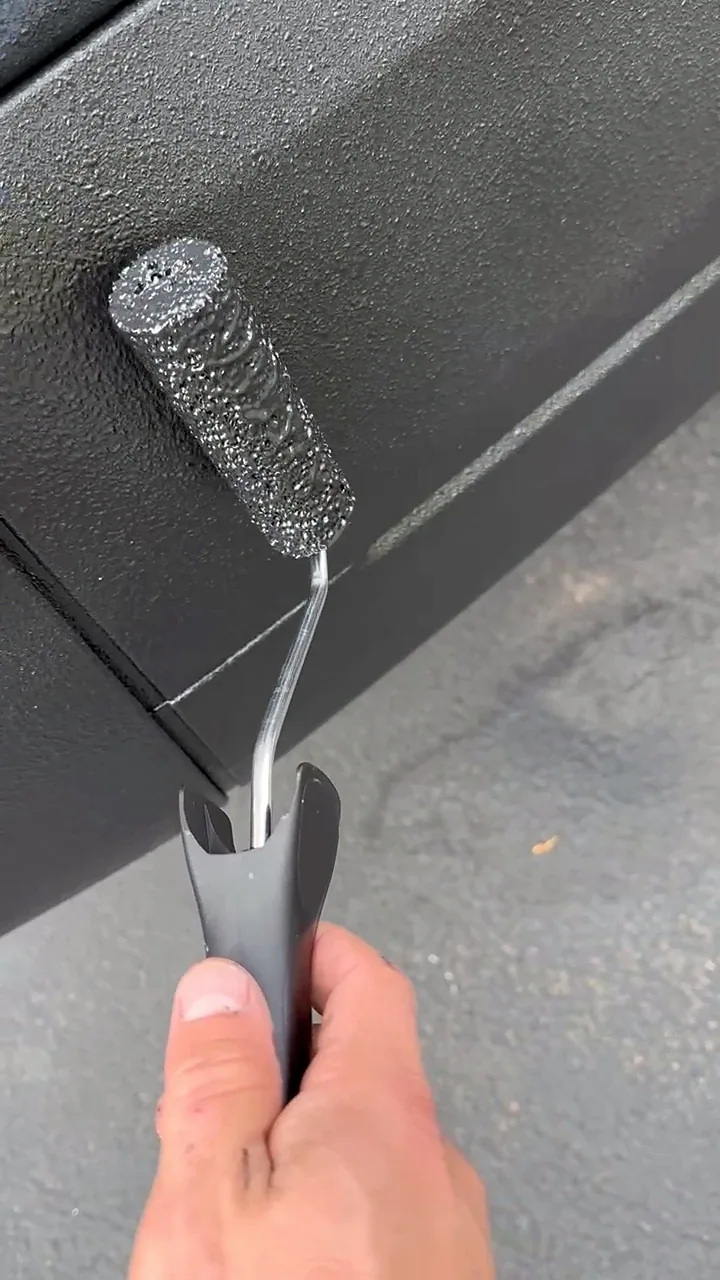
After rolling, I described the finish as more even. I also noticed that it had become much glossier. I had wanted more of a matte look, so the correction changed two things at once: the consistency I wanted to improve and the amount of shine I could see.
That tradeoff is the part I would pay closest attention to when looking back at this build. I preferred the more even result and was pleased with it, even though the appearance had moved away from my original matte preference.
Before, Preparation and the Finished Result
| Stage | What changed on my van |
|---|---|
| Prepared hood | The white hood was scuffed, with nearby lights, grille, vent inserts and windshield edge masked. |
| Primer stage | The hood had a gray-green surface while the surrounding masking remained in place. |
| First black application | I sprayed the black coating, then noticed different amounts of sheen along the sides in daylight. |
| Roller correction | I rolled more coating over the side trim and described the result as more even and glossier. |
| Final photographs | The masking was removed, revealing black textured lower trim and hood against the white body. |
My Takeaway from the Black RAPTOR Project
I was very happy with the finished appearance. The full side photograph shows how the black lower band sits against the white body, while the front photograph shows the texture and shine that are harder to judge from a distant view.
The project also gave me a more specific lesson than simply whether I liked the coating. Spraying was one stage; inspecting the result in daylight and correcting the sides was another. The roller made the side finish more even in my assessment, and it also made it shinier.
At the end of this recording, I still had the grille, hood vent inserts and other small details on my future-work list. The photographs here capture the completed trim-and-hood stage and the result I was pleased to walk around and show.
More of My Preparation and Spray Work
My expanded film brings more of the work into view: preparation along the lower trim, aerosol work around the hood and bumper, and the black bedliner spray session on the lower panels. I kept the sequence with my original explanation of the sheen problem, the corrective roller coat and the daylight result.
The lower-trim spray footage gives me a clearer record of that part of the job. The hood and bumper clips show aerosol preparation; the added black spray-gun footage follows the lower trim.
The Expanded Preparation and Spray Film
Preparing the Lower Trim
Preparing the Hood and Bumper
Continuing the Aerosol Hood Preparation
Applying Black Bedliner to the Lower Trim
Continuing Along the Lower Edge
My More Even, Glossier Result
Read the spoken transcript
Hi everyone, this is Steve with Project Freedom. I'm going to be working on my van here today doing RAPTOR spray on the plastic trim as well as the wheel wells in some of the bottom part of the van. So I'll show you what I'm going to do here. So basically I'm going to do it from there down to the bottom so I'm going to cover this white part here with the RAPTOR spray as well which takes a little bit different preparation because we have plastic molding and then we have the paint there.
I'm going to do the same with the wheel well up front here. I'm going to do the hood with the RAPTOR spray and then the front bumper, So the steps I've taken thus far have been that I washed everything with soap and water first then I degreased everything then I sanded everything then I degreased everything again then I used a tack cloth which is like a sticky I've never used it before but if I got it from Home Depot it's a sticky cloth that gets all the little dust and specks off and then that's where I am now
So I basically have my compressor here and as you can see the way it hooks up is the bottle actually thread up to and they provide a gun and a kit that I got and it's actually quite easy and spraying it's very easy everything is very black there after I did about two full coats of the RAPTOR spray all around So I'm looking at it today after I've done the bedliner yesterday and I'm not sure if you can see this.
I'm noticing a little bit of inconsistency in the evenness of the spray and you know probably from the sprayer but in some parts it has a little more sheen to it and others it's more flat. it looks a little uneven to me and so what I'm gonna do is get some more RAPTOR bedliner and then roll it on at least on the sides here because the sides are the most visible of course.
I'm going to show you my application over here. And I'm hoping that this will result in a bit more of an even application to the side here. And so let's take a look. I'm going to roll through that throughout and we'll see how it comes out. So I've finished rolling and everything is definitely much more even after the rolling. It's it's much more even.
The rolling, applying it that way makes the finish much glossier. It's like before it was quite matte. Now it's almost like a metallic finish. It's very shiny. I'm not sure if you can see this through the video, but the finish is very shiny. Not exactly what I wanted. I wanted more of a matte look, but that's alright. I'm still happy with it.
It looks good. So here we have the final product and I'm extremely happy with how it turned out. It was worth the three full days of work and get a little bit closer. As you can see it's pretty shiny but I like it a lot. The lines are very clean even though the tape got rained on and I'm extremely happy with the way it looks.
We'll go and take a look at the hood too. On this side how it turned out it looks very great and again very very happy with it.
What the Closer Views Add to My Build Record
The preparation clips show the work around the lower panels and the front of the van in more detail. The two lower-trim spray clips follow the same session, including my move toward the lower edge. Seeing those stages beside the finish assessment makes the sequence easier to follow.
My takeaway is still the appearance I recorded: an uneven sheen after spraying, then a more even but glossier finish after my roller correction. The daylight photographs elsewhere in this article show that result. The later side-finish and hood-vent update below remains a separate follow-up to the earlier film.
Later Follow-up: Side Finish and Hood Vents
When I came back to show the coating again, I described the sides as having two sprayed coats followed by two rolled coats. Looking along the black trim, I was pleased with how even the surface looked. The close-up below records that later side finish, beneath the white body panels.
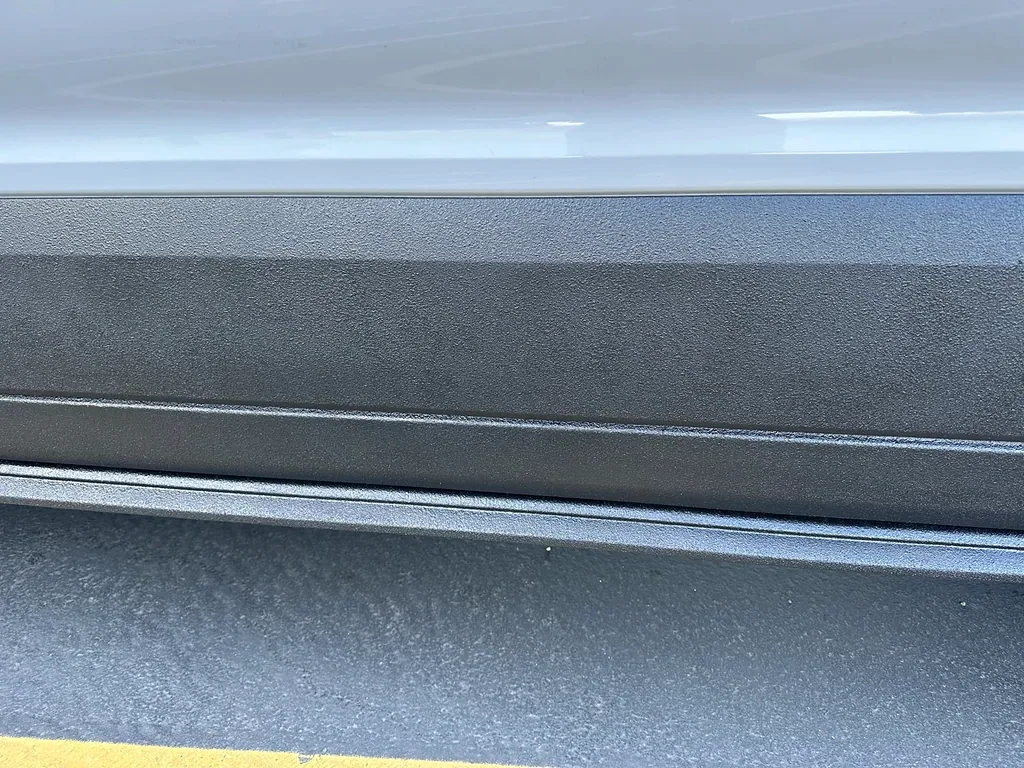
I had also coated the hood vent inserts by then. In that follow-up, I explained that I had used an aerosol RAPTOR spray on the inserts and pointed out the difference between their finish and the surrounding hood. I had tried rolling the inserts afterwards, but that attempt had not worked out for me.
My next idea was another rolled coat across the hood to bring the appearance together. That was still on my to-do list in this recording. The later update adds to the story: I liked the evenness of the sides, while the smaller vent inserts had become another finish detail to work through. It also sits alongside my earlier reaction that the rolled finish was glossier than I originally wanted.
The HD Ridez N-Series Running Boards Project shows the next work around this coated lower trim, including loosening the trim clips and fitting the board beneath the doors.
Coating and Roller Pages
My RAPTOR coating purchase page collects the kit record and alternatives. The roller-and-tray page covers that purchase and separate Amazon options.
Next, follow the Method Race Wheels MR701 Project, compare my white-bedliner project, or browse the original build diary.
Follow the Black RAPTOR Project Days
My project diary records the work, photographs and videos behind this project.
The Product I Bought
This is the product behind my recorded project. The original photographs, video and installation details below show its role in my build.
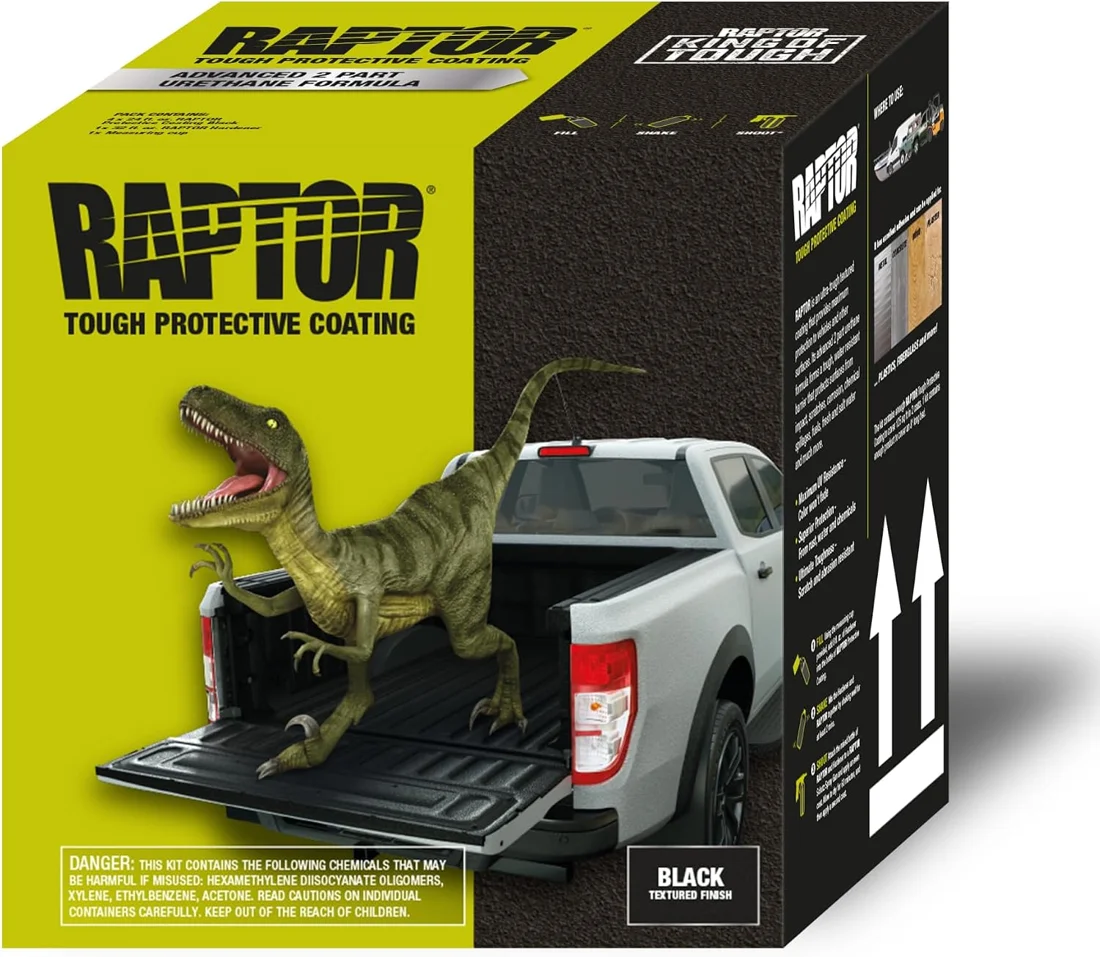
U-POL RAPTOR Black Urethane Bedliner Kit
This urethane coating kit includes a spray gun for applying a textured finish. It offers a larger coating-system format than a small aerosol can.
View On Amazon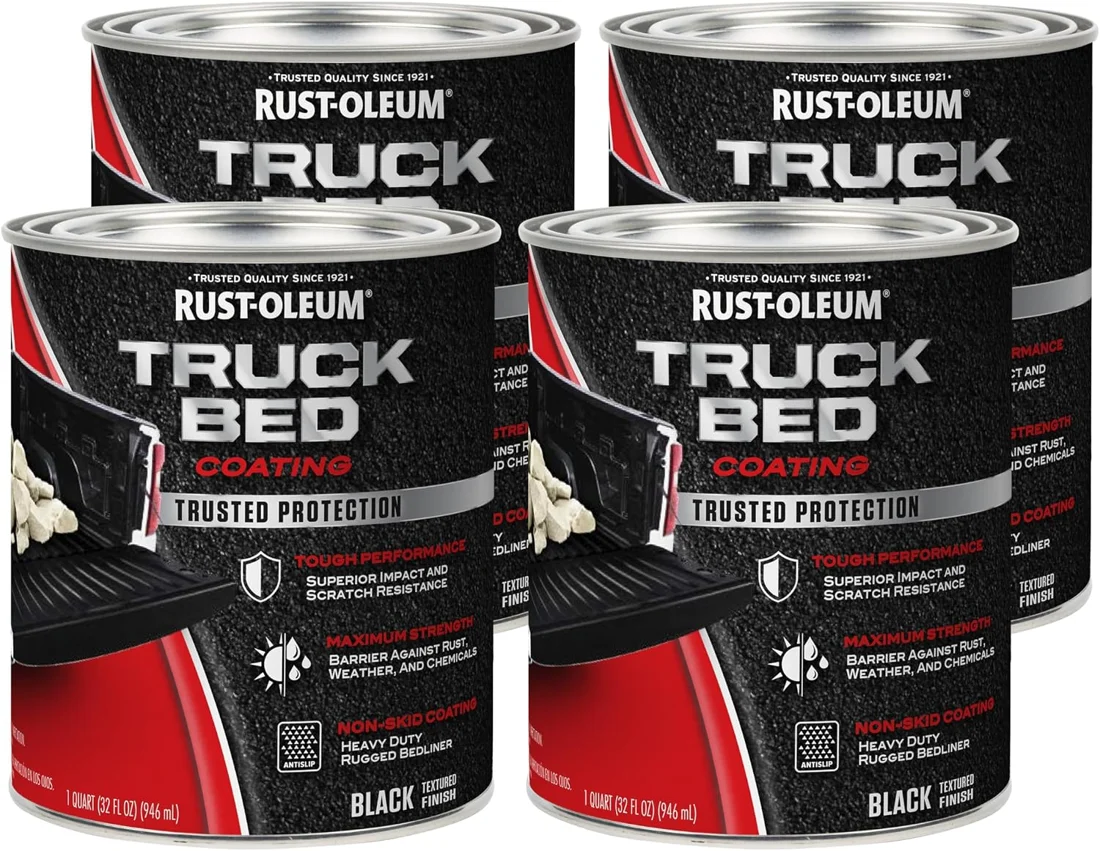
Rust-Oleum Black Truck Bed Coating
This black truck-bed coating is supplied in quart cans for coating work. It forms a textured finish and offers a different application format from an aerosol can.
Alternative To Compare
View On Amazon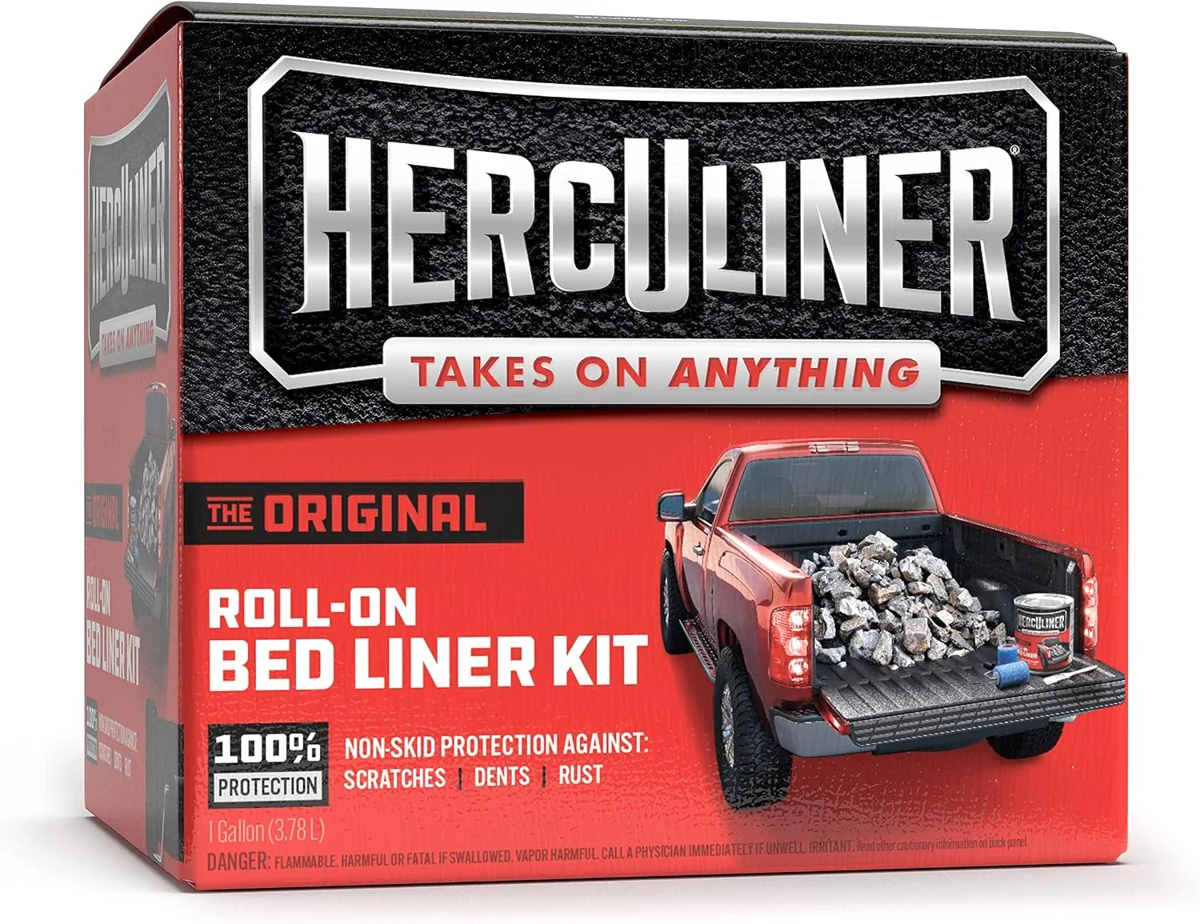
Herculiner Roll-on Bedliner Kit
This Herculiner kit pairs black bedliner coating with application accessories. The roll-on format spreads the coating with a roller.
Alternative To Compare
View On AmazonWhat to Compare Across the Three Finish Stages
I compare the sides after spraying, the actual corrective rolling and the unmasked daylight result. That sequence explains why I changed application method during this project. My later side-finish and hood-vent update is a separate recording; it belongs after this earlier correction rather than being folded into the initial spray session. The expanded film and the shorter edited versions remain available together so the closer views can be read against the wider story.
Watch The Additional Finished Edit
U-POL RAPTOR Black Urethane Bedliner Kit: My Transit Trim and Hood Project — Landscape
Read This Video’s Spoken Transcript
Hi everyone, this is Steve with Project Freedom. I'm going to be working on my van here today doing RAPTOR spray on the plastic trim as well as the wheel wells in some of the bottom part of the van. So I'll show you what I'm going to do here. So basically I'm going to do it from there down to the bottom so I'm going to cover this white part here with the RAPTOR spray as well which takes a little bit different preparation because we have plastic molding and then we have the paint there.
I'm going to do the same with the wheel well up front here. I'm going to do the hood with the RAPTOR spray and then the front bumper, and then the front bumper, So the steps I've taken thus far have been that I washed everything with soap and water first then I degreased everything then I sanded everything then I degreased everything again then I used a tack cloth which is like a sticky I've never used it before but if I got it if I got it from Home Depot it's a sticky cloth that gets all the little dust and specks off and then that's where I am now
So I basically have my compressor here and as you can see the way it hooks up is the bottle actually thread up to and they provide a gun and a kit that I got and it's actually quite easy and spraying it's very easy everything is very black there after I did about two full coats of the RAPTOR spray all around So I'm looking at it today after I've done the bedliner yesterday and I'm not sure if you can see this.
I'm noticing a little bit of inconsistency in the evenness of the spray and you know probably from the sprayer but in some parts it has a little more sheen to it and others it's more flat. it looks a little uneven to me and so what I'm gonna do is get some more RAPTOR bedliner and then roll it on at least on the sides here because the sides are the most visible of course.
I'm going to show you my application over here. And I'm hoping that this will result in a bit more of an even application to the side here. And so let's take a look. I'm going to roll through that throughout and we'll see how it comes out. So I've finished rolling and everything is definitely much more even after the rolling. It's it's much more even.
The rolling, applying it that way makes the finish much glossier. It's like before it was quite matte. Now it's almost like a metallic finish. It's very shiny. I'm not sure if you can see this through the video, but the finish is very shiny. Not exactly what I wanted. I wanted more of a matte look, but that's alright. I'm still happy with it.
It looks good. So here we have the final product and I'm extremely happy with how it turned out. It was worth the three full days of work and get a little bit closer. As you can see it's pretty shiny but I like it a lot. The lines are very clean even though the tape got rained on and I'm extremely happy with the way it looks.
We'll go and take a look at the hood too. On this side how it turned out it looks very great and again very very happy with it.
Explore My Black RAPTOR Video Collection for the films, stage clips and viewing guide.
Questions from This Project
Does The Added Spray-Gun Footage Show The Hood?
The added black spray-gun footage shows the lower trim. The hood and bumper aerosol clips show preparation, and my hood photographs document the separate stages around that area.
Why Did I Return To The Side Trim With A Roller?
I noticed an uneven sheen along the sprayed sides in daylight. I recorded the corrective rolling and described the result as more even but glossier than I wanted.
How Do The Project Diaries Relate To The Films?
The six Black RAPTOR project-day entries follow my introduction, preparation, spraying, roller correction, daylight result and later follow-up. The main project story brings those stages together, while the diary keeps each work session in its own context.