Choosing a cargo or passenger van for a camper conversion is a decision about the starting configuration. I would compare what is already fitted, what I want to retain and what work remains before comparing two asking prices. A more finished cabin can save one task while creating another; an emptier interior can offer a clearer starting point while leaving more work to complete.
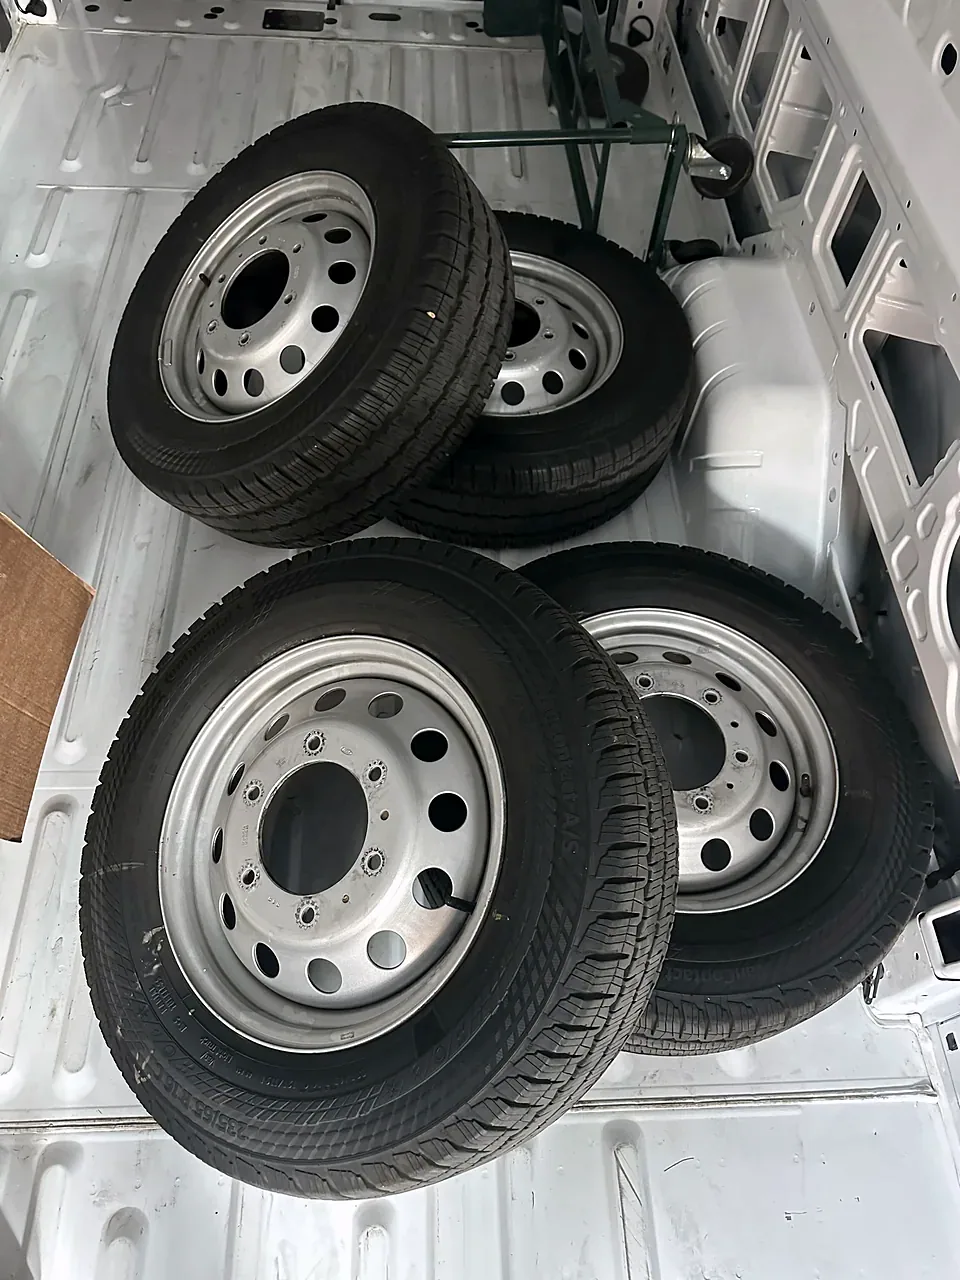
My own project is a 2023 Ford Transit 250 high-roof extended conversion. That exact configuration is part of the build story, but it does not decide the right starting vehicle for every layout. The useful comparison is between actual candidates and the same requirements, with existing features and proposed changes kept visible.
The platform comparison covers Transit, Sprinter and ProMaster selection. This guide addresses a different question within that process: how cargo and passenger starting arrangements affect the conversion work. Its output is a keep, remove, add and verify sheet for each vehicle on your shortlist.
Download The Blank Cargo Or Passenger? Worksheet
Identify The Actual Starting Configuration
Write down the model year, body, roof, door arrangement and factory configuration of each candidate. Preserve the listing and the vehicle-specific records used to identify it. A broad label such as cargo van or passenger van helps organize the comparison, but the actual fitted equipment and body details determine the starting point you will work with.
Ford's Transit Body Decoder separates cargo and passenger configurations and provides a route into configuration-specific information. Use the relevant model-year documentation and the actual vehicle records when comparing candidates. Keep those references alongside your own observations rather than carrying a specification across from a similar-looking vehicle.
Record aftermarket changes separately from factory features. A candidate may have had seats, lining, windows or equipment altered during previous ownership. Photograph the current state and ask which documents describe the changes. The vehicle's original description and its present interior may answer different questions about the work ahead.
Give each candidate its own worksheet column. Use the same headings and measurement locations so the comparison remains readable. If you compare one van's bare-body dimension with another's finished interior dimension, mark the difference before drawing a conclusion. Consistent records prevent a convenient number from becoming a misleading advantage.
Decide What The Finished Van Must Do
Before evaluating the starting features, define the required conversion. List sleeping, storage, food preparation, work and the other selected functions. Identify the people and equipment the arrangement must accommodate. These requirements provide the test for whether an existing feature is useful, irrelevant or a constraint on the proposed interior.
Separate travel seating from furniture used while parked. Record the actual vehicle seating arrangement and the requirements that would apply to any proposed change. Keep that work as its own verified design subject rather than assuming a seat, mounting position or interior bench can be repurposed merely because it physically fits.
Describe routines as well as objects. A bed needs an approach and clothing access; a kitchen needs supplies, preparation and cleanup; a work area needs a place for equipment after use. The full-time-living guide explains this method. Apply it equally to both candidate vehicles so the starting trim does not become the requirement by default.
List the features you genuinely want to keep. Existing windows or a particular finished surface may suit your plan. If you intend to remove a feature immediately, put the associated work in the comparison rather than counting it as an advantage. The best starting point is the one that helps complete your chosen arrangement.
Inventory Existing Trim And Interior Features
Walk through each candidate and list the fitted floor, wall and ceiling finishes. Note the openings, trim transitions and areas they cover. Record whether you plan to keep each feature, remove it or decide later. That simple inventory makes the proposed work more concrete than a general impression that one interior is more complete.
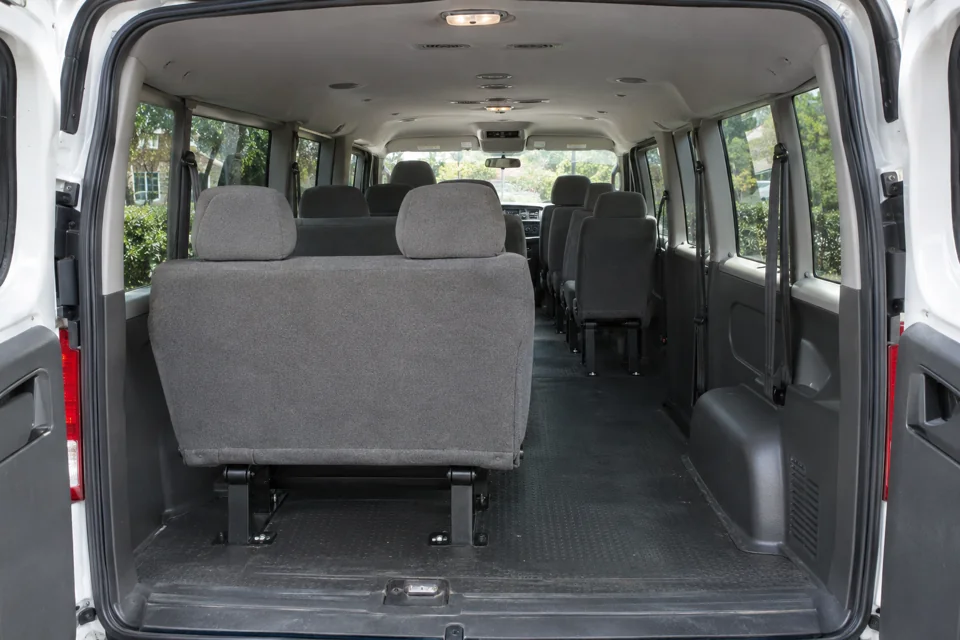
For retained finishes, check the space they leave at the locations your furniture uses. A finished wall can provide a useful surface while reducing a critical width. A ceiling treatment can affect the standing space at a particular position. Measure the actual arrangement and preserve the reference points in your notes.
For proposed removals, identify the appropriate documentation and the work required before including a reduced dimension in your plan. Do not assume every panel is decorative or every visible fixing explains the whole assembly. Keep the removal question separate from the intended furniture shape until you understand the actual vehicle-specific arrangement.
Record where unfinished edges or openings would remain after a change. Removing an interior piece can reveal an area that needs a new finish or access treatment. Include that restoration work in the scope. A starting feature is not cost-free to discard simply because you do not want it in the final appearance.
Compare Windows With Furniture And Privacy
Draw the actual window positions beside the proposed bed, cabinets and work area. Include their height and the surrounding interior envelope. A window can be valuable for the routine you want while limiting where a tall storage unit sits. Evaluate the complete relationship instead of treating more glazing as automatically better or worse.
Think about the view and privacy in each living state. Where will you sit, sleep or change clothes? What covering arrangement do you want, and where does it remain when open? Put that space into the drawing. A window decision includes its relationship with furniture and coverings, not only the opening visible from outside.
Keep any proposed new opening as a separate project. Identify the exact vehicle and selected product requirements before treating it as a completed option. The base-vehicle comparison can reserve the intended position, but the installation details belong with the relevant documents and verified design rather than an attractive generic drawing.
Use the SketchUp layout guide to compare furniture positions around the existing openings. Keep the window and body geometry consistent between options. If a proposed cabinet only fits after the model's window is moved, you have changed the vehicle assumption rather than solved the furniture problem.
Measure Finished Space At The Places That Matter
Choose measurement locations from the intended layout. Sleeping width at the chosen height, standing clearance where you expect to stand and the opening used for a large container can matter more than the largest empty-cabin dimensions. Record those locations so you can repeat the comparison in another candidate.
Distinguish measured current space from planned finished space. A cargo interior may still need lining; a passenger interior may retain some existing finish and replace other parts. Show the proposed buildup separately. The usable-space guide explains why wheel wells, doors and curved panels must remain in the model.
Keep the complete furniture envelope in the drawing. Handles, open doors and access panels occupy room beyond a closed cabinet. A layout that fits the nominal width may still leave an awkward passage during use. Compare those operating states in both vehicles using the same furniture and carried items.
Take the decisive movements into a full-size mockup. Rehearse getting into bed, reaching storage and moving through the entrance. Keep observed fit separate from an estimate of what a future finish will leave. The comparison becomes more useful when the remaining uncertainty is specific enough to resolve before purchase.
Keep Vehicle Systems Separate From Interior Assumptions
Identify the original equipment that interacts with the interior work and locate the applicable vehicle documentation. Keep controls, vents, wiring routes and service access in the record where relevant. The starting configuration may include features you want to retain, but their presence does not by itself establish how they should be integrated into the camper arrangement.
Record proposed changes as questions with a next source to consult. “Retain this outlet in the furniture plan” and “remove this equipment” create different tasks. Avoid treating every item hidden behind trim as available space. Preserve what you can observe and identify the relevant records before designing around an assumed empty cavity.
For house electrical and water equipment, develop the selected system as its own project. A passenger interior's existing equipment does not automatically answer the conversion's load or service requirements. Likewise, an empty cargo area does not choose the house equipment for you. The electrical hub organizes the related reference topics.
Carry the resolved space and access requirements back into the furniture drawing. That keeps the vehicle-system questions connected to the layout without letting the layout silently decide technical details. You can then compare the actual work remaining in each candidate rather than assigning an unexplained advantage to whichever appears more equipped.
Build A Keep, Remove, Add And Verify Sheet
Give each current feature one status. Keep means it supports the selected design. Remove means you have identified a proposed change and its required work. Add means the finished arrangement needs something not currently present. Verify means a decision depends on evidence you have not yet obtained.
Use a separate row for each meaningful feature. “Passenger interior” is too broad if you want to keep the ceiling but replace the floor and some trim. Smaller rows let you price and sequence the work accurately. Keep the current state, selected outcome and supporting source beside each other.
Connect every removal to its finishing consequence. If a panel goes, identify what replaces it or remains visible. Connect every addition to its dimensions and neighboring work. If a new unit requires an opening or access space, show that in the drawing rather than leaving it as an item on a shopping list.
Review unresolved rows before comparing total cost. A candidate with many blanks should not appear simpler because the work has not yet been defined. Use the same statuses for both vehicles. This turns the starting-configuration comparison into a practical project scope instead of a contest between broad vehicle labels.
Compare The Whole Starting-Point Cost
Separate vehicle acquisition from the conversion work needed to reach your required result. Then include retained features, removal work, new materials, finishing, tools and any paid tasks identified by the actual plan. Keep dated quotes and known purchases distinct from estimates. A lower asking price and a lower completed-project cost are different claims.
Do not assign a value to a feature you intend to discard without accounting for the associated work. Equally, do not ignore a useful retained feature because it was not part of your original shopping list. Compare how it serves the selected requirement and what it changes elsewhere in the plan.
The cost-planning guide gives a complete-scope method. Use a separate work package for preparing the base interior so it does not disappear into furniture costs. Shared tools and deliveries should remain visible without being charged at full price repeatedly to several projects.
End the estimate with unresolved questions and the purchases they affect. If a dimension or removal detail remains unknown, identify the next action. A readable incomplete estimate is more useful than a neat total built from assumptions. Keep the decision open where the evidence is still needed, while continuing the parts of the comparison that are already understood.
Think Through The First Work Sessions
Write the first few tasks you would carry out in each candidate. Start with the state in which the vehicle would arrive, including any loose items or existing interior. Identify the records, workspace and equipment needed before the first substantial change. This makes the starting point tangible rather than imagining both vehicles already stripped and ready.
Include storage for removed material and parts you intend to retain. A workspace can become difficult when every removed panel must be kept but has no identified location. Preserve labels and photographs so retained pieces remain understandable. The workspace guide helps connect these tasks with the place available for the build.
Keep the selected configuration usable for the work sequence you plan. If a particular access route is needed to bring in furniture, identify when it must remain open. If a finish is retained, plan how the later jobs meet it. The exact order follows your design and vehicle documents, with dependencies recorded rather than guessed.
Use the project-planning guide to turn each task into a next action and completion check. The comparison may reveal that one starting vehicle reduces the work you most want to avoid. That is a more meaningful advantage than simply having more or less trim at the first viewing.
Work Through A Specific Layout Example
Imagine that your required layout includes a bed, an accessible storage unit and a work surface. In Candidate A, the existing finish leaves enough measured space for the arrangement you want to retain. In Candidate B, the current space is larger but still needs the selected lining. Keep those conditions separate before deciding which provides more useful finished room.
Now place the same open drawer and seated work position in both drawings. One candidate's door or window arrangement may affect the furniture position even if the overall dimensions are similar. Record that conflict at its actual location. Changing the furniture requirement for one van would make the comparison less informative.
Next, list the preparation work. Candidate A might need a specific trim transition resolved, while Candidate B needs a larger lining project. Price the actual tasks with their materials and access requirements. Neither label tells you which is simpler until the work is defined for the arrangement you intend to build.
Finish by identifying the decision and its remaining check. You might keep both candidates until a finished-width question is answered, or remove one because an essential routine cannot be accommodated. The example's value is the process: same requirements, actual starting conditions and specific consequences, with no assumed winner based only on cargo or passenger branding.
Record Why You Selected The Starting Vehicle
Keep a short summary above the detailed worksheet. State the required layout, the features retained and the main work added by the chosen starting configuration. Include the measurements and documents that settled the decision. That gives later design changes a reference when you wonder why a particular feature was kept or removed.
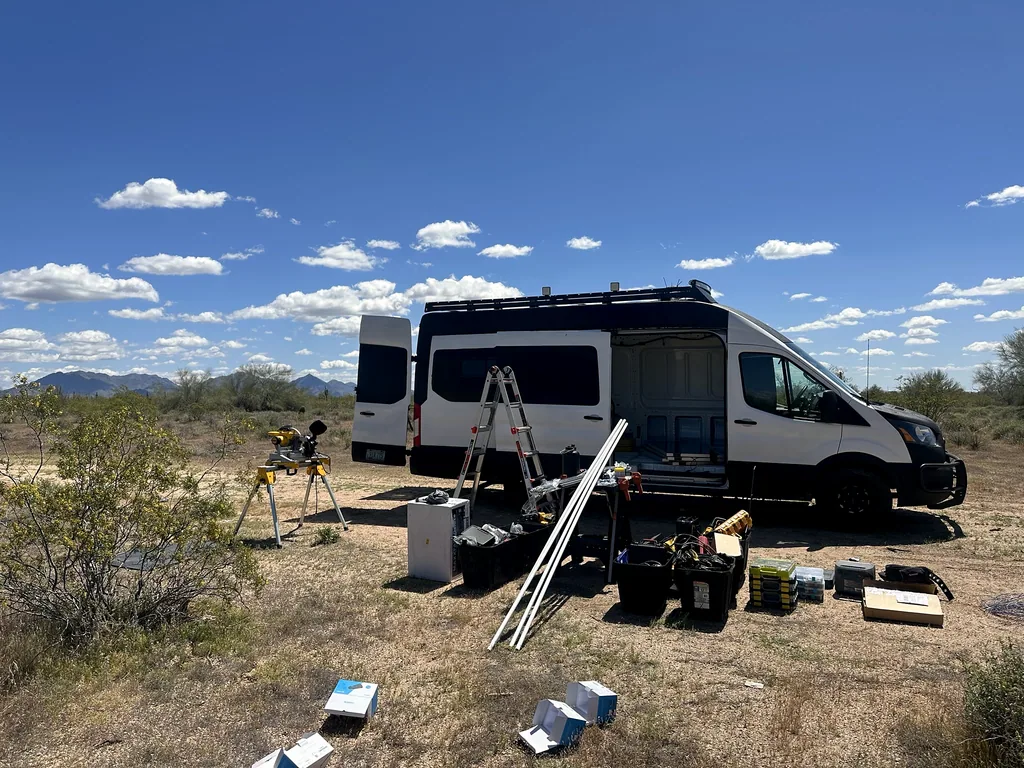
Preserve the other candidate's record too. A comparison can explain a choice even when the vehicles are no longer available. If a similar listing appears later, the old requirements and measurement locations can guide a new viewing without pretending the earlier observations apply to a different van.
Update the decision log when a later layout change affects the reasons for the original choice. An existing window that once supported a work area may interact differently with a revised cabinet. Keep the new decision separate so the history of the build remains understandable.
My Transit build diary follows the actual projects that grew from one selected vehicle. For your own conversion, choose the starting point that supports the complete planned result, then document the work that turns it into your interior. Cargo and passenger labels begin the comparison; the measured configuration and practical scope finish it.
Create A Starting-Point Comparison You Can Read At A Glance
After the detailed inspection, write a short starting-point summary for each candidate. Begin with its exact configuration and the source used to identify it. List the features you would retain, the major removal tasks and the additions needed for your chosen arrangement. Keep the unresolved questions in their own group so the summary does not make an incomplete scope look settled.
For example, two candidates might both accommodate the planned bed while differing in the finish around it. One may retain a current wall treatment; the other may require a new lining project. Compare the finished sleeping width, storage opening and access route after those selected treatments. Keep the current measurement and the planned result in separate fields rather than adding them together as though both were observed.
Next, compare the work needed before the bed project can start. Identify which decisions concern the base vehicle and which concern your new furniture. A retained trim edge might need a defined transition, while an unlined area might need the finish buildup resolved first. This tells you what each starting configuration changes in the sequence, beyond the visible amount of trim.
Add the workspace consequence. Where will removed pieces be stored, and which new materials must arrive before an opening can be finished? Keep associated transport and storage arrangements in the plan. An interior that appears almost ready can still create an awkward first stage if the pieces you want to retain have nowhere to go during the work.
Then identify the next fact that could change the decision. It might be a finished dimension, a vehicle-specific document or a quote for a preparation task. Give that fact a source and action. Resolve the decisive question first rather than spending time comparing minor finish preferences while the required sleeping or access arrangement remains uncertain.
Keep The Selected Configuration With The Purchase Record
Once you choose a starting vehicle, save the comparison and the records that established its current state. Keep photographs, measurements and configuration details together. Later projects can then distinguish the original features from changes made during the conversion. That is useful when a panel is removed months later or a revised furniture plan raises a question about why an existing feature was retained.
Do not erase the comparison when a later design change makes another arrangement appealing. Add the new requirement and identify what it changes. The original record still explains the decision made with the requirements and evidence available at that time. This keeps the build history coherent while allowing the conversion itself to evolve around actual experience and new priorities.
Frequently Asked Questions
Is A Cargo Van Always Easier To Convert?
Compare the actual preparation, lining, furniture and equipment work needed for your layout. An emptier interior can simplify one part while leaving more to add. The useful answer comes from the complete selected scope for each candidate.
Can Existing Passenger-Van Trim Be Retained?
Record the exact trim and check the finished space, access and interfaces required by your design. Keep vehicle-specific documentation with any proposed changes. Retain a feature when it serves the selected arrangement rather than assuming all trim must stay or go.
How Should I Compare Windows?
Draw their actual positions beside furniture, privacy coverings and the intended routines. Check the space occupied by the complete arrangement. Keep any proposed new opening as a separate documented project instead of moving it casually in the layout model.
Which Dimensions Matter Most?
Measure the clearances that decide your requirements: sleeping space at its intended height, standing space where used, furniture openings and loading routes. Keep bare and finished measurements separate. Compare the same locations and the same furniture states in each vehicle.
What Should The Final Comparison Show?
A vehicle-specific keep, remove, add and verify sheet, with layout observations, documents, complete-scope costs and the next unresolved check. That record explains the starting point and gives the conversion plan a clear first set of tasks.