A weekend camper van conversion has a useful advantage as a planning brief: you can define a short trip from packing to returning home. That makes it easier to decide which functions need a permanent place, which items can be packed for the trip and which improvements belong in a later stage.
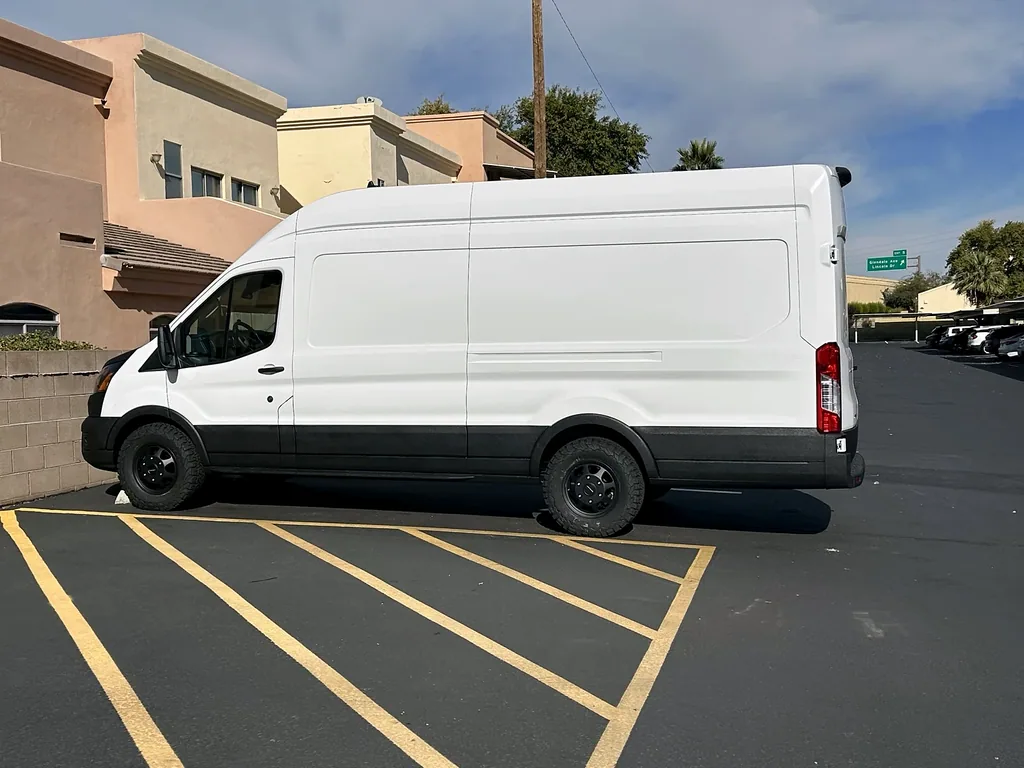
My own project is a 2023 Ford Transit 250 high-roof extended conversion, with many separate jobs documented in the build diary. For a weekend-focused arrangement, I would use the same project-by-project thinking with a narrower endpoint. The question is what the van needs to support the intended trip, rather than how many features can be added to the interior.
This guide develops that first setup as a complete routine. It covers the packing list, sleeping arrangement, food and water access, storage, returning home and deciding what to improve next. Keep the general DIY planning guide for the whole conversion process. Here, the output is a trip-specific interior brief and a manageable first-stage project list.
Download The Blank Weekend Conversion Worksheet
Define One Representative Weekend
Choose a real type of trip you want to make. Write down who is going, what activities they plan and what equipment travels with them. A weekend with bulky recreation equipment creates a different storage problem from a short visit focused on walking and simple meals. The vehicle and interior should be compared against that concrete use.
Describe the routine in order: pack, travel, arrive, prepare food, relax, sleep, get dressed, leave and unpack. Include what happens when the weather changes your preferred outdoor routine. The purpose is to identify which tasks must remain workable inside the van and which depend on arrangements you intend to use outside it.
Keep assumptions visible. If you expect to use facilities at the destination, record that in the trip brief and identify the alternative arrangement you want available. Do not let an assumed facility remove a requirement without a decision. Equally, avoid designing the entire conversion around a rare scenario before you have defined the trips you expect to repeat.
End with a small set of requirements. These might be a sleeping arrangement that does not bury the morning items, food supplies that can be reached without unloading everything and a defined place for used clothing. Specific requirements are easier to draw and check than “comfortable weekend van,” which can mean something different every time you shop.
Inventory What You Already Take
Lay out the actual items you expect to carry. Group them by sleeping, food, clothing, activities, cleaning and trip equipment. Record the outside dimensions of the largest containers and awkward pieces. A storage plan based on real possessions is more informative than a row of identical boxes in a drawing.
Separate frequently used items from items retrieved only at the destination. Morning clothing, food and everyday supplies need different access from equipment that can remain packed during the drive. Put that distinction beside the item list. It helps decide which storage needs a door, drawer or immediate reach and which can occupy a less convenient position.
Also separate clean, used and wet items. They may begin the trip in the same collection and return in different states. Give each state a location. If the weekend includes damp clothing or dirty equipment, show where it goes before it is cleaned at home. The end-of-trip condition is part of the packing problem.
Keep a short “not coming” list for objects you are considering but have not selected. That stops optional equipment from silently becoming a storage requirement. Revisit the list after a planned packing rehearsal or a documented trip observation. The first interior should support the chosen load, with room for decisions that are still open.
Give Sleeping A Complete Arrangement
Start with the sleeping space you need and the route to reach it. Include bedding, clothing access and the things used immediately before sleep or after waking. A mattress outline alone does not show whether you can enter the bed, retrieve a bag or move through the interior when the sleeping arrangement is ready.
Compare a fixed and a convertible arrangement using the same possessions. A fixed bed keeps the sleeping surface available; a convertible arrangement gives the area another role. The useful comparison is the changeover and the storage it displaces. The bed-layout guide goes deeper into that particular decision.
For a convertible setup, write down what moves and where it goes. Include the bedding when the bed is not in use and the items that occupied the area before it becomes a bed. If a table or storage container must leave the van, make that explicit in the routine. A drawing of the two final states should be accompanied by the steps between them.
For a fixed setup, look at access beneath and around it. Identify which items can be reached through the interior and which require an exterior door. Decide whether that arrangement serves the weekend routine you described. A storage compartment can offer generous volume while making a frequently needed item inconvenient to retrieve.
Plan Food Preparation From Supplies To Cleanup
Write a simple meal routine instead of starting with a full kitchen photograph. Identify the food you will bring, the surfaces you will use, the utensils needed and the cleanup that follows. Give each part a position in the interior or the trip arrangement. This tells you what the first setup needs to support without automatically committing to a large permanent unit.
Check access while the sleeping and storage arrangements remain in their normal states. Can the meal supplies be reached without unloading the activity equipment? Does a preparation surface also hold work items or bags? If it serves several purposes, draw the changeover and identify where the displaced items go before food preparation begins.
Keep the selected cooking equipment's actual use and installation requirements with its own documentation. At the layout stage, reserve the space those requirements establish and distinguish packed equipment from installed equipment. Do not treat a generic block labeled “stove” as a complete decision about how the meal routine will work.
Include cleanup supplies and the destination of used items. A towel, utensils and food containers do not disappear when the meal is finished. Give them a storage or cleaning stage that returns the surface to its next function. A compact weekend kitchen is practical when the whole sequence fits, not simply when the visible countertop is small.
Connect Water And Bathroom Needs To The Trip
List the water uses you intend to support and the equipment selected for them. Keep drinking, food preparation and washing as separate entries so the routine is understandable. Record the actual container or system dimensions when known. Leave unresolved quantities as questions to answer instead of guessing a complete water arrangement from the available cabinet space.
Show access for filling, use, cleaning and removal as applicable to your selected arrangement. Those tasks may need different openings. A container that fits in storage can still be awkward to handle through a small door. Use a full-size representation and the actual route before building furniture around it.
Decide what toilet arrangement belongs in the trip brief and where it is accessible when the bed is ready. If you are considering a shower, compare the setup, drying and storage requirements too. The shower-and-toilet layout guide develops those options without assuming a weekend van needs the same permanent bathroom as another person's build.
Keep the system decisions connected to the layout but documented separately. The water-system references can help organize the next questions. The weekend plan identifies the routine and reserved space; the selected equipment and its documentation establish the actual component details and work required.
Organize Storage By The Order You Use It
Make a packing map using the sequence of the trip. Items needed during arrival should be reachable before the rest is unpacked. Sleeping supplies need access when the cabin is in its evening state. Equipment used only after reaching the destination can occupy a different position. This approach makes access more useful than simply filling every available cavity.
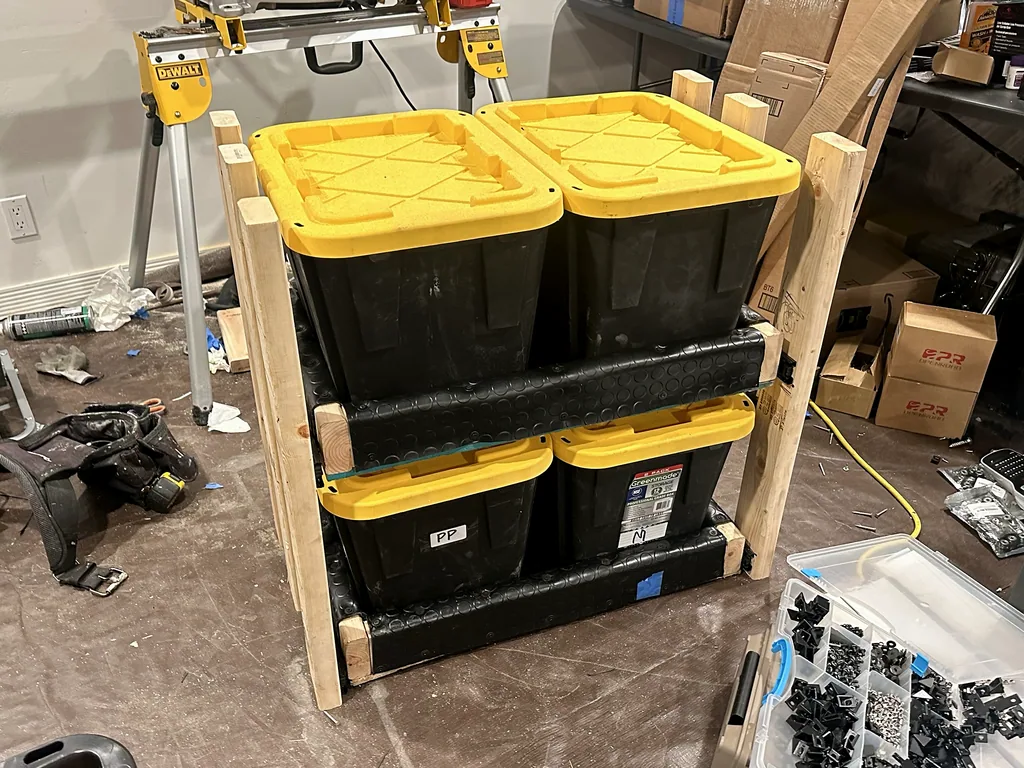
Group small items into identifiable collections, then give each collection a defined home. Avoid a plan with many general-purpose containers whose contents must be searched every time. A label can identify a group, but the compartment's position still matters. The items you reach for repeatedly should not require removing unrelated furniture.
Show doors and drawers open in the layout. My storage-bin drawer planning article considers the container, surrounding frame and movement together. Apply the same idea to your weekend load: storage volume, retrieval space and the room left for another person are separate parts of the arrangement.
Include a small amount of deliberately unassigned space if your chosen load needs it, and identify its purpose. It might be temporary staging while changing clothes or moving a container. Keep it distinct from forgotten storage. An open area is useful when it supports a task; otherwise, it can quickly become the place where every unresolved item accumulates.
Compare Permanent Furniture With Trip-Packed Equipment
Not every weekend function needs a permanently dedicated unit. Compare what a fixed piece provides with what a packed arrangement requires each trip. A permanent compartment gives an item a consistent location; a removable container may let the van serve another purpose between trips. Both approaches have preparation and storage consequences.
Draw the between-trips state as well as the travel state. If furniture comes out, identify where it is stored at home. If it stays in, check whether it interferes with the other jobs you expect the van to do. The modular-interior guide helps turn that flexibility into a defined changeover rather than a vague promise of removability.
Keep attachment and transport details as their own verified work. A temporary appearance does not make an item's travel arrangement unimportant. Record the exact equipment and connection requirements in the project plan, and preserve them when changing between uses. The layout comparison should show the intended positions without inventing an attachment method.
Choose the permanent features that simplify the routines you repeat. Keep occasional needs in a clearly planned trip load when that serves your brief. The useful balance is personal: it depends on your equipment, storage at home and willingness to set up and pack away. Compare those practical tasks before deciding that one style is inherently simpler.
Define The Electrical Need Before Shopping
List the electrical items you actually intend to use and their expected use during the representative weekend. Separate lights, charging and other loads in the record. Use the actual equipment information and your intended hours, keeping unknown values visible. A short trip is still a sequence of energy use and charging opportunities rather than a reason to guess at a complete setup.
Keep the weekend routine distinct from a universal system recommendation. You may intend to drive between stops or remain in one location, and those plans affect the questions you need to resolve. Record the available charging arrangements separately from the loads. Do not assume that a particular trip length determines a battery or solar size by itself.
Use the electrical-system hub to find the relevant detailed references, and the solar-energy planning guide for the energy-budget method. Keep exact component selection and installation details in that separate system work. Here, the goal is a clear load list connected to the trip you are planning.
Also reserve access in the interior. Charging devices, storing cables and reaching the selected equipment are physical layout questions. Show them in the state where they will be used, including the bed or meal setup. A charging location that is convenient in an empty cabin may become difficult to reach once the weekend load is packed.
Make A First-Stage Build List With A Clear Endpoint
Translate the trip requirements into a short list of projects. Give each one a defined result, prerequisites and a completion check. “Finish storage for these containers” is easier to act on than “build the interior.” Keep the drawing, equipment dimensions and required materials beside the task so the next action is clear.
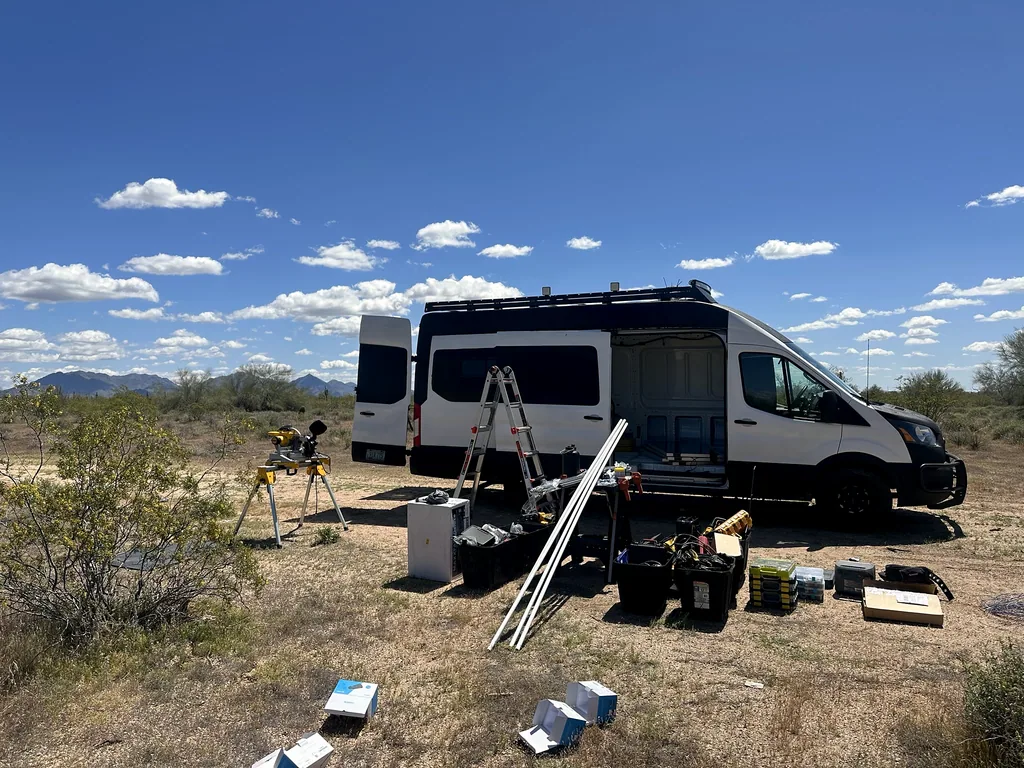
Separate the first-stage scope from future ideas. A later finish, different furniture arrangement or additional system can remain on the improvement list. Identify shared work that must be resolved now to avoid blocking the later stage. Dimensions, access and routes are worth considering early even when a particular component will be added later.
Price the complete selected scope using the conversion-cost guide and blank cost worksheet. Keep owned equipment distinct from planned purchases. Add actual quotes and quantities, and preserve a named action for unresolved amounts. The first stage should have a readable budget instead of an attractive list with the difficult lines left blank.
Use the project-planning guide to select the next task whose dependencies are ready. Buying parts is one task, fitting and checking them is another. Keep those statuses separate. The first setup becomes manageable when you can recognize which work is complete and which work is only selected or ordered.
Rehearse Packing And An Ordinary Evening
Before committing to the full arrangement, put the planned load into a mockup. Follow the arrival routine and retrieve the items needed first. Set up the evening space, prepare the sleeping arrangement and locate the next morning's supplies. This rehearsal tests the sequence that the conversion is meant to support.
Record concrete observations. “The food container is behind the sleeping equipment” suggests a storage change. “There is nowhere to put the table during bed setup” suggests a transition problem. Specific notes help you revise the right part instead of deciding the whole layout failed because one step felt awkward.
Check the same routine with the doors in the positions you expect to use. Include the interior tasks that must work when your preferred outside arrangement is unavailable. The full-size mockup checklist helps organize the observations, while your trip brief tells you which tasks matter most.
Revise one meaningful conflict, then repeat the affected sequence. Keep the same possessions so the comparison remains useful. If you remove half the load while changing the furniture, you may not know which change improved access. Save the packing map and drawing revision together as the basis for the first-stage build.
Plan The Return Home And The Next Improvement
A weekend setup includes unpacking, cleaning and restoring the van for its next use. Identify which items come out first, where used clothing and equipment go and which parts remain stored in the vehicle. The return routine often reveals whether a removable arrangement is genuinely convenient or simply moves work from the trip to the driveway.
Keep a short record of observations after actual use. Note the task, the obstruction or extra movement and the proposed change. Preserve what worked as well as what did not. A layout can serve the main routine well while needing one better storage position; that does not automatically call for rebuilding the entire interior.
Separate observed problems from new wants. An item you could not reach during breakfast is a specific access problem. A new feature you saw afterward is an optional idea. Put them in different lists, then prioritize changes that improve the trips you actually take. The decision log helps connect each selected change to the affected drawing and purchases.
For me, that is the useful role of a weekend-focused brief: it gives the conversion a practical endpoint and a way to learn from real use. Start with one complete trip routine, build the arrangement that supports it and keep the next improvement specific. The build diary shows how individual projects can be recorded without losing the wider conversion story.
Keep A Reusable Departure And Return Card
Turn the final packing map into a short departure card. Group items by their storage locations rather than writing one long alphabetical list. Each location should have a clear contents group and an access reason. This makes the card easier to use while loading and helps reveal an item that has lost its intended home after another project changes the interior.
Add a return column for the things that need to come out, be cleaned or be replenished. Keep those actions separate from the departure check. The van may look packed after a weekend while a frequently used supply is depleted or a damp item still occupies its temporary location. The return card closes the trip instead of leaving the next departure to discover unfinished cleanup.
Use a small change area at the bottom. Record the observed issue, the proposed adjustment and whether it affects furniture, the packing order or simply the contents. Many useful improvements can begin with a better position for an existing item. A new cabinet should be a response to a defined need, rather than the automatic answer whenever packing feels untidy.
Keep the card with the current layout revision and update it when a selected change is completed. Retain an earlier version if the arrangement changes substantially. That gives the weekend conversion a repeatable routine while preserving the reason for each improvement. The practical measure is whether the next trip is easier to prepare for, use and close out, with the equipment you actually carry in the van.
If another travel format remains on your shortlist, apply this same weekend routine in the camper van and RV comparison.
Frequently Asked Questions
What Should A First Weekend Conversion Include?
Define the sleeping, food, water, bathroom, storage and electrical routines required by your representative trip. Give each a usable position and a completion check. Keep the first-stage scope separate from later ideas so you can see what is needed to complete that arrangement.
Is Removable Furniture Better For Weekend Use?
Compare the changeover with your between-trips needs. Include where removed furniture and contents live, how long the process takes and what remains usable. A modular approach is useful when it makes a defined task easier, rather than simply making every item detachable.
How Do I Choose Between A Fixed And Convertible Bed?
Compare the same sleeping needs and carried items in both arrangements. A fixed bed keeps the surface ready; a convertible bed provides another use for the area. Draw the setup, displaced contents and return sequence before choosing.
Should I Build The Whole Interior Before The First Setup Is Complete?
Give the first stage a defined result and resolve the dependencies that affect later work. Keep optional improvements separate. Complete and check the selected projects rather than allowing new ideas to hide unfinished tasks.
How Do I Decide What To Improve After A Weekend?
Record specific observed tasks and obstacles, then identify the smallest change that addresses them. Keep new preferences separate from actual access or storage problems. Update the relevant drawing, packing map and budget when you select a change.